To make an AI generated spritesheet transparent, use a tool like Gamelabs Studio that supports transparency natively at each step of the process. In Gamelabs Studio, this means generating your base image sprite, animating it, then exporting a spritesheet to produce a transparent sprite sheet PNG ready for Unity, Godot, Unreal, or any other game engine.
Below, we walk through every step of this process: creating a sprite from a text prompt, generating animation frames with AI, and fine-tuning the transparency settings so there's no fringing or background noise bleeding into your final spritesheet.
Set Up Your Project
Before generating anything, you need a project and an asset to work inside. This takes about 30 seconds.
1. Create a New Project
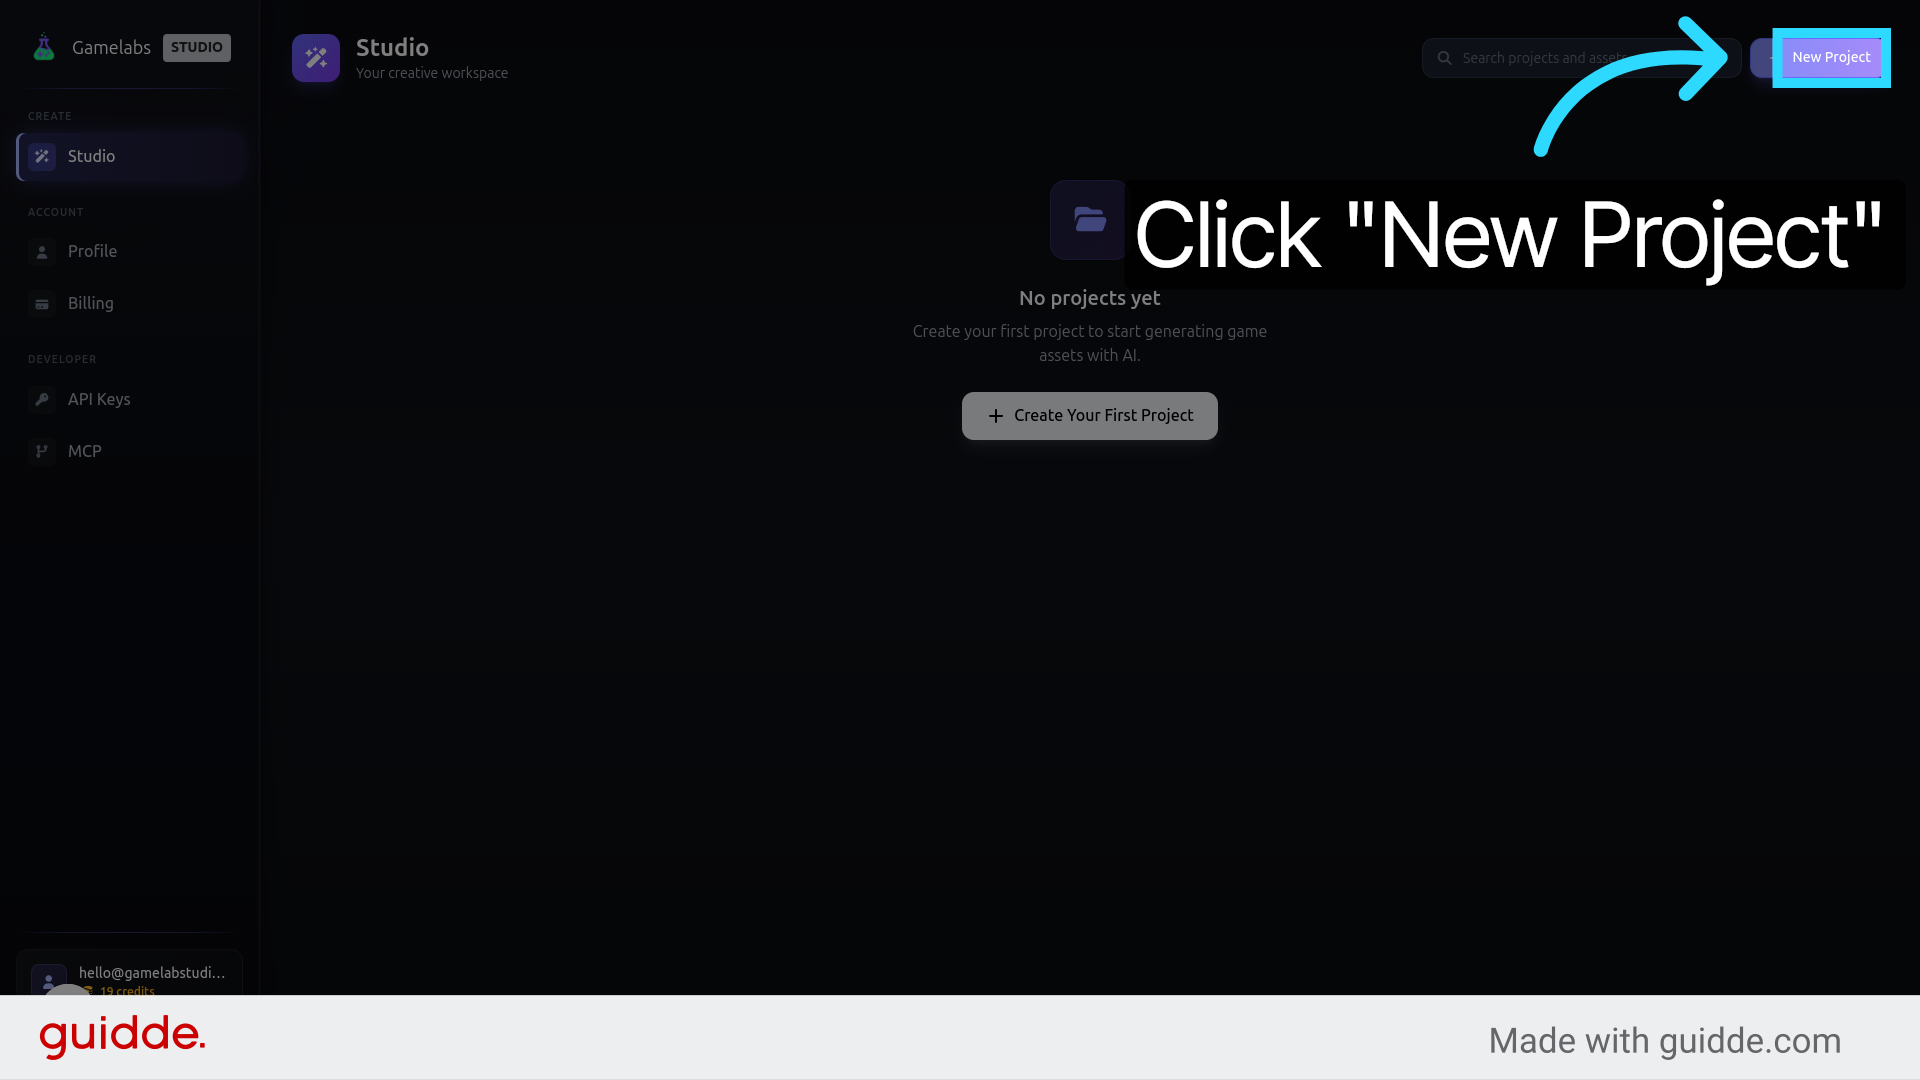
Head to
gamelabstudio.co and sign in. From the dashboard, click
New Project, give it a name (e.g., "Tank_Sprite_Demo"), and hit enter.
2. Open the Project
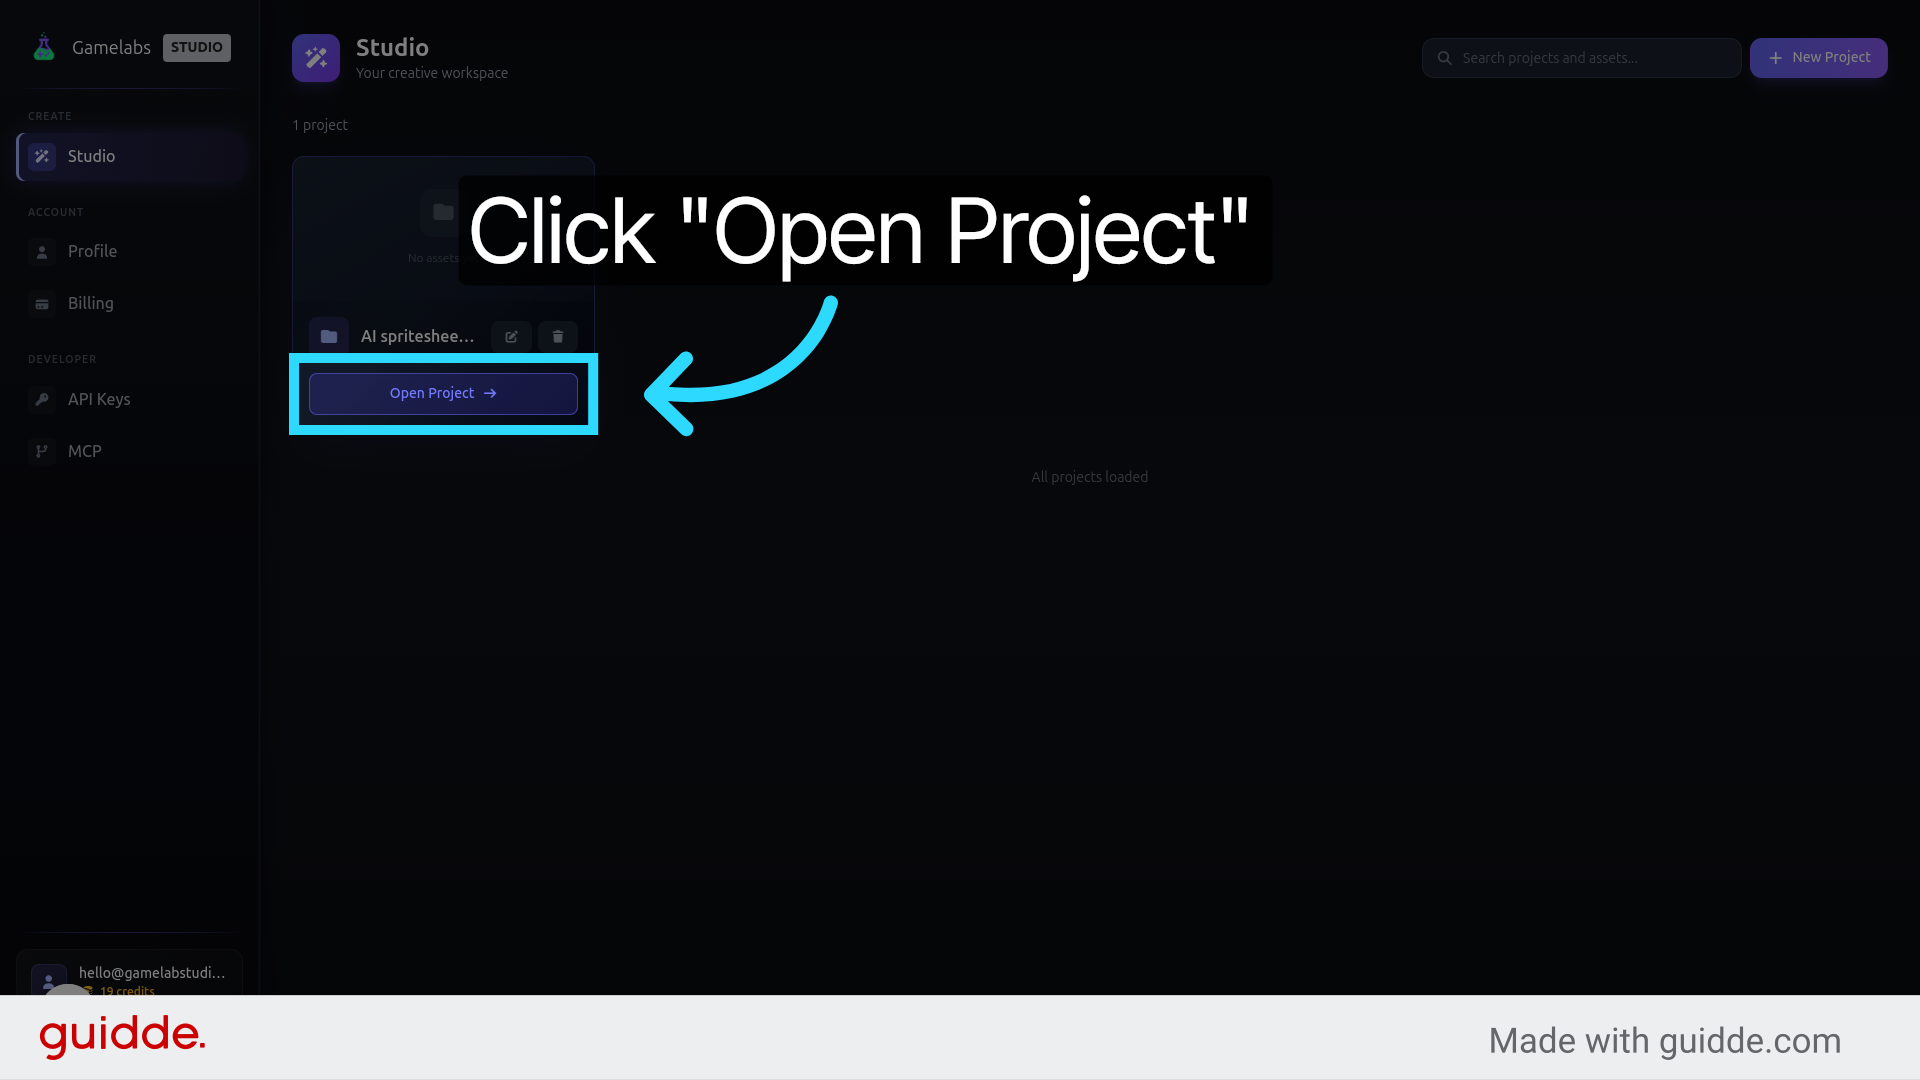
Locate your new project in the list and click Open Project to enter the workspace.
3. Create and Name an Asset
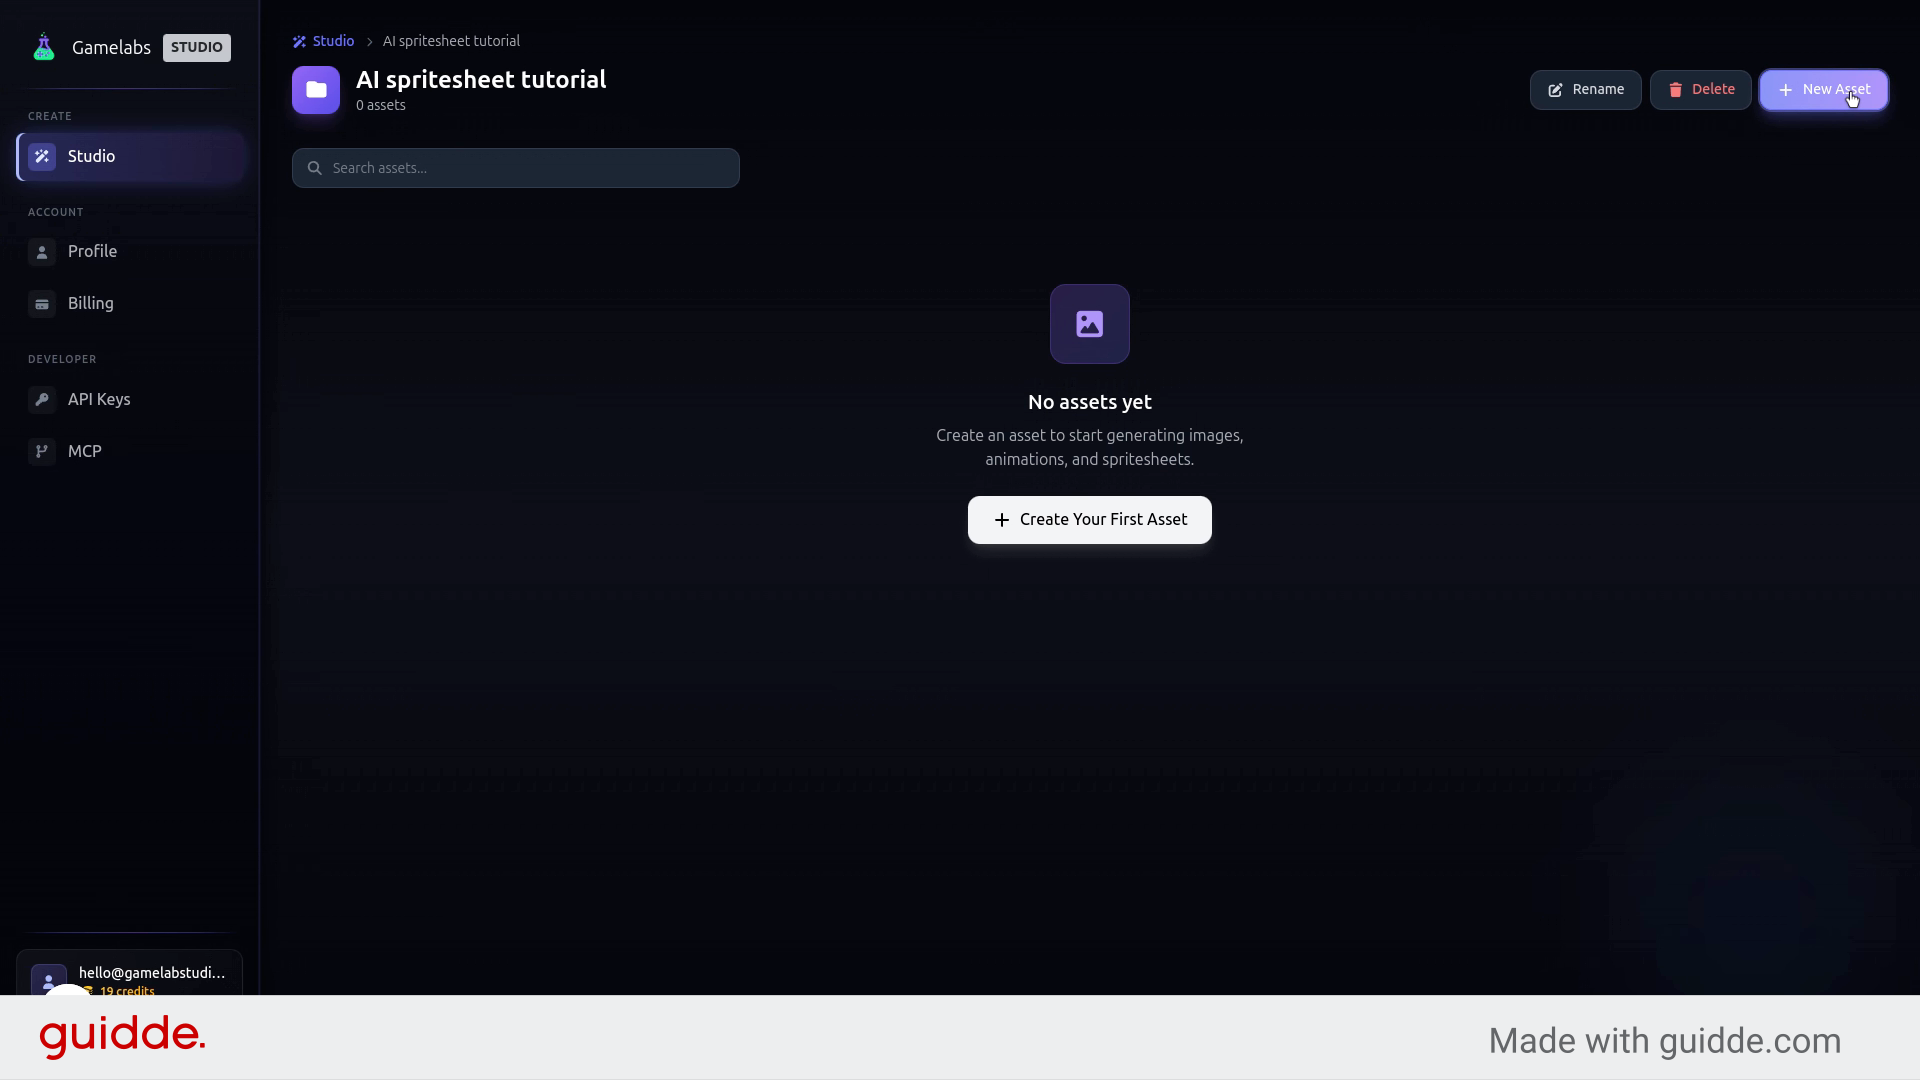
Inside the workspace, click New Asset and give it a descriptive name like "Main_Battle_Tank". Clear naming matters once your project grows beyond a handful of sprites. Click Save Name when you are done.
4. Open the Asset Editor
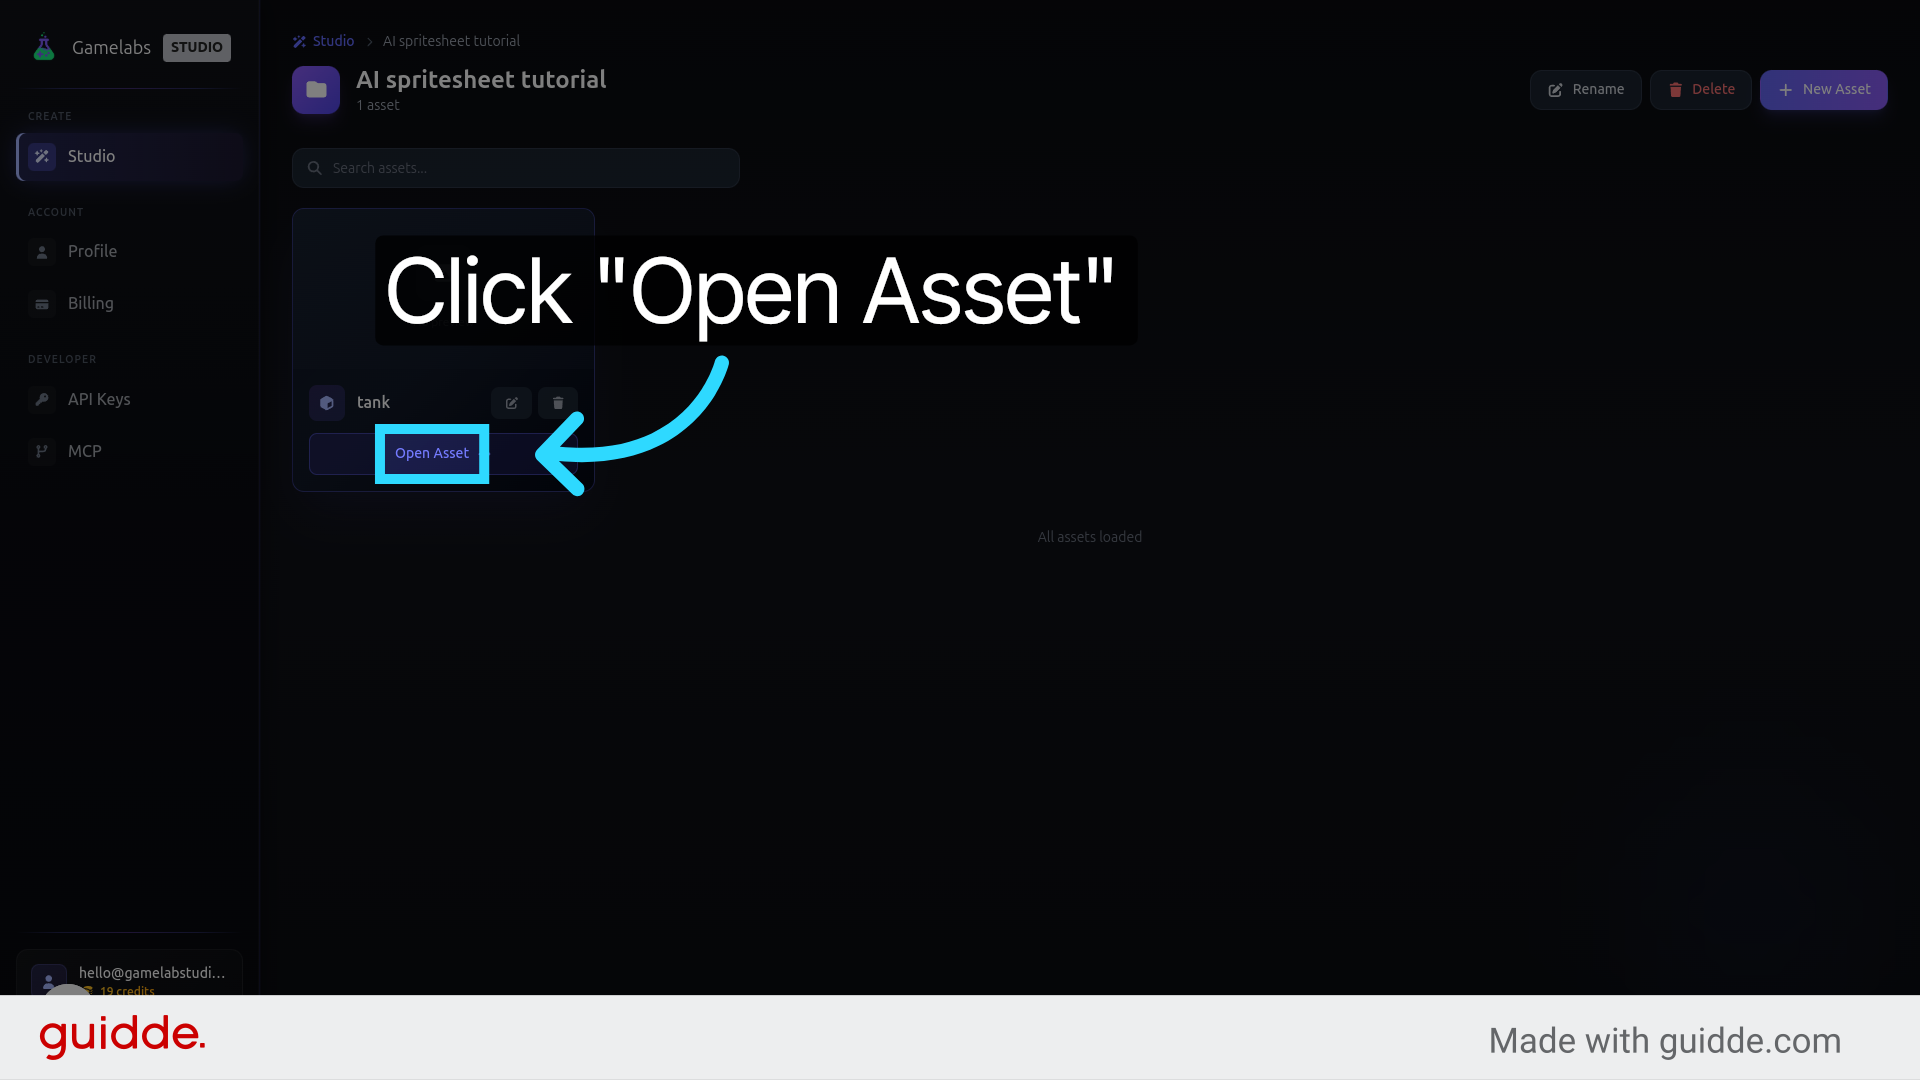
Click Open Asset to enter the editing suite. This is where the actual generation happens.
Generate the Static Sprite
With the asset editor open, you will configure the camera angle, write a text prompt, and let the AI produce your base image. This static frame becomes the foundation for all animations.
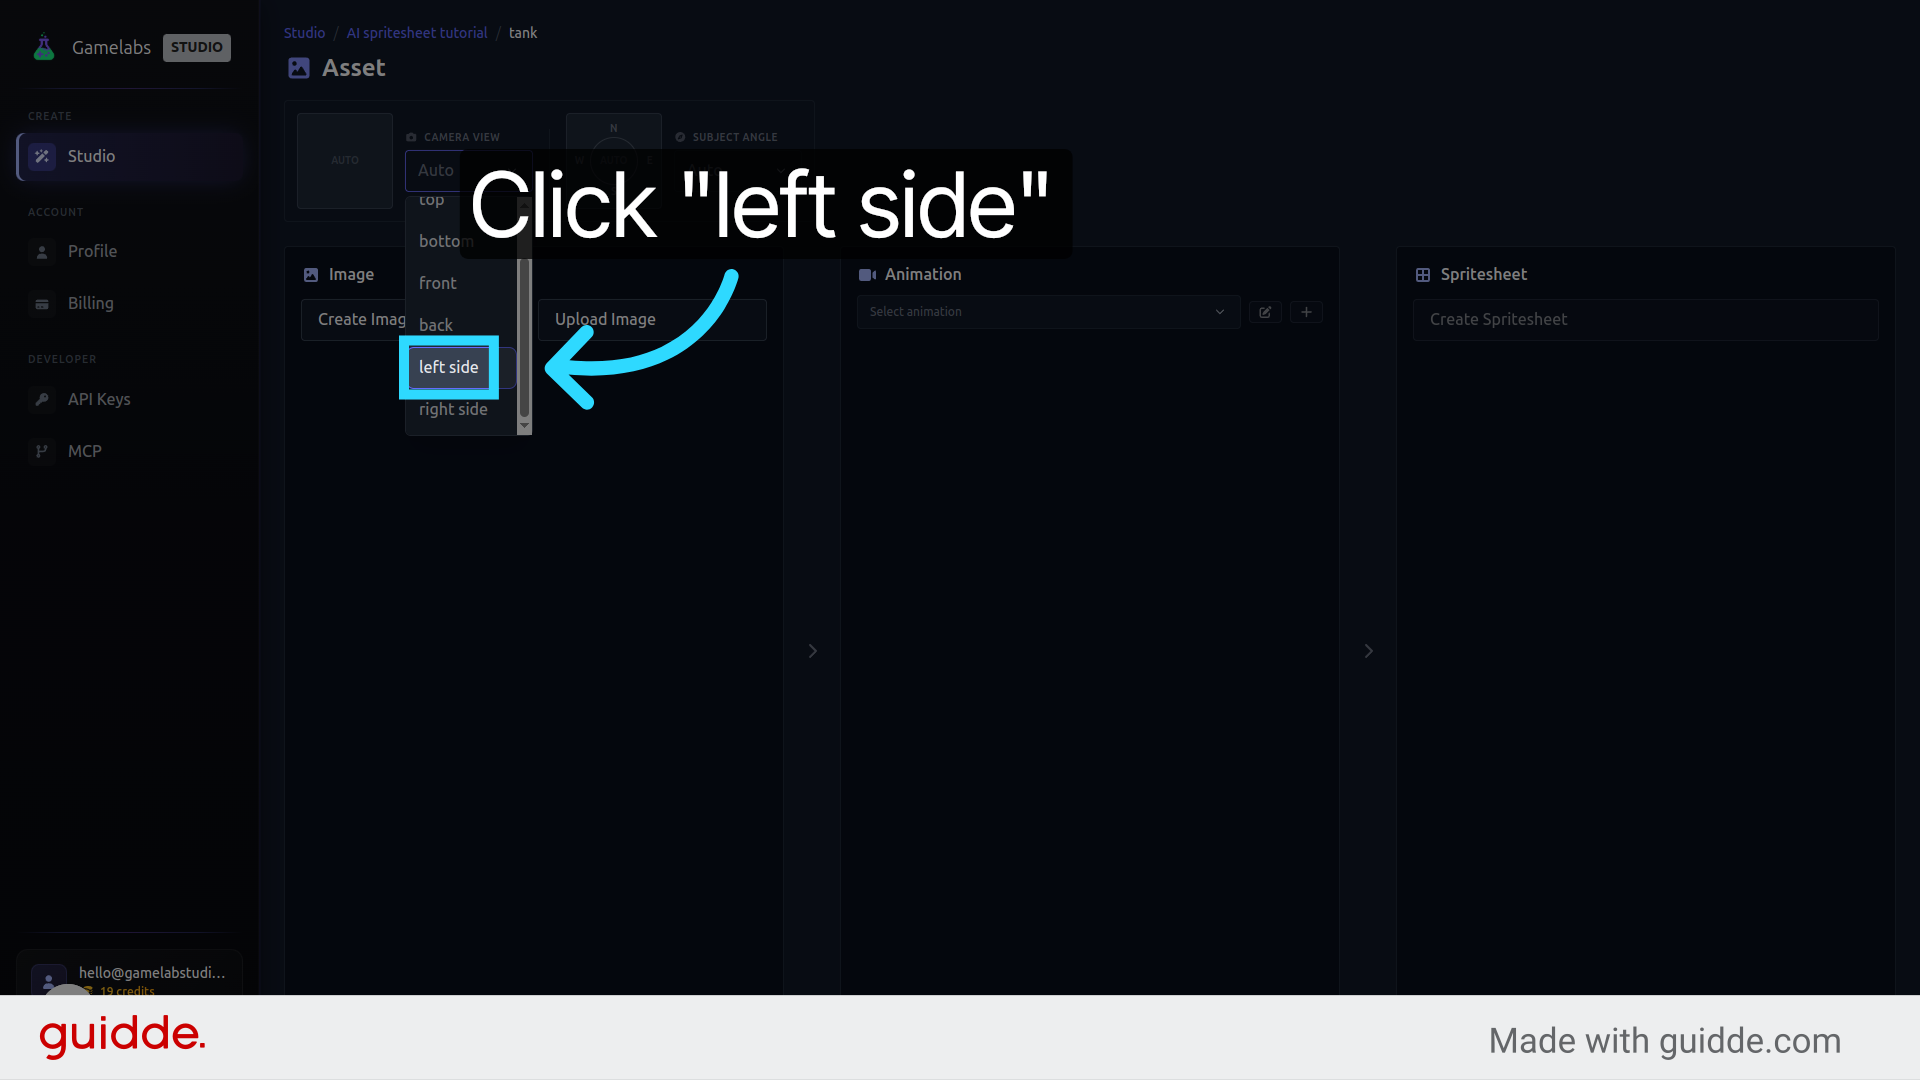
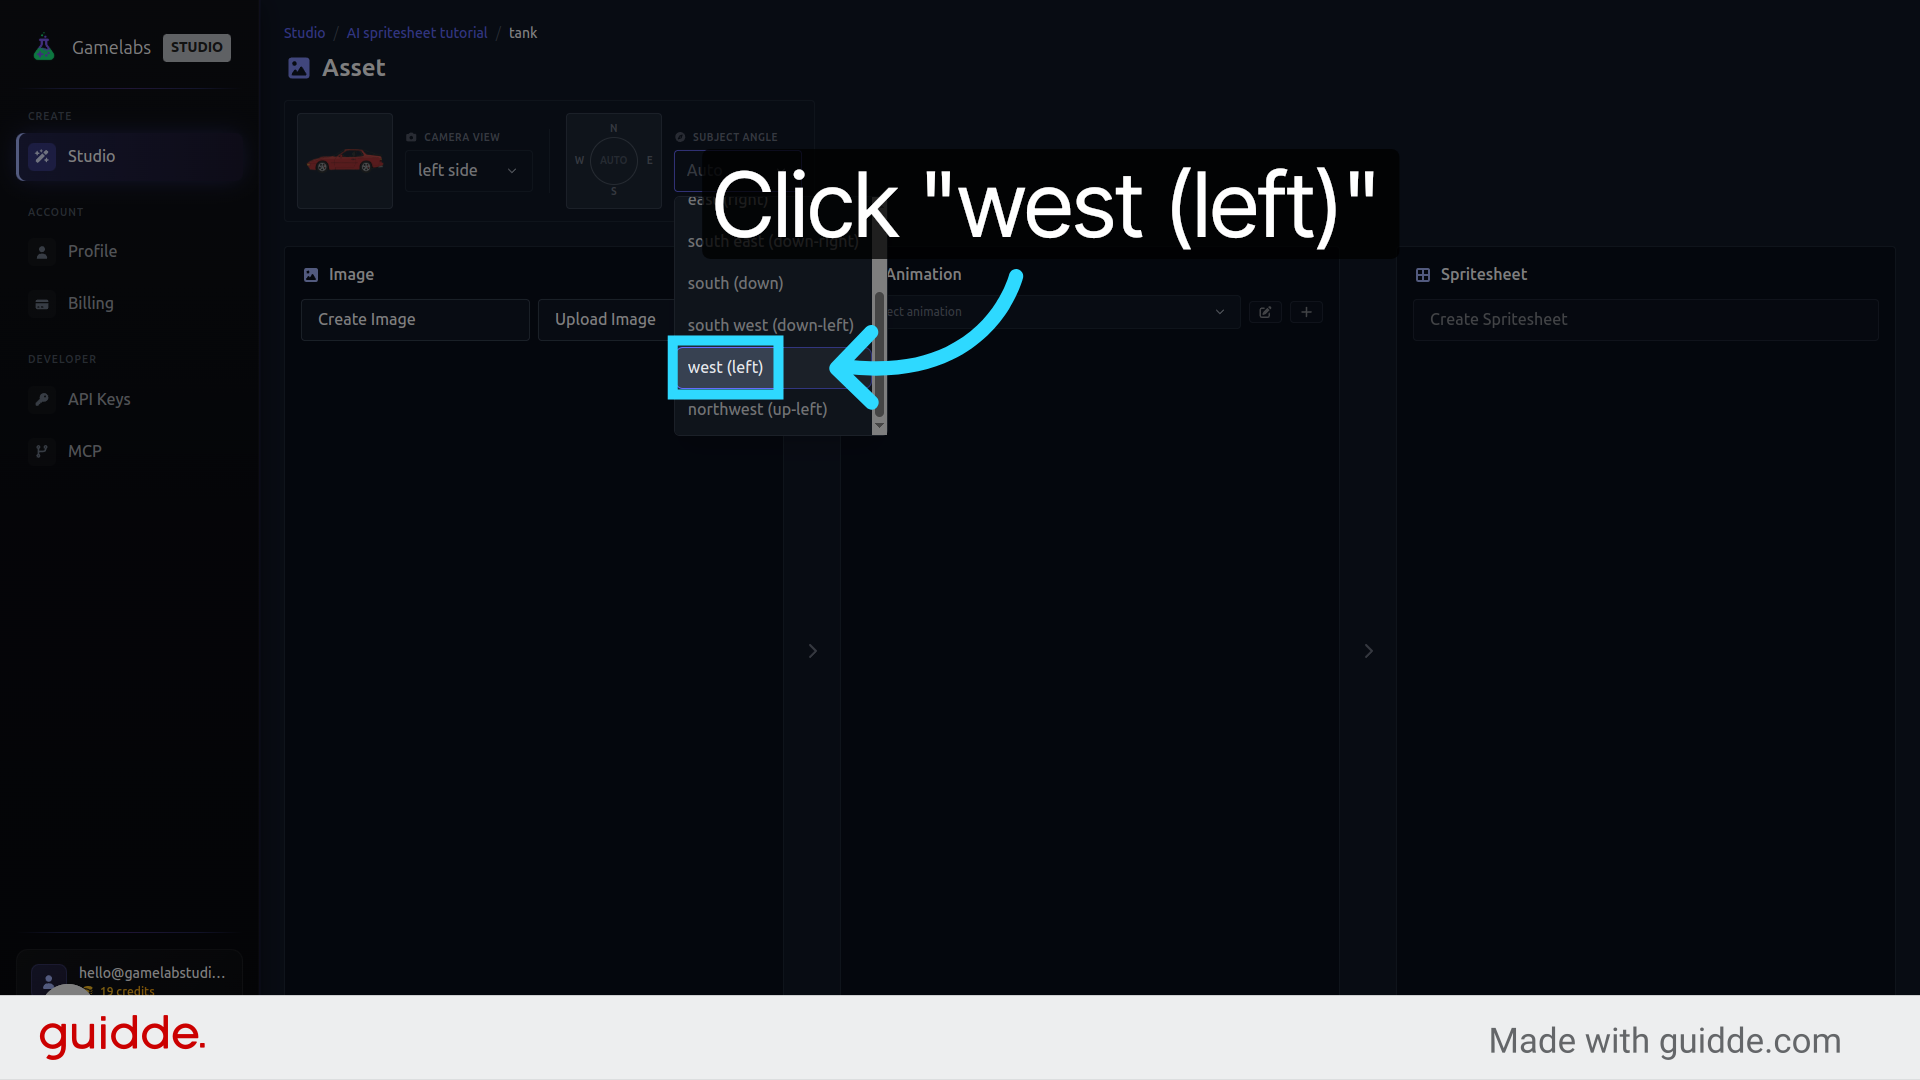
5. Set the View and Orientation
First, establish how the camera sees your subject. Select Left Side for a side-scrolling profile view, then choose the West direction so the sprite faces left on screen.
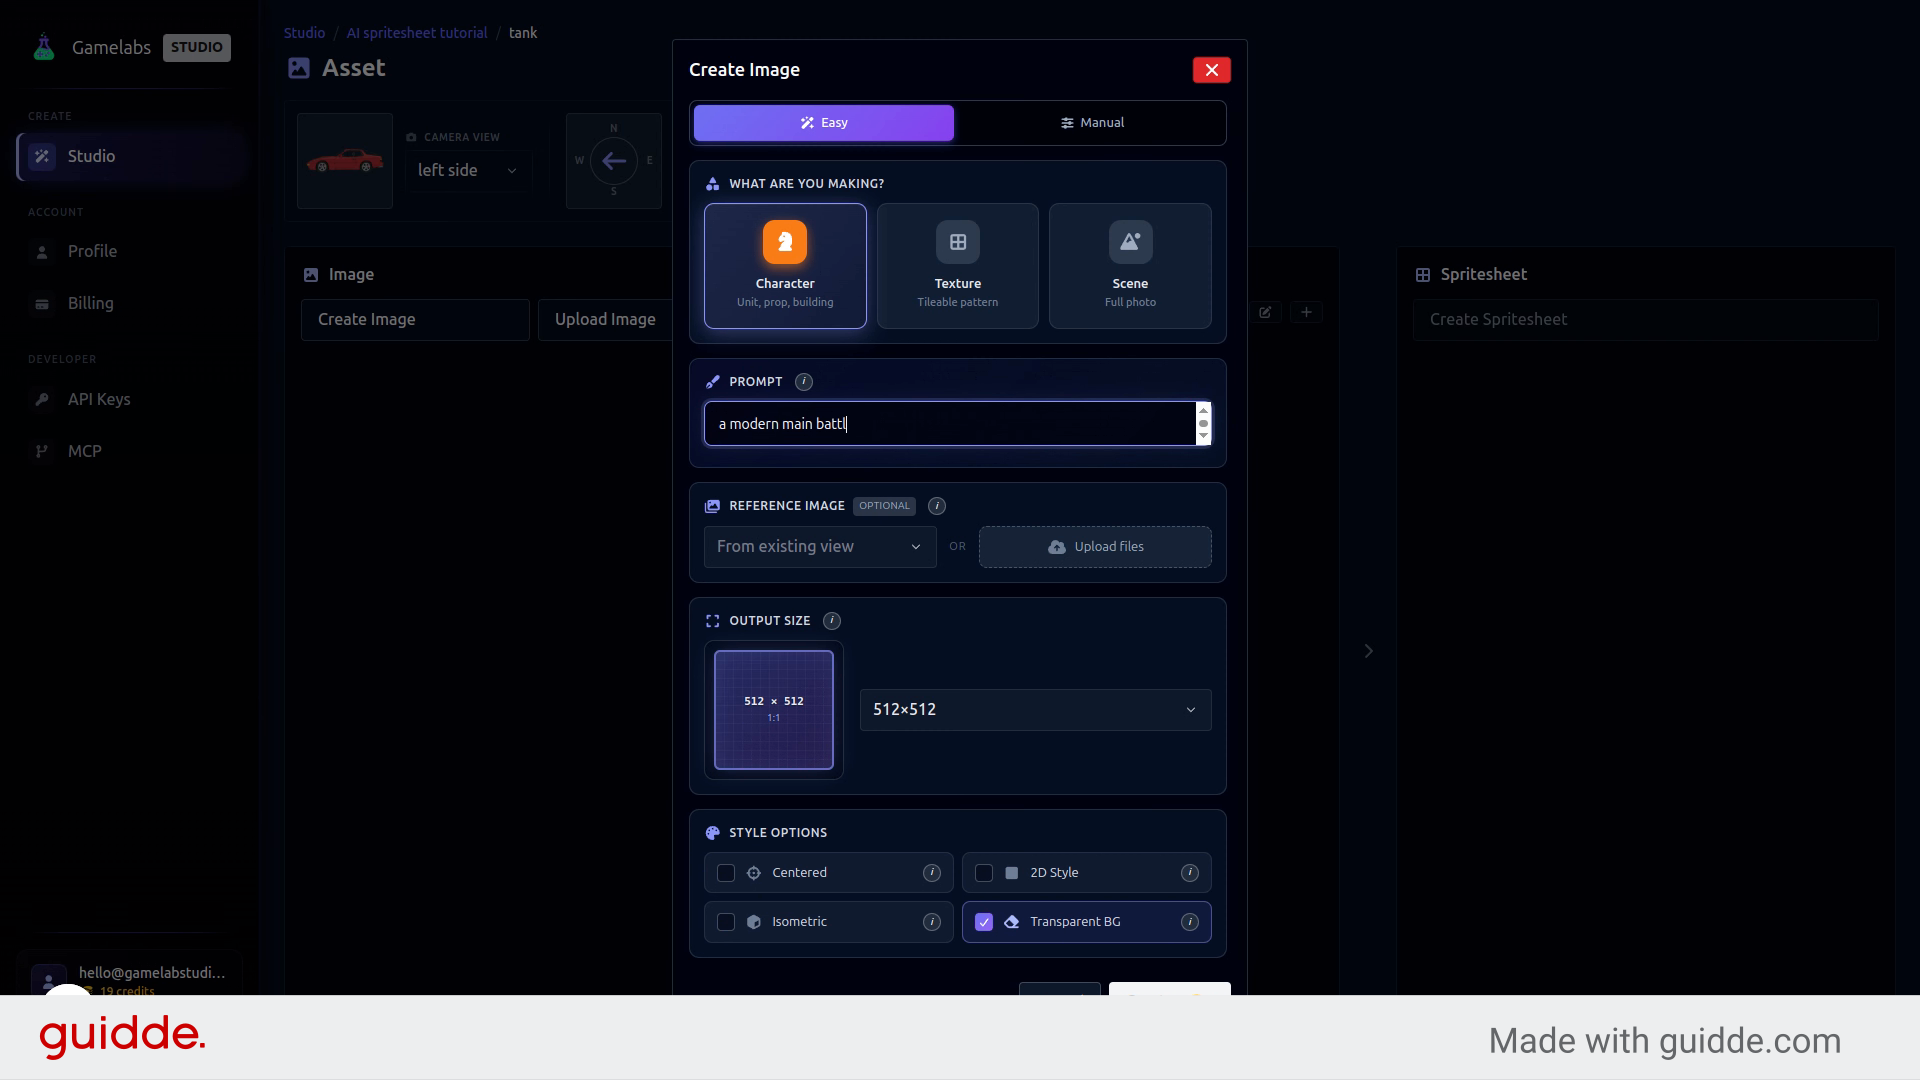
6. Write Your Image Prompt
Click Create Image to open the text-to-image panel. Enter a detailed prompt describing what you want—for example: "A modern main battle tank, side view, pixel art style, isolated on solid background." The more specific you are, the better the result.
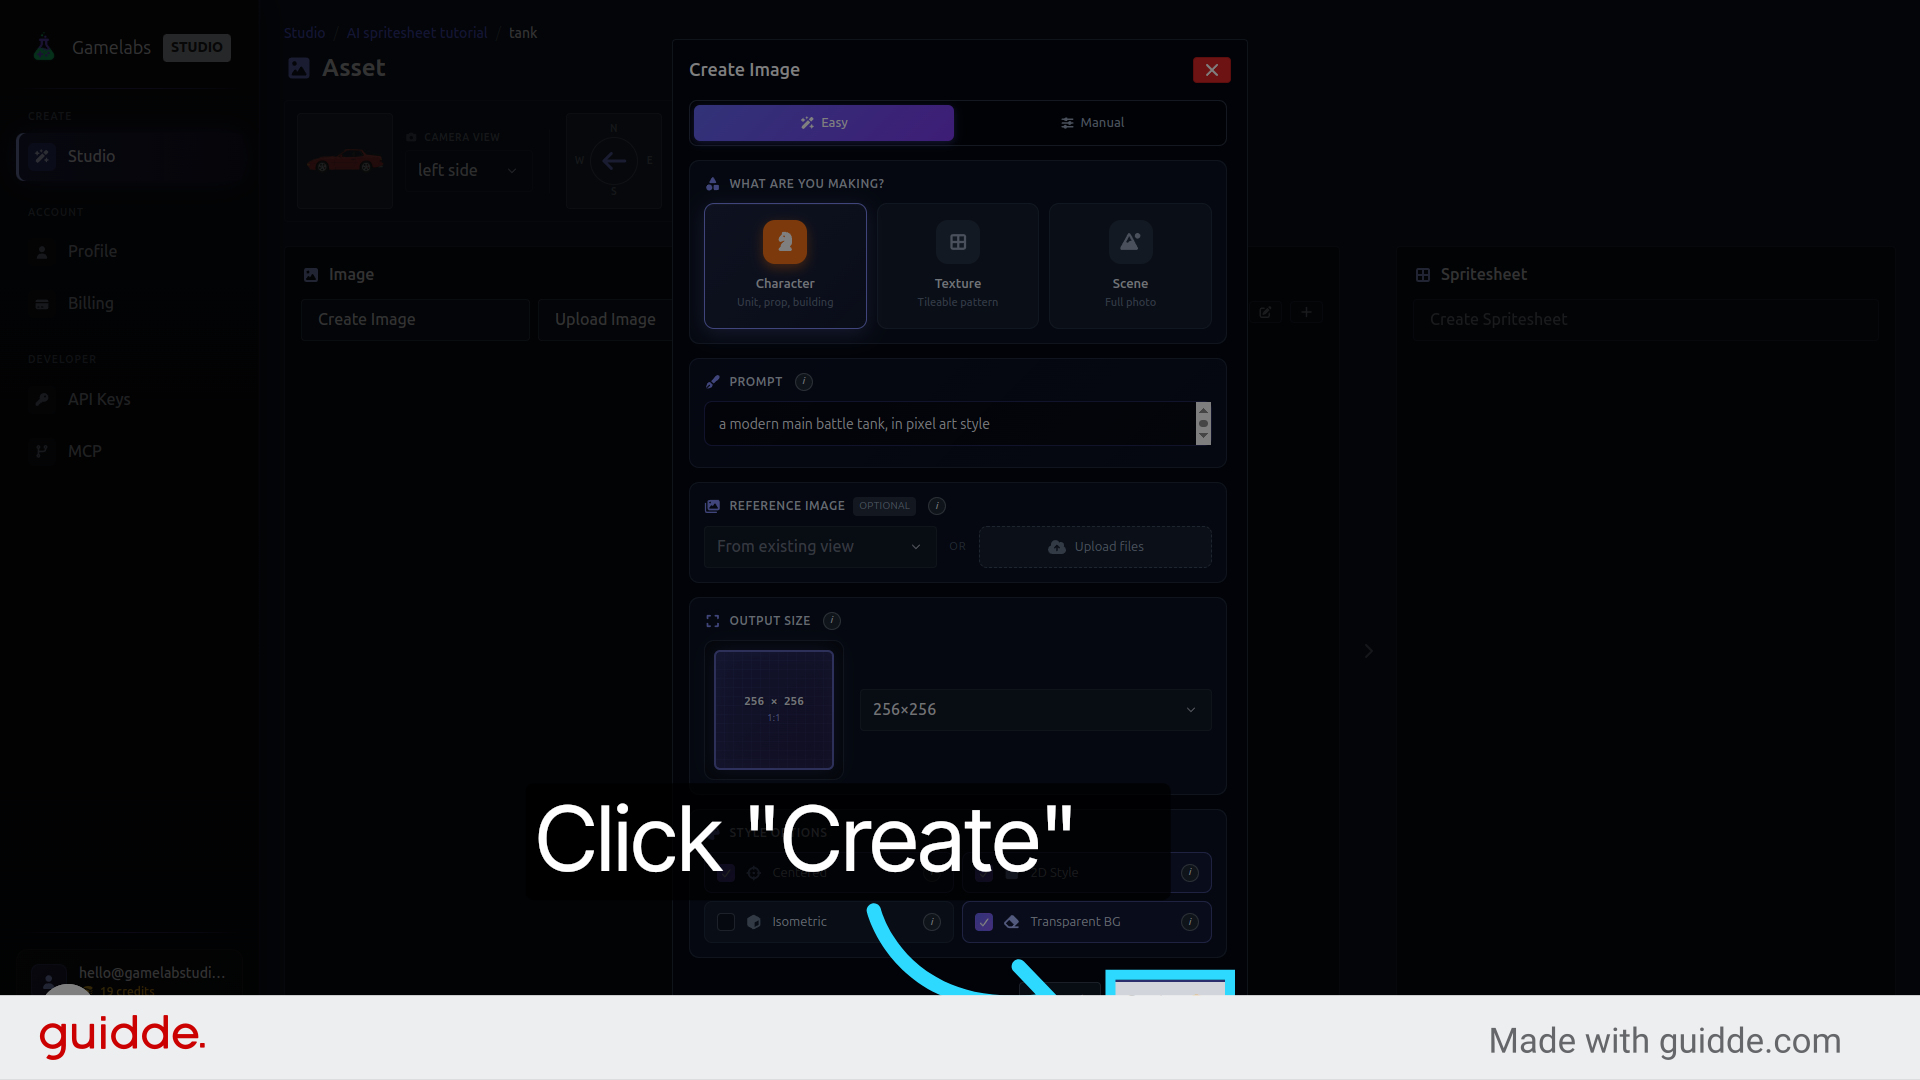
7. Pick a Size and Generate
Choose an image resolution. For pixel art, sizes around 256x256 and 512x512 tend to produce cleaner, more authentic results. Once you are happy with the settings, click Create to generate the base sprite.
Animate the Sprite
Now that you have a static image, you can turn it into an animation sequence. The AI generates new frames by interpreting a motion prompt against your base sprite.
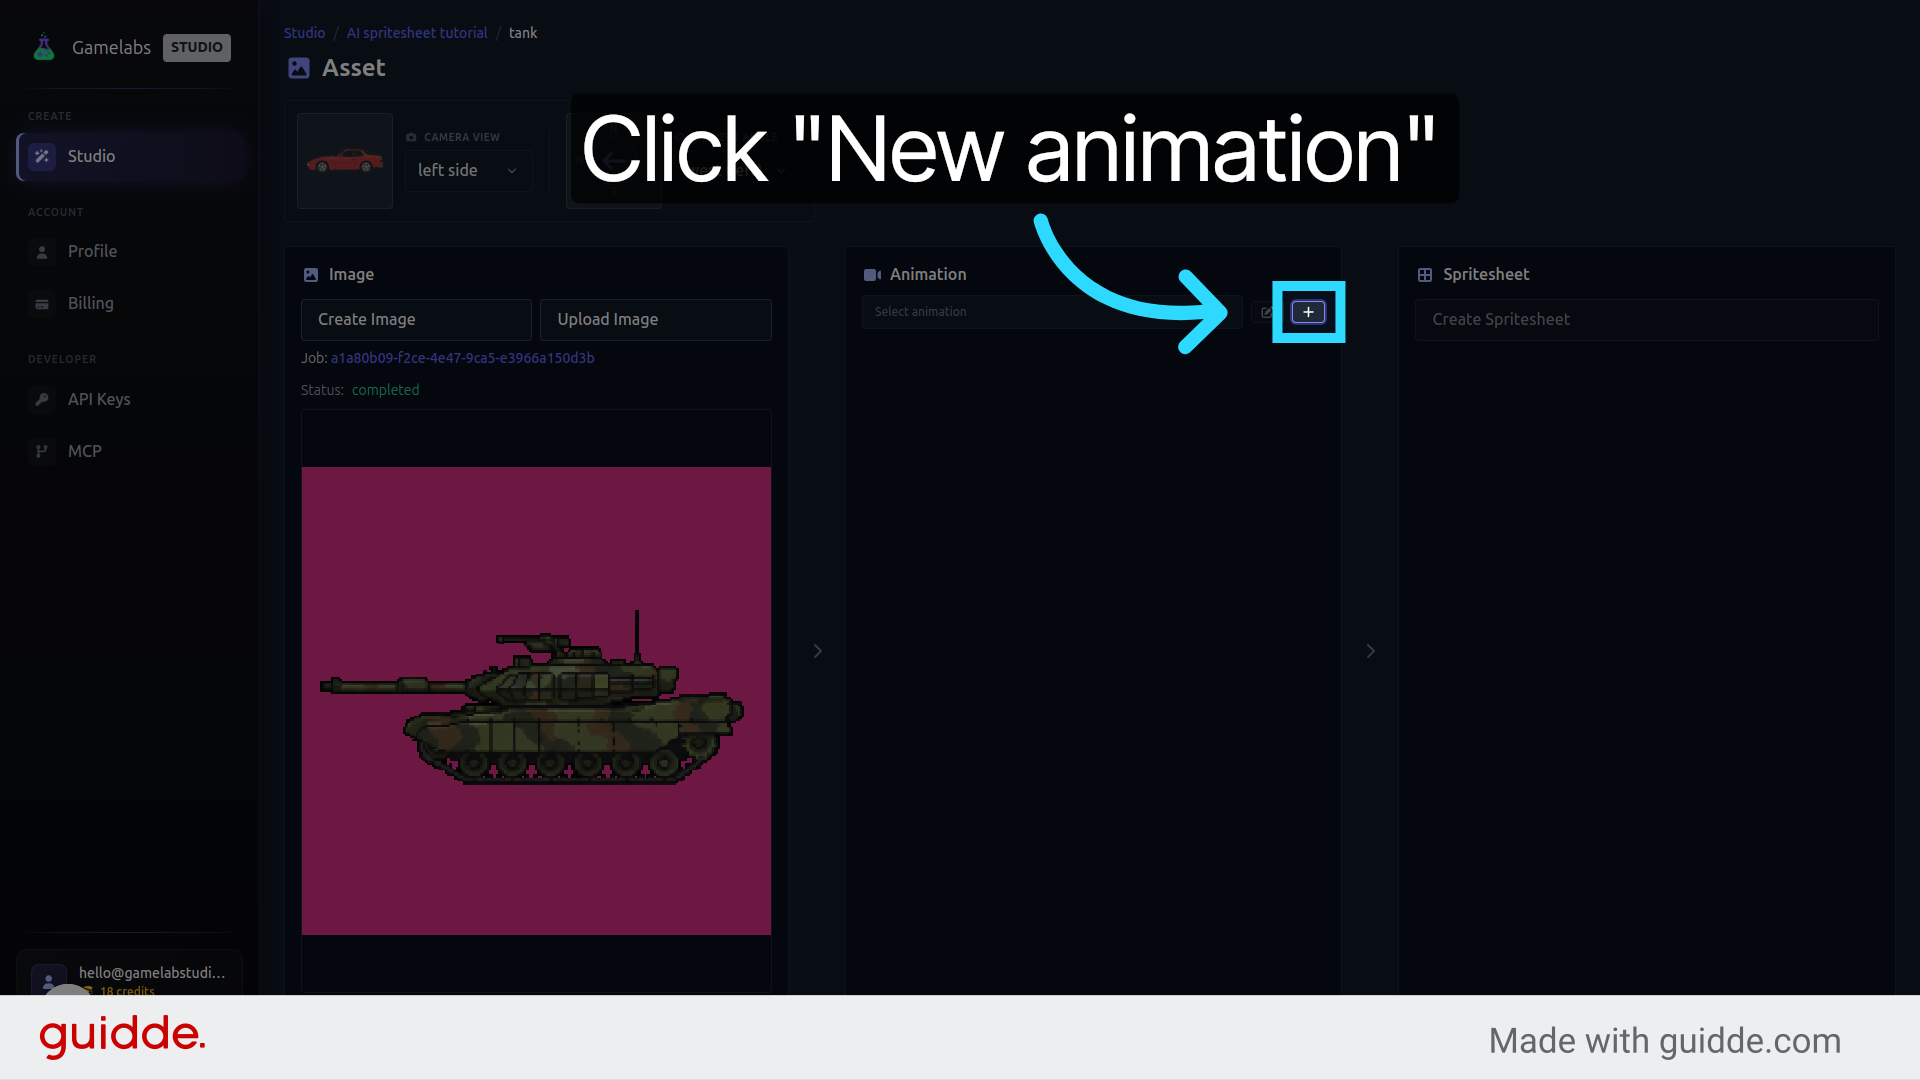
8. Add a New Animation
Click New Animation and give it a name like "Drive_Left". This keeps your animation library organized as you add more actions later (shooting, idling, exploding, etc.).
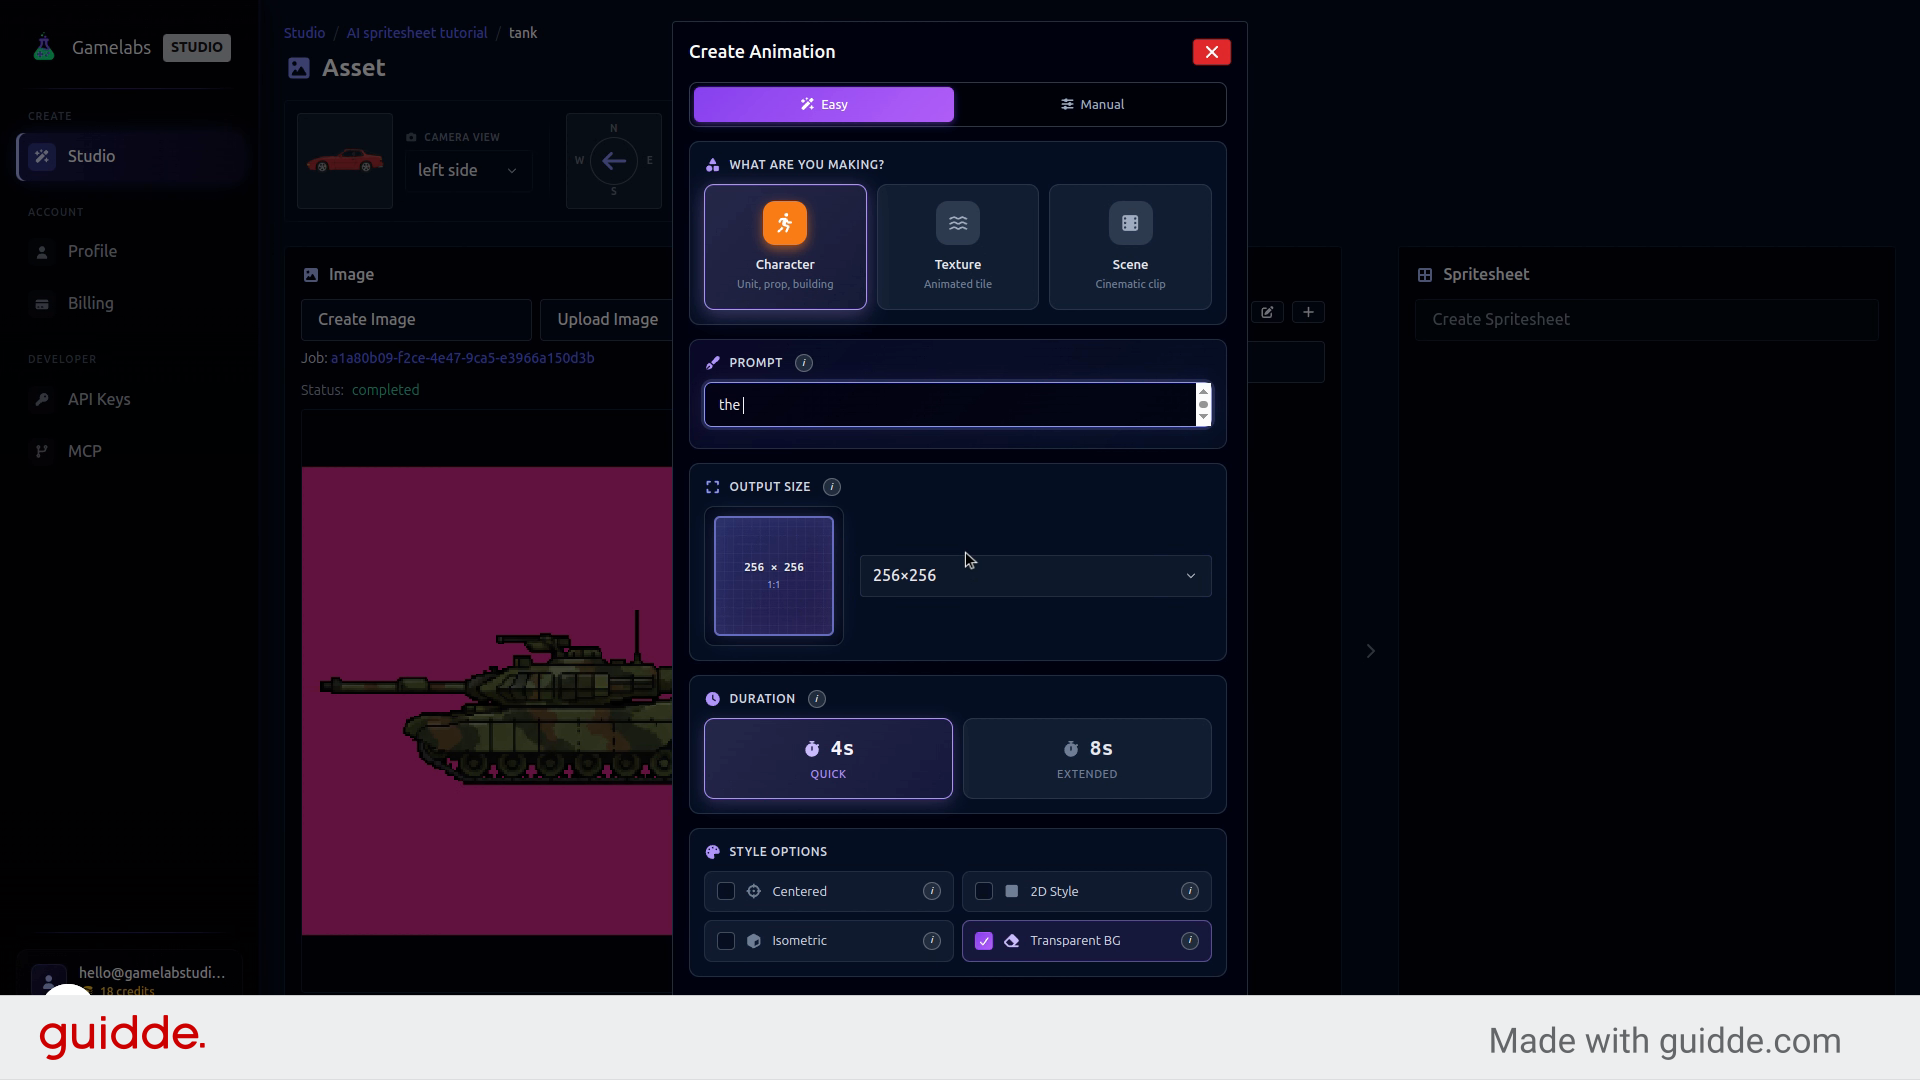
9. Describe the Motion
Click Generate Animation and describe the action you want: "The tank is driving west." The AI understands directional language, so "west" translates to leftward movement. Click Create to generate the frames.
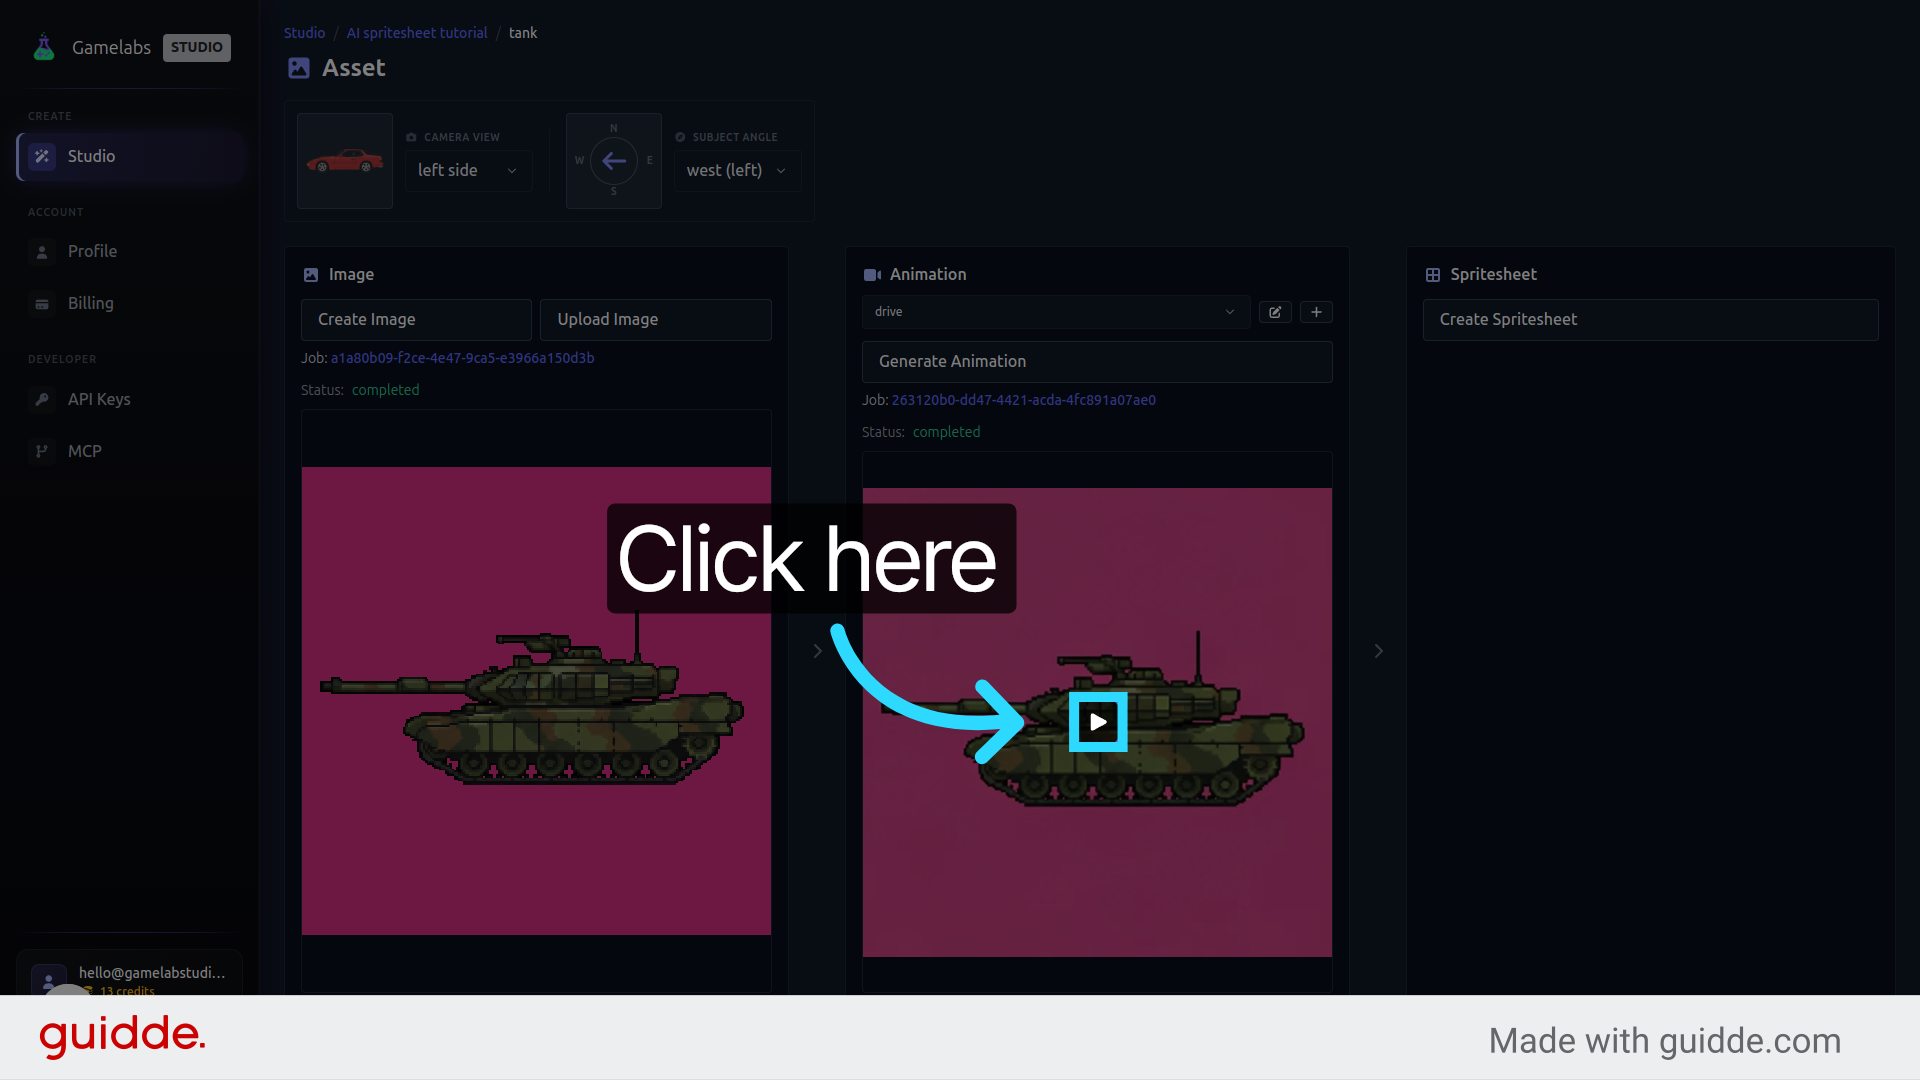
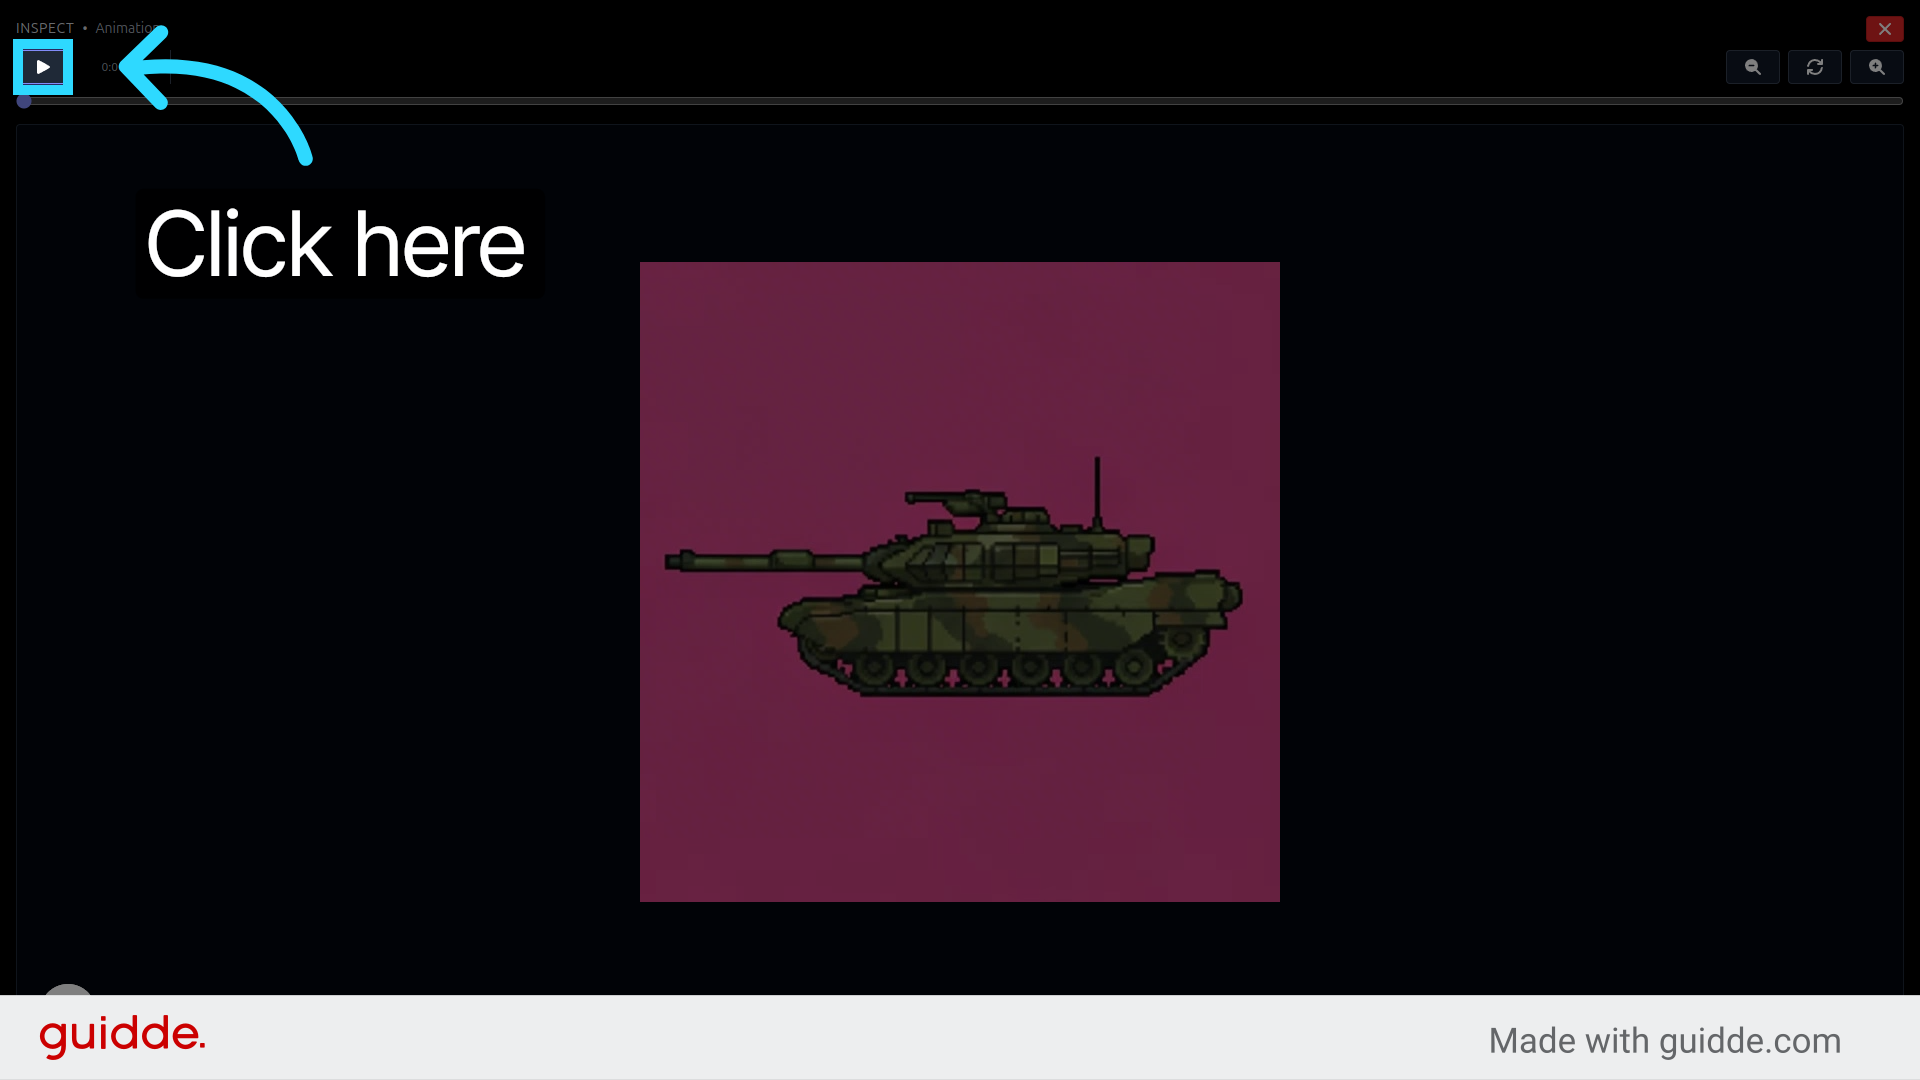
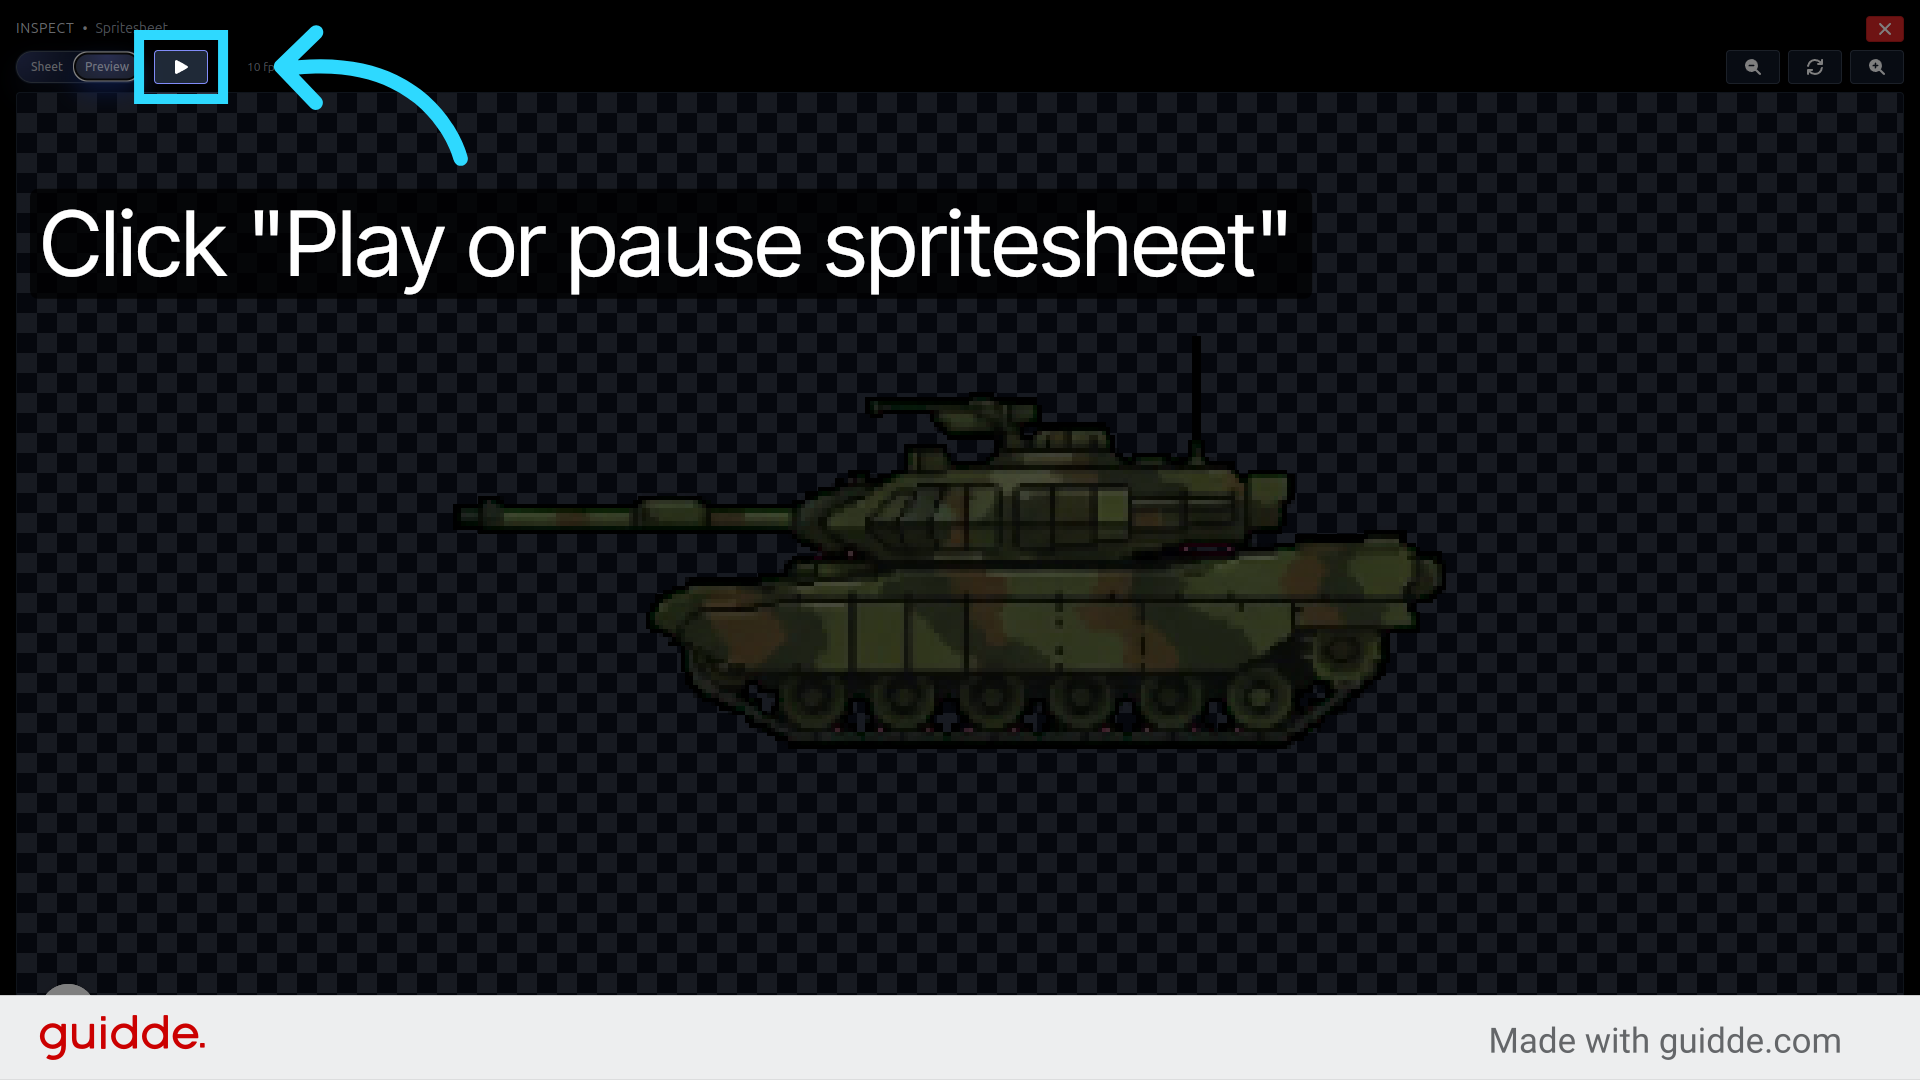
10. Preview the Animation
Hit play to preview the result. Check that the treads are moving smoothly and the perspective holds across frames. You can loop playback or step through individual frames to catch any artifacts.
Export a Transparent Spritesheet
The final step is compiling your animation frames into a single spritesheet image with a fully transparent background. This is what you will actually import into your game engine.
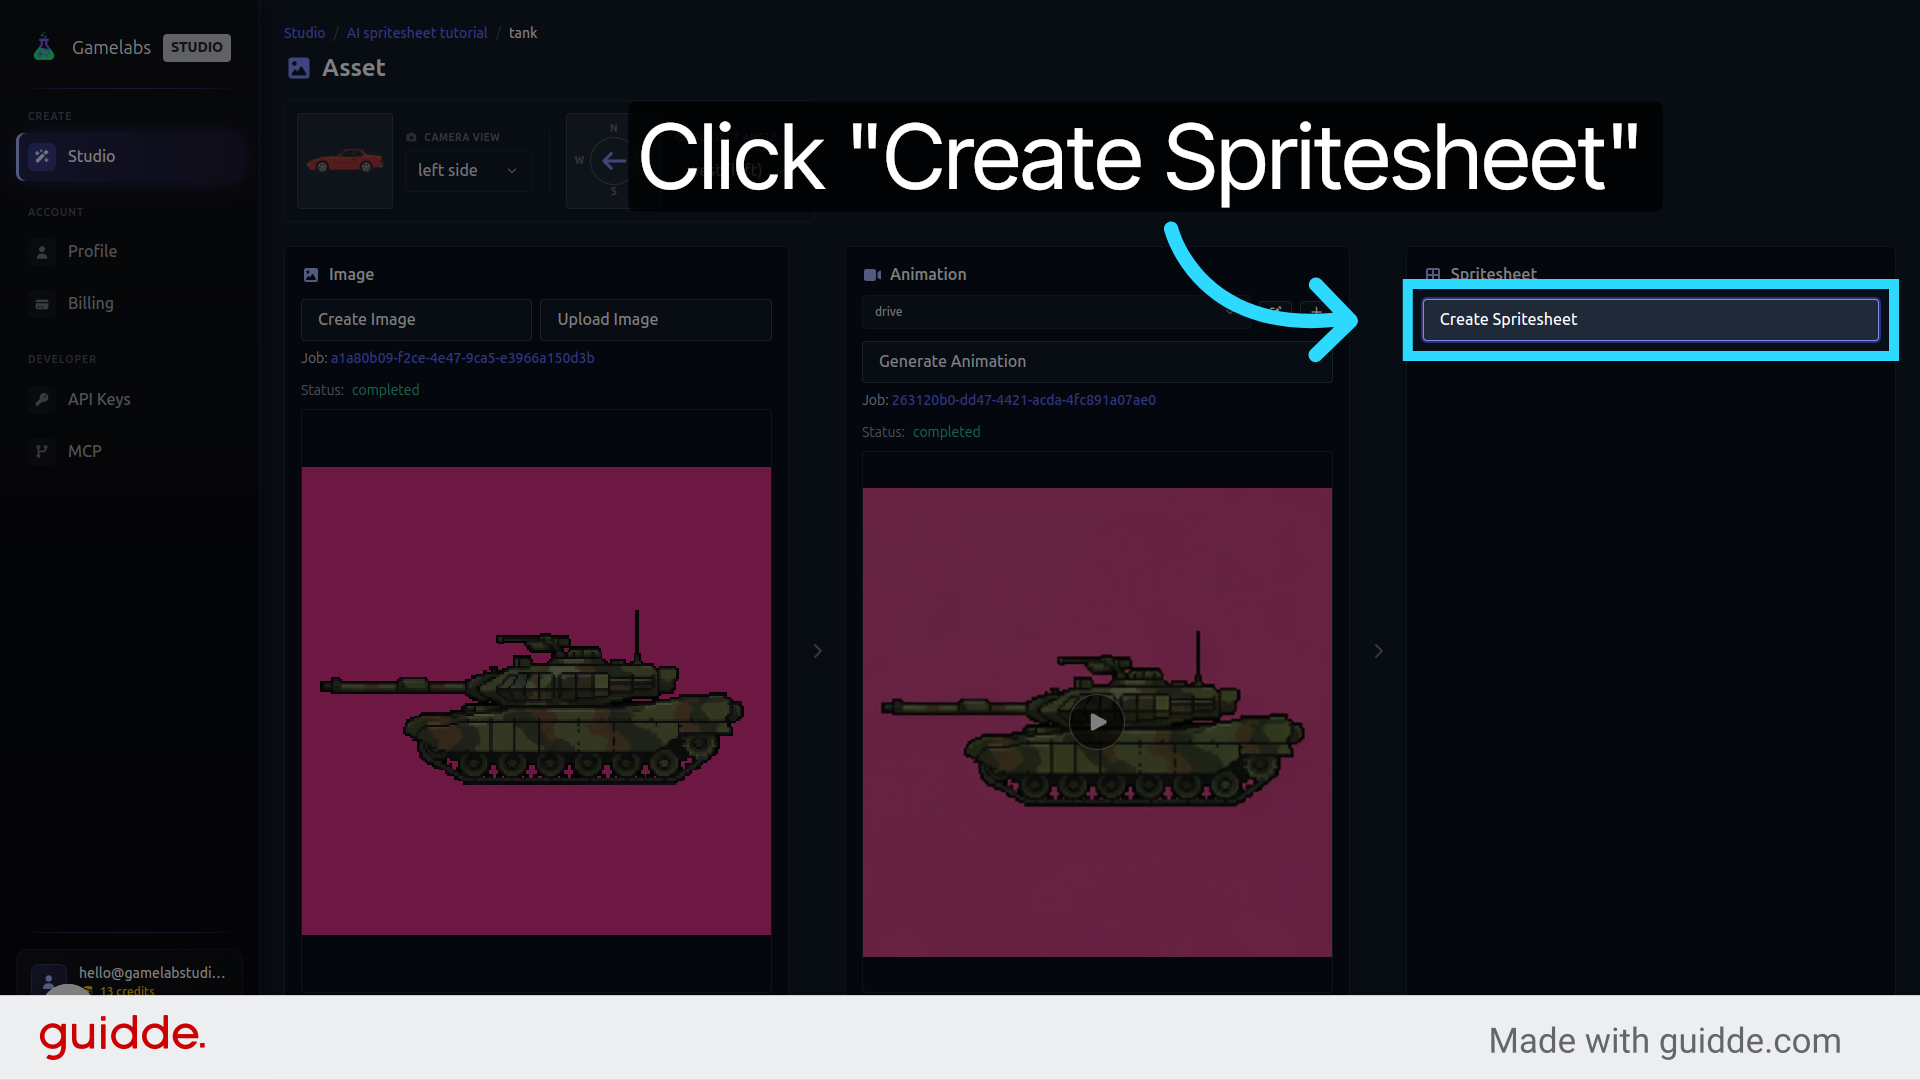
11. Generate an Initial Spritesheet
Close the animation preview and click Create Spritesheet. This compiles all your frames into a single texture atlas. Click Create to produce the first version.
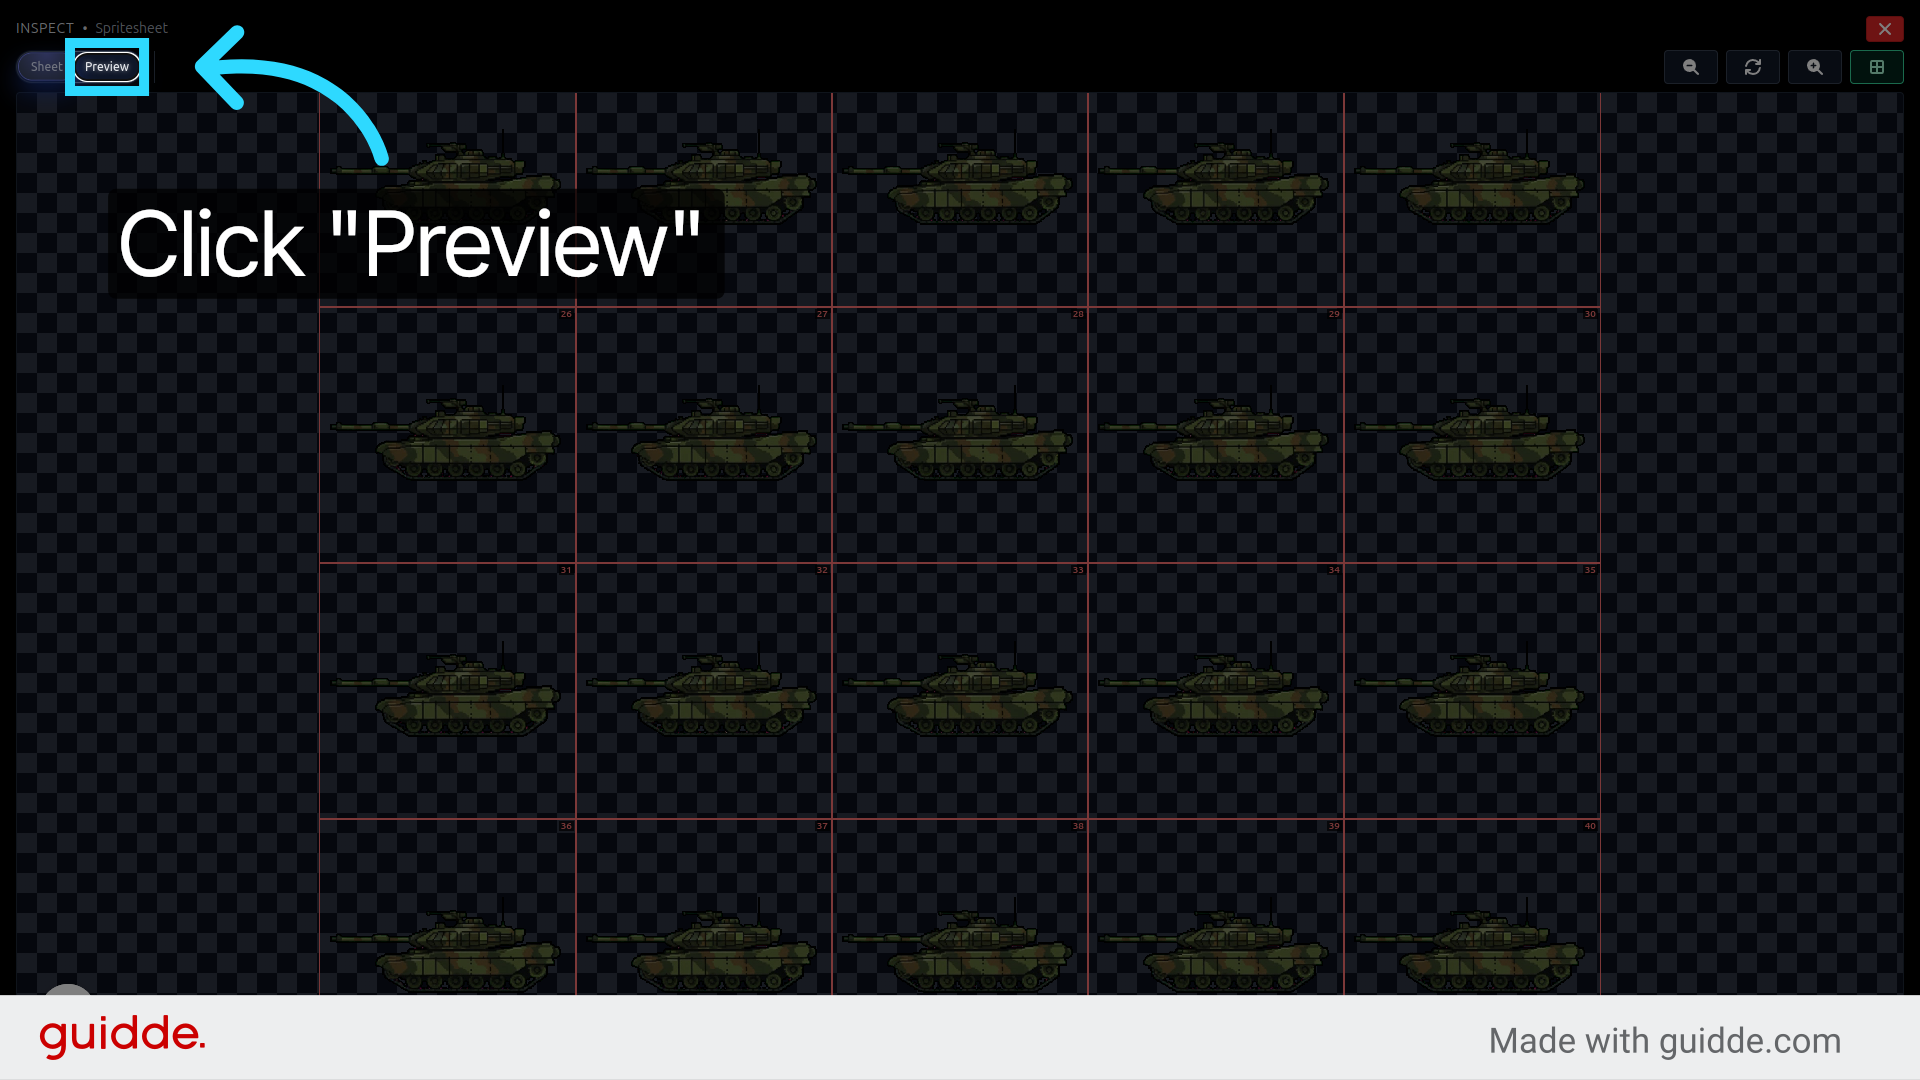
12. Inspect the Result
Click the thumbnail to preview the spritesheet, then hit Preview to watch the animation loop. Look closely for magenta fringing or background noise bleeding through—this is common on a first pass and is easy to fix.
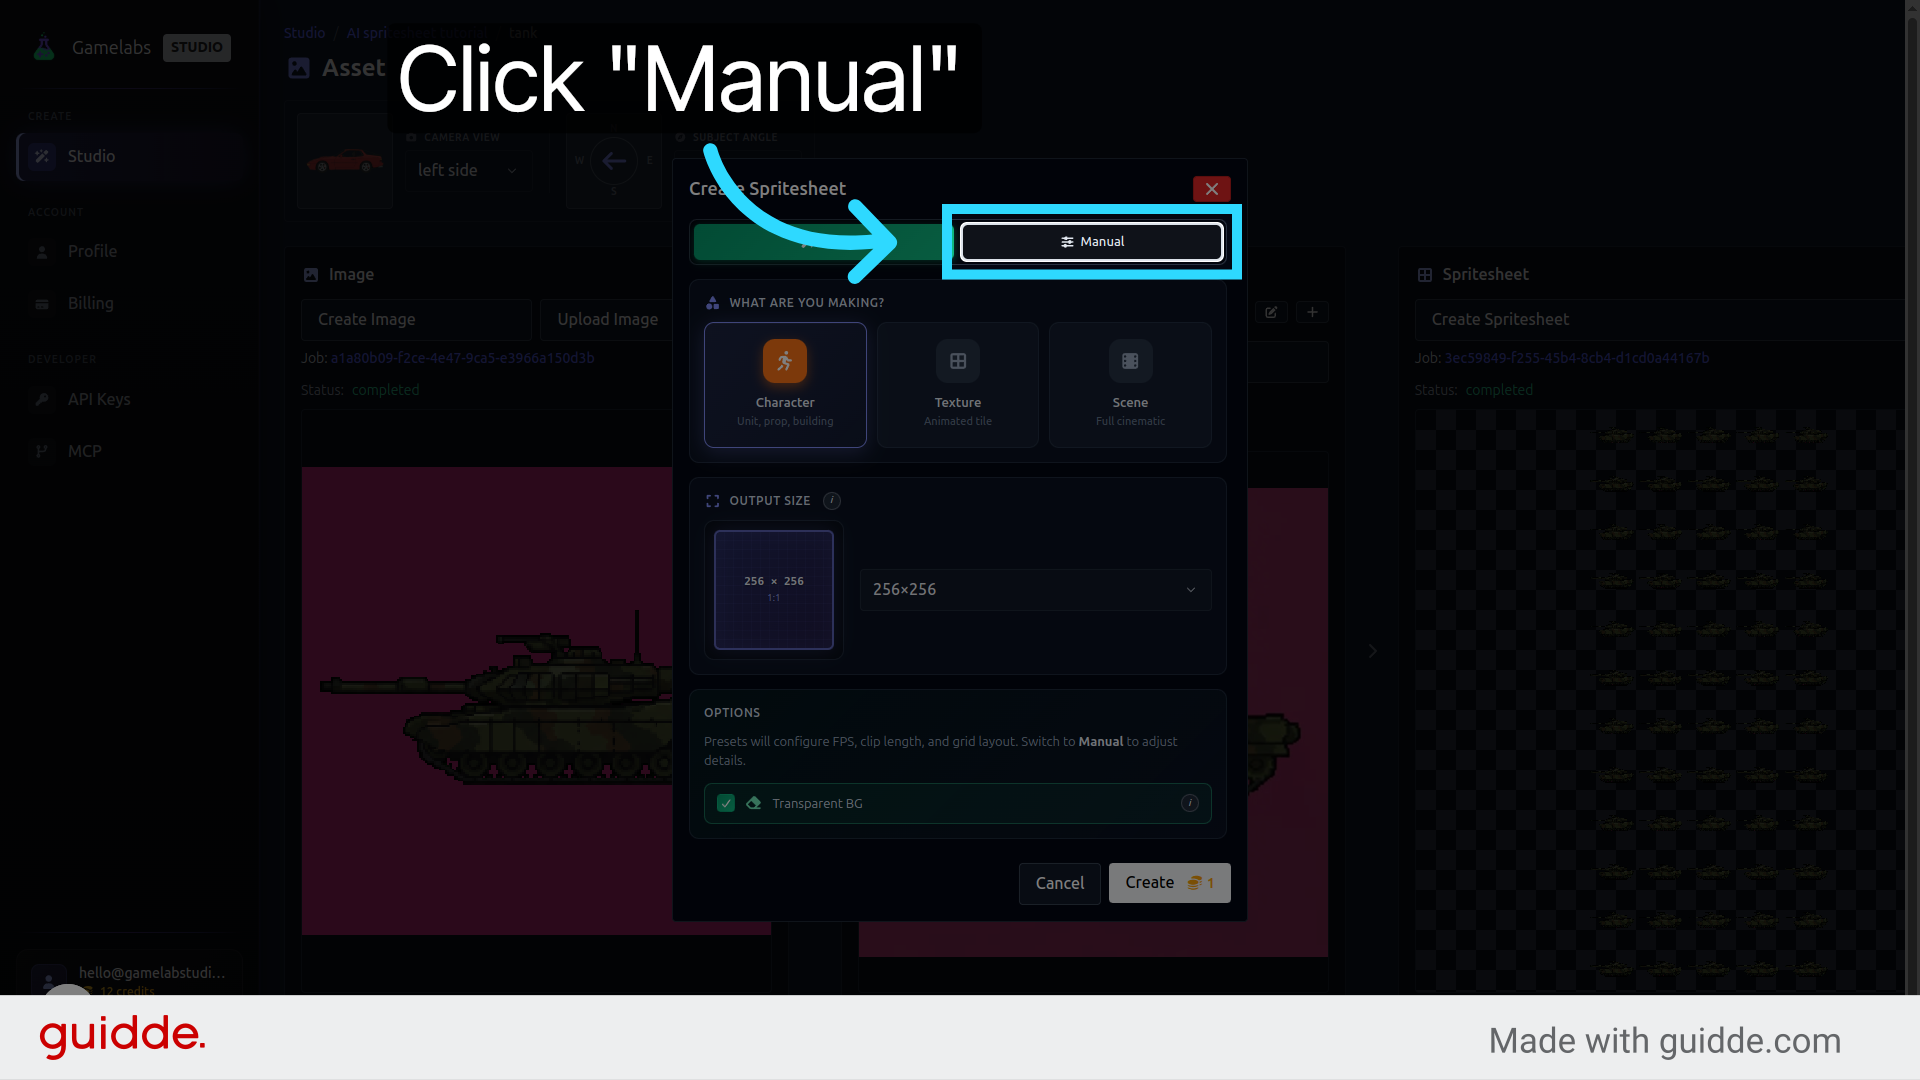
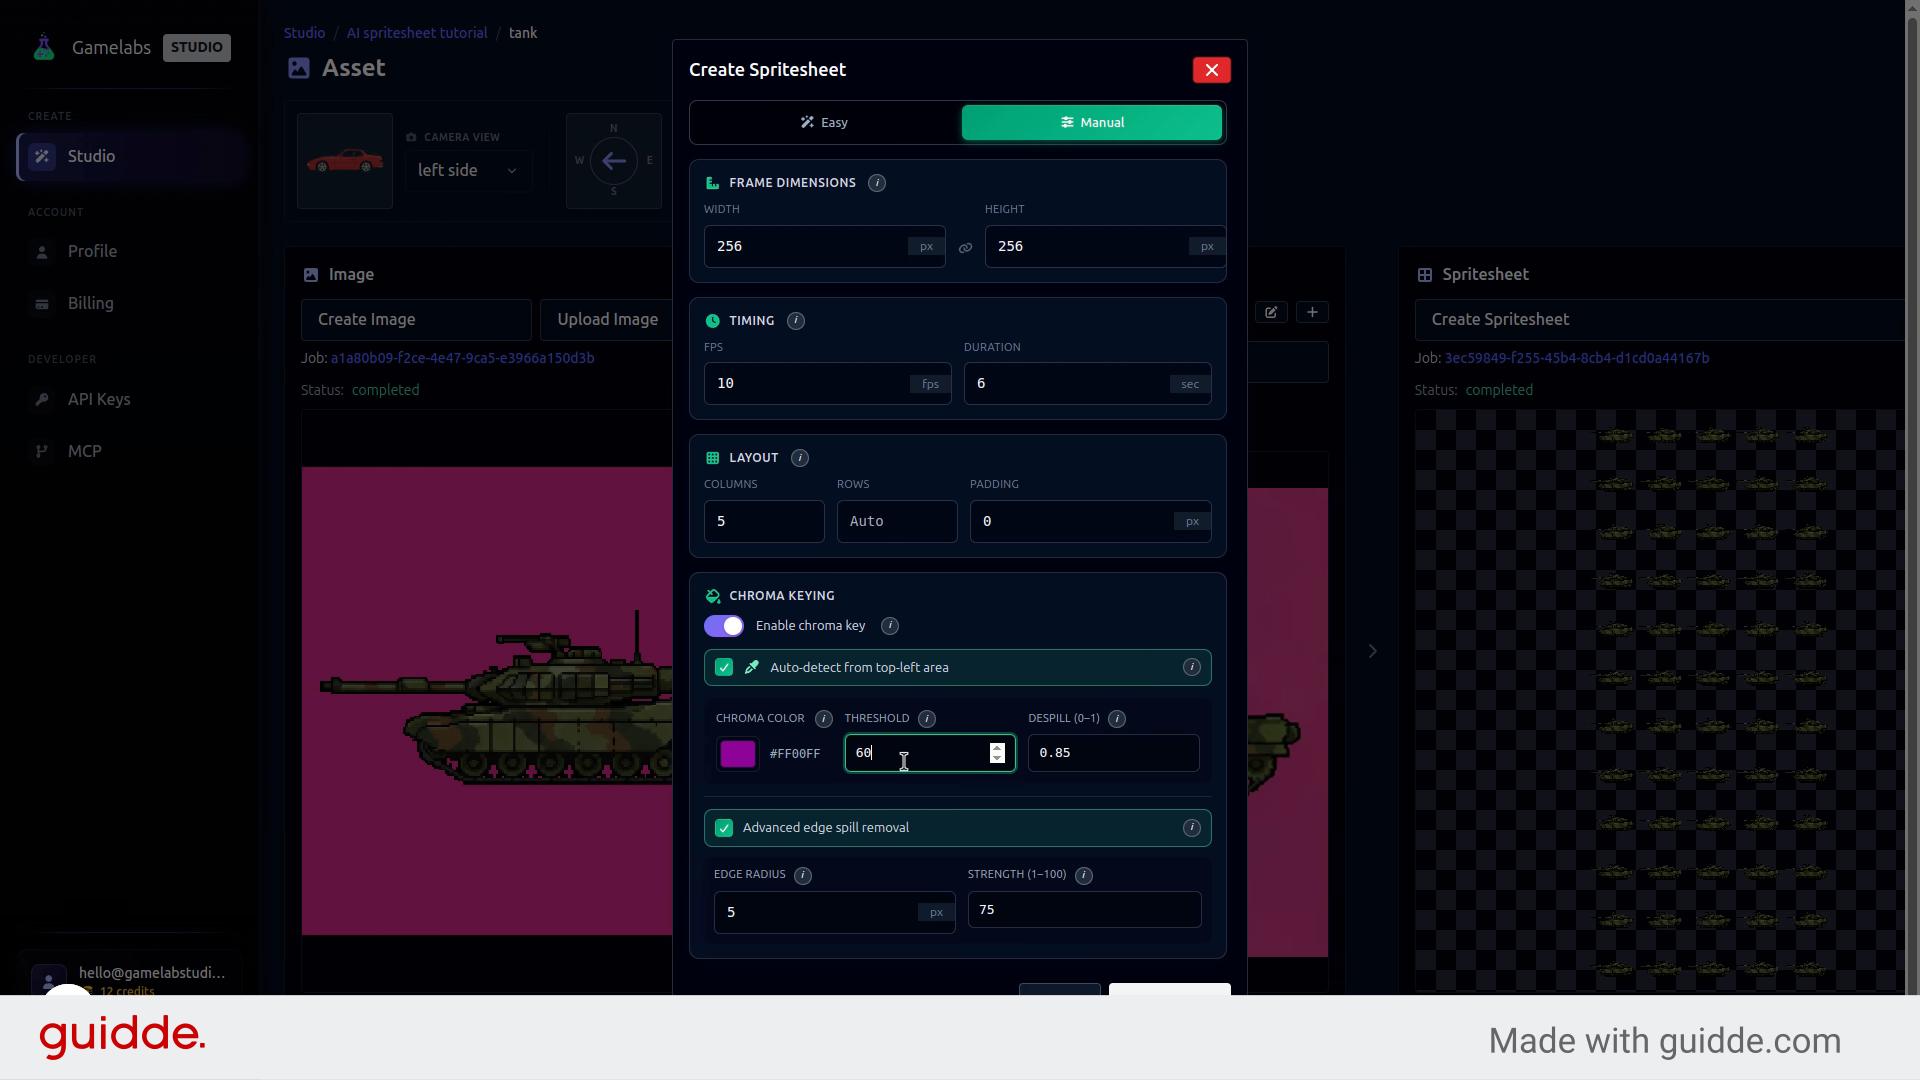
13. Fine-Tune Transparency with Manual Mode
If you see background artifacts, click the options area and then Create Spritesheet again. This time, switch to Manual Mode to get direct control over the chroma key settings:
- Threshold (set to ~70) — controls how aggressively colors near the background are treated as transparent. Higher values remove more background but risk eating into the sprite.
- Strength (set to ~80) — controls edge sharpness. Higher values produce a harder cutout, which works well for pixel art.
These values are a good starting point for pixel art. Adjust to taste depending on your sprite's color palette.
14. Generate the Final Spritesheet
Click Create to regenerate the spritesheet with your new transparency settings. Open the preview—you should now see a clean checkerboard pattern behind the sprite, confirming the background is fully transparent.

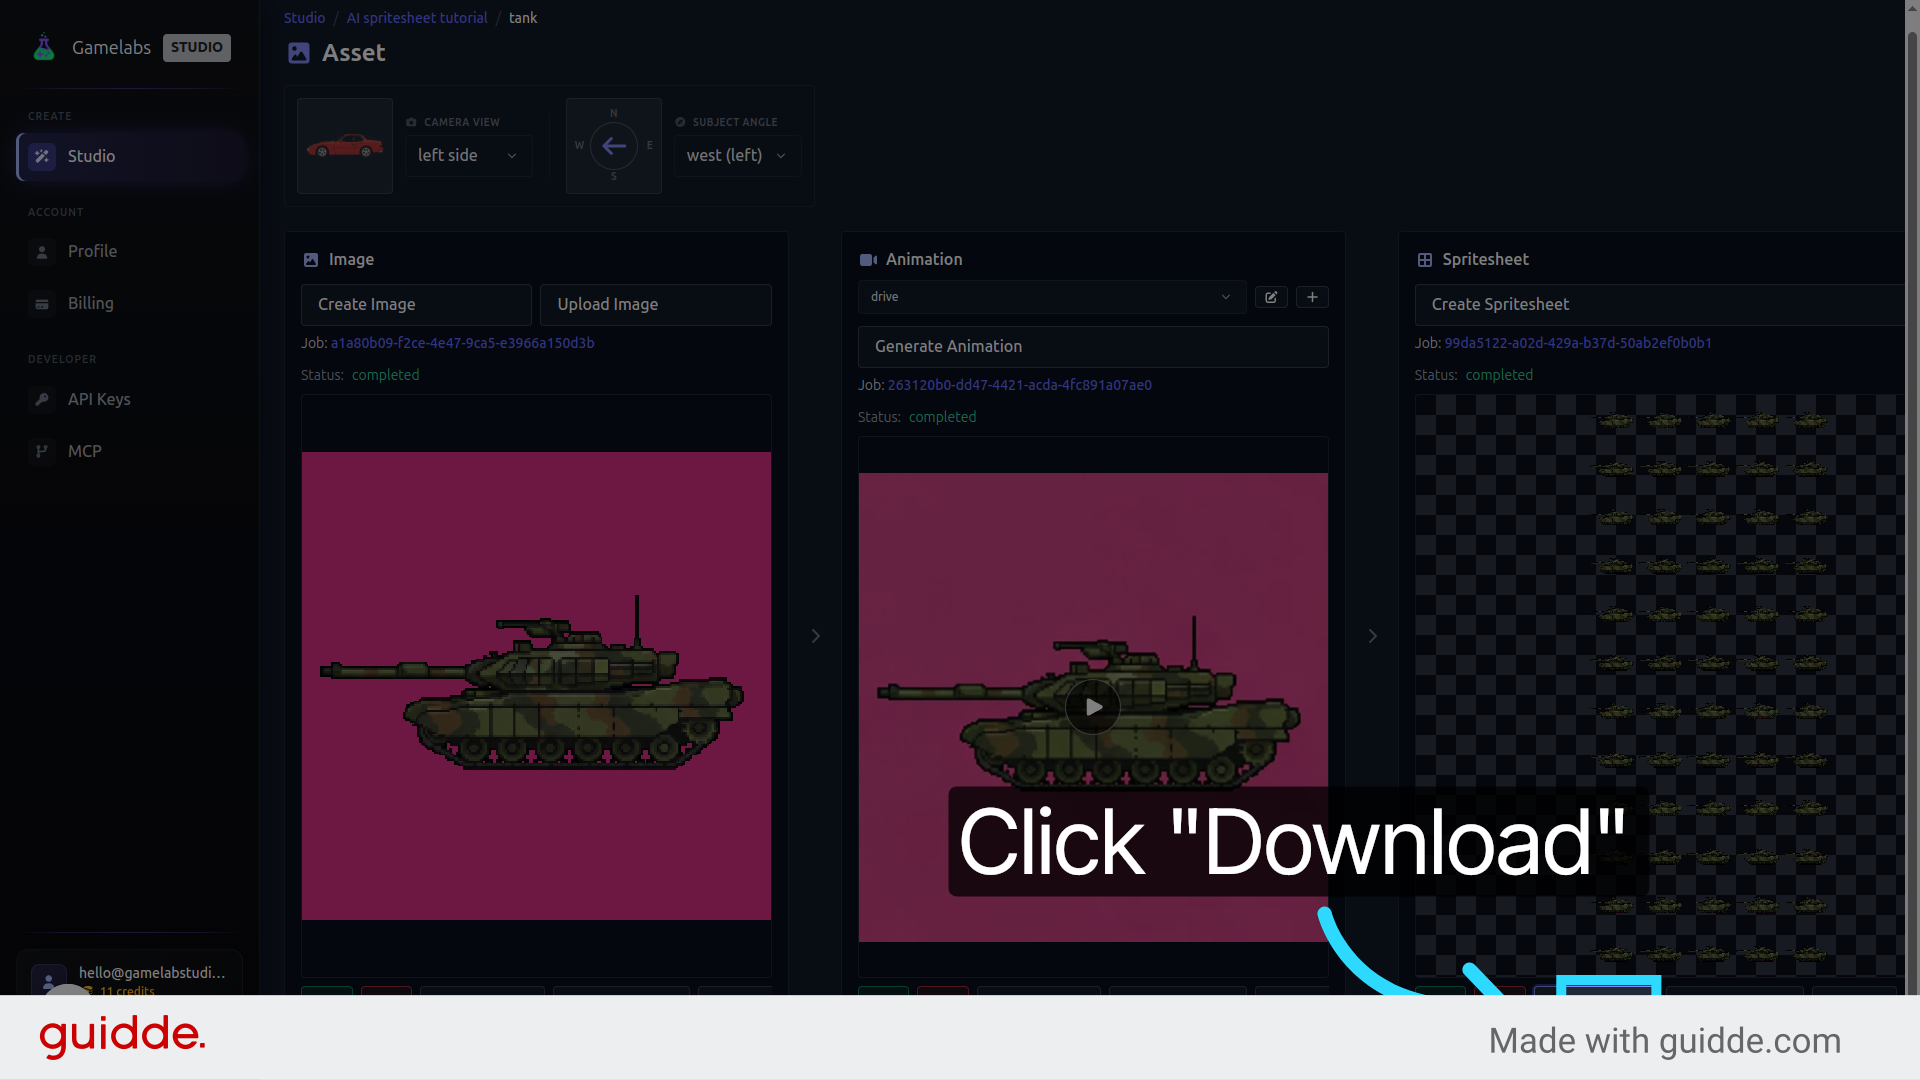
15. Download
Click Download to save the finished spritesheet. The file is ready to drop straight into Unity, Godot, Unreal, or any other engine that supports transparent PNGs.
What's Next
You have a transparent spritesheet ready for production. From here, you can go back and add more animations to the same asset (shooting, idling, taking damage), generate additional assets for your project, or tweak the transparency settings further if your engine's lighting reveals any fringing. The whole pipeline—from text prompt to game-ready spritesheet—takes just a few minutes.