Gamelab Studio generates production-ready spritesheets (PNG images with every animation frame arranged in a grid). Unity is the most widely used game engine for 2D and 3D games, and it has robust support for exactly this kind of asset. The workflow is straightforward: export your spritesheet from Gamelab, drop it into your Unity project, configure the texture import settings, slice it in the Sprite Editor, and create an animation clip.
In this guide, we walk through the full process from downloading the spritesheet PNG and its metadata out of Gamelab Studio, to getting a fully animated sprite playing in Unity. We cover the texture import settings that keep pixel art crisp, the Sprite Editor's grid slicing tools, and how to build an animation clip with the correct frame rate.
What You Get from Gamelab Studio
When you generate a spritesheet in Gamelab Studio, the platform produces a single PNG image containing all of your animation frames laid out in a uniform grid. Every spritesheet comes with built-in metadata that tells you exactly how the grid is structured, no guesswork required. These values map directly to Unity's Sprite Editor slicing settings.
1. Open Your Asset in Gamelab Studio
Navigate to
gamelabstudio.co and open the project containing your spritesheet. If you haven't generated one yet, use the Asset Wizard to create an image, animate it, and extract a spritesheet. The whole pipeline runs inside the app.
2. Download the Spritesheet PNG
Once your spritesheet is ready, click the Download button on the spritesheet card. This saves a single PNG file to your machine, for example, knight_run.png. The image contains every frame arranged in a grid with consistent cell dimensions and full alpha transparency.
3. Note the Spritesheet Metadata
Gamelab Studio displays the full grid metadata for every spritesheet you generate. Click the Metadata button (the ⓘ icon) on the spritesheet card to see all the values you need for Unity:
You can also click the spritesheet preview to open the full-screen Inspector. Toggle the Grid overlay to see numbered frame boundaries, or switch to Preview mode to watch the animation play back at the configured FPS.
The metadata dialog shows these fields:
- Frame Width / Frame Height — Pixel dimensions of a single frame (e.g. 128 × 128 px). In Unity this maps to the Grid By Cell Size values in the Sprite Editor.
- Columns / Rows — Grid layout of the sheet (e.g. 6 × 4). In Unity this maps to the Grid By Cell Count values in the Sprite Editor.
- Frame Count — Total number of animation frames.
- FPS — Playback speed (e.g. 12). In Unity this maps to the Samples value in the Animation window.
- Duration — Total animation length in seconds.
- Padding — Spacing between frames in pixels (usually 0). In Unity this maps to the Padding field in the Sprite Editor slice dialog.
Keep these values handy—you will enter them into Unity in the following steps.
Import the Spritesheet into Unity
With the PNG on disk, the next step is bringing it into your Unity project and configuring the import settings so the texture is treated as a multi-frame sprite with crisp pixel rendering.
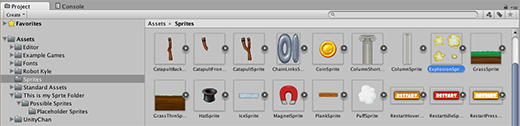
4. Drag the PNG into Your Project
Open your Unity project and locate the folder where you keep your sprite assets (e.g., Assets/Sprites). Drag the downloaded PNG file directly from your file explorer into the Project window in Unity. Unity will import it as a texture asset.
5. Configure the Texture Import Settings
Click on the imported texture in the Project window to select it. The Texture Import Inspector will appear on the right. This is where you tell Unity how to interpret the image.
Set the following properties:
- Texture Type — Set to
Sprite (2D and UI). If you created your project with the 2D template, this may already be the default.
- Sprite Mode — Set to
Multiple. This tells Unity the texture contains more than one sprite frame and enables the Sprite Editor.
- Pixels Per Unit — Set this to match your frame size. For a 32×32 sprite, use
32. For 64×64, use 64. This controls how large the sprite appears relative to one Unity unit.
6. Apply Pixel Art Settings
If your spritesheet contains pixel art (which most Gamelabs assets are), you need to change additional settings to prevent Unity from blurring your sprites:
- Filter Mode — Set to
Point (no filter). This is critical—bilinear filtering will make pixel art look blurry.
- Compression — Set to
None. Compression can introduce artifacts on crisp pixel edges.
- Max Size — Make sure this value is large enough to fit your full spritesheet without downscaling. If your sheet is 512×512, set it to at least
512. Unity will silently downscale if this is too small, causing blurriness.
Click Apply at the bottom of the Inspector to save these settings.
Slice the Spritesheet in the Sprite Editor
Unity's Sprite Editor lets you define the boundaries of each individual frame within the spritesheet. Since Gamelab Studio exports on a uniform grid, slicing is straightforward.
7. Open the Sprite Editor
With the spritesheet selected in the Inspector, click the Sprite Editor button. This opens a dedicated window where you can see the full texture and define sprite boundaries.
Note: If the Sprite Editor button is grayed out, make sure Sprite Mode is set to Multiple and you have clicked Apply. You may also need to install the 2D Sprite package from the Package Manager if you are using a 3D project template.
8. Slice by Grid
In the Sprite Editor, click the Slice dropdown in the top-left toolbar. You have two approaches depending on the metadata from your Gamelab export:
- Grid By Cell Size — Enter the Frame Width and Frame Height from the Gamelab metadata (e.g., 128 × 128). Use this when you know the exact pixel dimensions of each frame.
- Grid By Cell Count — Enter the Columns and Rows from the Gamelab metadata (e.g., 6 columns × 4 rows). Use this when you know the grid layout.
If you used padding in your Gamelab Studio export, enter the same pixel value in the Padding field so the slice boundaries align correctly.
9. Apply the Slice
Click Slice to preview the grid overlay on your spritesheet. You should see individual rectangles drawn around each frame. Verify the count matches the Frame Count from the Gamelab metadata.
Click Apply in the top-right of the Sprite Editor window to save. Back in the Project window, click the expand arrow on your spritesheet asset. You should now see each frame listed as a child sprite (e.g., knight_run_0, knight_run_1, knight_run_2, etc.).
Create a Sprite Animation
Now that Unity has individual frames, you can turn them into a playable animation clip in seconds.
10. Select All Frames and Drag to Scene
In the Project window, expand the spritesheet asset and select all the child sprites (click the first frame, then Shift-click the last). Drag them directly into the Scene view or the Hierarchy panel.
Unity will prompt you to save a new .anim file. Name it something descriptive like Knight_Run.anim. Unity automatically creates three things:
- An Animation Clip (
.anim) containing all the frames in order
- An Animator Controller (
.controller) that manages animation states
- A GameObject in the scene with a Sprite Renderer and Animator component attached
11. Set the Frame Rate
Open the Animation window via Window → Animation → Animation. Select the GameObject you just created. You should see the animation timeline with all your sprite frames.
To match the frame rate from Gamelab Studio, look for the Samples field in the Animation window. If you do not see it, click the three-dot menu (⋮) in the top-right corner of the Animation window and enable Show Sample Rate. Set the Samples value to match the FPS from your Gamelab metadata (e.g., 12 for a 12 FPS animation).
12. Preview and Adjust
Press the Play button in the Animation window to preview the animation. If the speed feels off, tweak the Samples value—lower values make the animation slower, higher values speed it up. Compare the playback with the Preview mode in Gamelab Studio's Inspector to confirm the animation looks the same.
You can also hit Play in the Unity Editor itself to see the animation running in the Game view. The sprite should cycle through all frames at the configured rate.
Quick Reference
Use this table to map Gamelab metadata fields to their corresponding Unity properties:
Gamelab Metadata      Unity Property              Where
────────────────      ──────────────              ─────
Frame Width/Height    Pixel Size (X / Y)          Sprite Editor → Slice → Grid By Cell Size
Columns               Column                      Sprite Editor → Slice → Grid By Cell Count
Rows                  Row                          Sprite Editor → Slice → Grid By Cell Count
Padding               Padding                     Sprite Editor → Slice dialog
FPS                   Samples                     Animation window
Frame Count           Total child sprites         Project window (verify after slicing)
Duration              Animation length            Animation window timeline
Recommended Import Settings
Here is a summary of all the import settings in one place:
| Setting |
Value |
| Texture Type |
Sprite (2D and UI) |
| Sprite Mode |
Multiple |
| Pixels Per Unit |
Match your frame size (e.g., 32, 64, 128) |
| Filter Mode |
Point (no filter) |
| Compression |
None |
| Max Size |
≥ your spritesheet dimensions |
| Slice Type |
Grid By Cell Size or Grid By Cell Count |
| Animation Samples |
Match the FPS from Gamelab metadata (e.g., 12) |
Tips and Best Practices
Use Transparent Backgrounds
When exporting from Gamelab Studio, enable Remove Background before generating your spritesheet. This gives you a transparent PNG that composites cleanly over any game scene. Unity handles PNG alpha natively—no extra configuration required.
Verify with the Inspector Before Exporting
Before you download, use Gamelab Studio's Inspector to sanity-check your spritesheet. Open the Inspector by clicking the spritesheet preview, toggle Grid on to see numbered frame boundaries, and switch to Preview mode to watch the animation play back at the configured FPS. If a frame looks off or the timing is wrong, you can regenerate the spritesheet before bringing it into Unity.
Multiple Animations from One Character
Gamelab lets you generate multiple animations for the same character (run, idle, attack). Each animation produces its own spritesheet with its own metadata. In Unity, create a separate .anim clip for each spritesheet. The Animator Controller manages transitions between clips. Set up states and transitions in the Animator window (Window → Animation → Animator) and switch between them in code:
using UnityEngine;

public class PlayerAnimation : MonoBehaviour
{
    Animator _anim;

    void Start()
    {
        _anim = GetComponent<Animator>();
    }

    void Update()
    {
        float move = Input.GetAxis("Horizontal");
        _anim.SetFloat("Speed", Mathf.Abs(move));
    }
}
Automate with the Gamelab MCP Server
If you have the
Gamelab MCP server connected to your editor, you can generate and download spritesheets without ever leaving your IDE. Ask your AI assistant to create an asset, animate it, and extract a spritesheet—it will call the Gamelab API and save the resulting PNG directly into your project folder, ready to import into Unity.
Troubleshooting
Sprites look blurry in the Game view
Double-check that Filter Mode is set to Point (no filter) and Compression is set to None. Also verify that Max Size is not smaller than your actual texture resolution—Unity will silently downscale if it is.
Frames are sliced incorrectly
Re-open the Sprite Editor and verify the cell size matches the exact Frame Width and Frame Height from the Gamelab metadata. If you used padding during export, enter the same padding value in the Sprite Editor's Padding field.
Animation plays too fast or too slow
Open the Animation window and adjust the Samples value. This number represents frames per second. Match it to the FPS from the Gamelab metadata dialog.
Sprite Editor button is grayed out
Make sure you have set Sprite Mode to Multiple and clicked Apply in the Inspector. The Sprite Editor is only available when the texture is configured as a multi-sprite sheet. You may also need to install the 2D Sprite package from the Package Manager (Window → Package Manager) if you are using a 3D project template.
That is all it takes. Generate your sprites in Gamelab Studio, check the metadata and grid overlay in the Inspector, download the PNG, drop it into Unity, configure the import settings, slice with the Sprite Editor, and drag the frames into your scene. For the full Unity sprite documentation, see the
official Unity Sprite Manual.