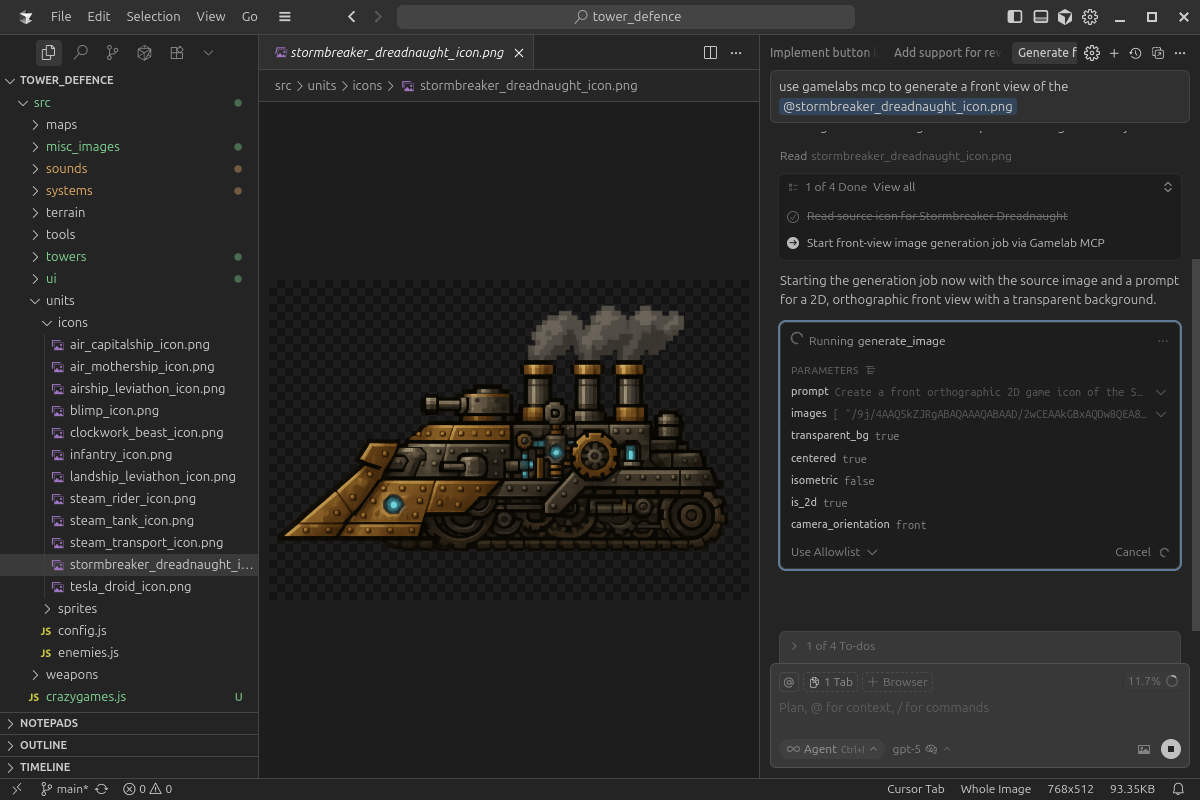
The Model Context Protocol (MCP) is an open standard that lets AI coding assistants like Cursor and GitHub Copilot call external tools directly from your editor. Instead of switching between your IDE and a browser, you can generate game art, animate sprites, and build spritesheets without ever leaving your code.
In this guide, we walk through how to connect Gamelab Studio's MCP server to your editor of choice. Once configured, your AI assistant gains access to Gamelab's full generation pipeline—image creation, video animation, spritesheet extraction, and project management—all through natural language prompts in your chat window.
Retrieve Your API Key & Config
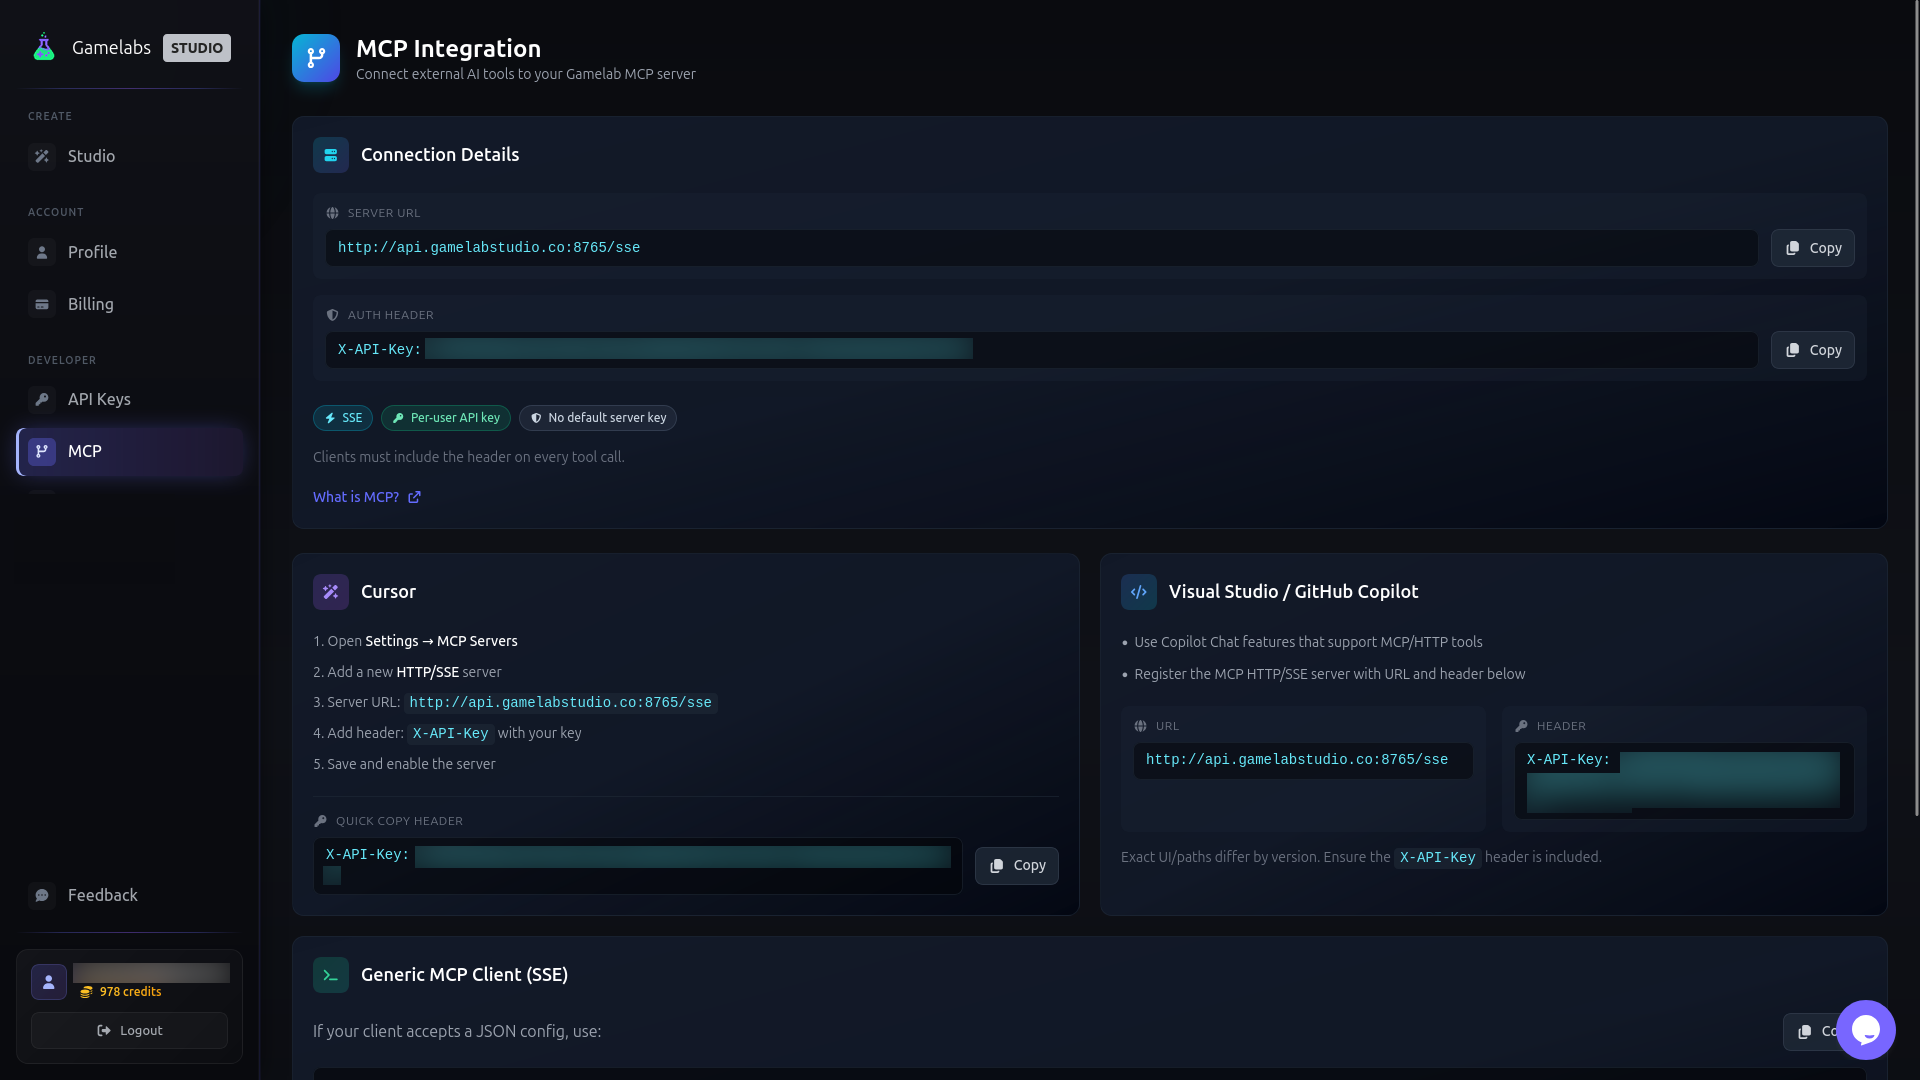
Every request to the Gamelabs MCP server is authenticated with a personal API key. This key is tied to your account and must be included as a header on every tool call your editor makes. You will find it on the MCP Integration page inside your Gamelab Studio dashboard.
1. Log In to Gamelabs Studio
Navigate to
gamelabstudio.co and sign in to your account. If you do not have one yet, create a free account first.
2. Open the MCP Integration Page
From the main dashboard, click the MCP item in the sidebar navigation. This page contains your server URL, API key, and setup instructions for every supported client.
3. Server URL
Under Connection Details, locate the Server URL field. Click Copy to save it to your clipboard. The URL is:
http://api.gamelabstudio.co:8765/sse
4. Auth Header
Directly below the URL, you will see the Auth Header field containing X-API-Key: <your_api_key>. Click Copy to grab it. This key is unique to your account—keep it private.
Connect from Cursor
Cursor has native MCP support. Adding the Gamelab server takes under a minute and gives the AI agent direct access to all generation and project management tools.
5. Open Cursor Settings
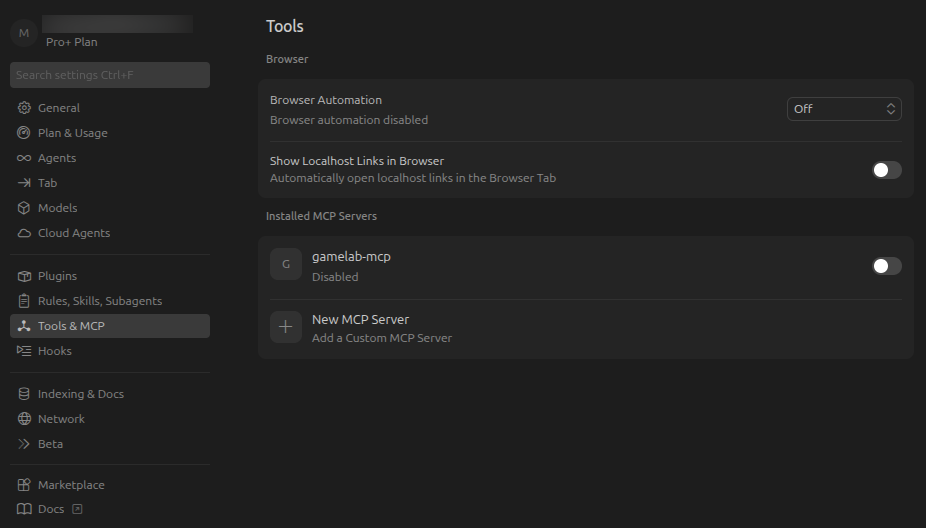
In Cursor, open the command palette or navigate to Cursor Settings → Tools & MCP. This is where all external tool servers are registered.
6. Add a New HTTP/SSE Server
Click the button to add a new MCP server.
7. Copy the JSON Configuration
On the MCP Integration page in Gamelab Studio, scroll to the Generic MCP Client (SSE) card and click Copy to grab the full JSON config. It follows this structure:
{
  "mcpServers": {
    "gamelab-mcp": {
      "type": "sse",
      "url": "http://api.gamelabstudio.co:8765/sse",
      "headers": {
        "X-API-Key": "your api key here"
      }
    }
  }
}
8. Save and Enable
Click Save and make sure the server toggle is enabled. Cursor will connect to the Gamelab MCP server and discover all available tools automatically. You should see a green connection indicator confirming the link is active.
Connect from VS Code / GitHub Copilot
If you are using Visual Studio Code with GitHub Copilot, you can register the same MCP server to access Gamelab tools through Copilot Chat. The exact UI may differ by version, but the core configuration is the same.
9. Open Copilot MCP Settings
In VS Code, navigate to the Copilot Chat settings that support MCP/HTTP tool registration. Consult your Copilot version's documentation for the exact location.
10. Register the Server
Add a new HTTP/SSE server and provide both the URL and the X-API-Key header. Ensure the header is included—requests without it will be rejected.
Connect Any MCP Client via JSON Config
Many MCP-compatible clients accept a JSON configuration block. If your tool supports this, you can paste the following config directly. Some clients use slightly different keys (for example, transport instead of type)—consult your client's MCP documentation.
11. Copy the JSON Configuration
On the MCP Integration page in Gamelab Studio, scroll to the Generic MCP Client (SSE) card and click Copy to grab the full JSON config. It follows this structure:
{
  "mcpServers": {
    "gamelab-mcp": {
      "type": "sse",
      "url": "http://api.gamelabstudio.co:8765/sse",
      "headers": {
        "X-API-Key": "your api key here"
      }
    }
  }
}