
Gamelab Studio generates production-ready spritesheets: PNG images with every animation frame arranged in a uniform grid. Construct 3 can import these sheets directly into a Sprite object's Animations Editor, slice them into individual frames, and play them without writing traditional code.
In this guide, we walk through the complete process—from generating an AI-animated asset and downloading its spritesheet from Gamelab Studio to importing, configuring, and controlling the animation in Construct 3.
What You Get from Gamelab Studio
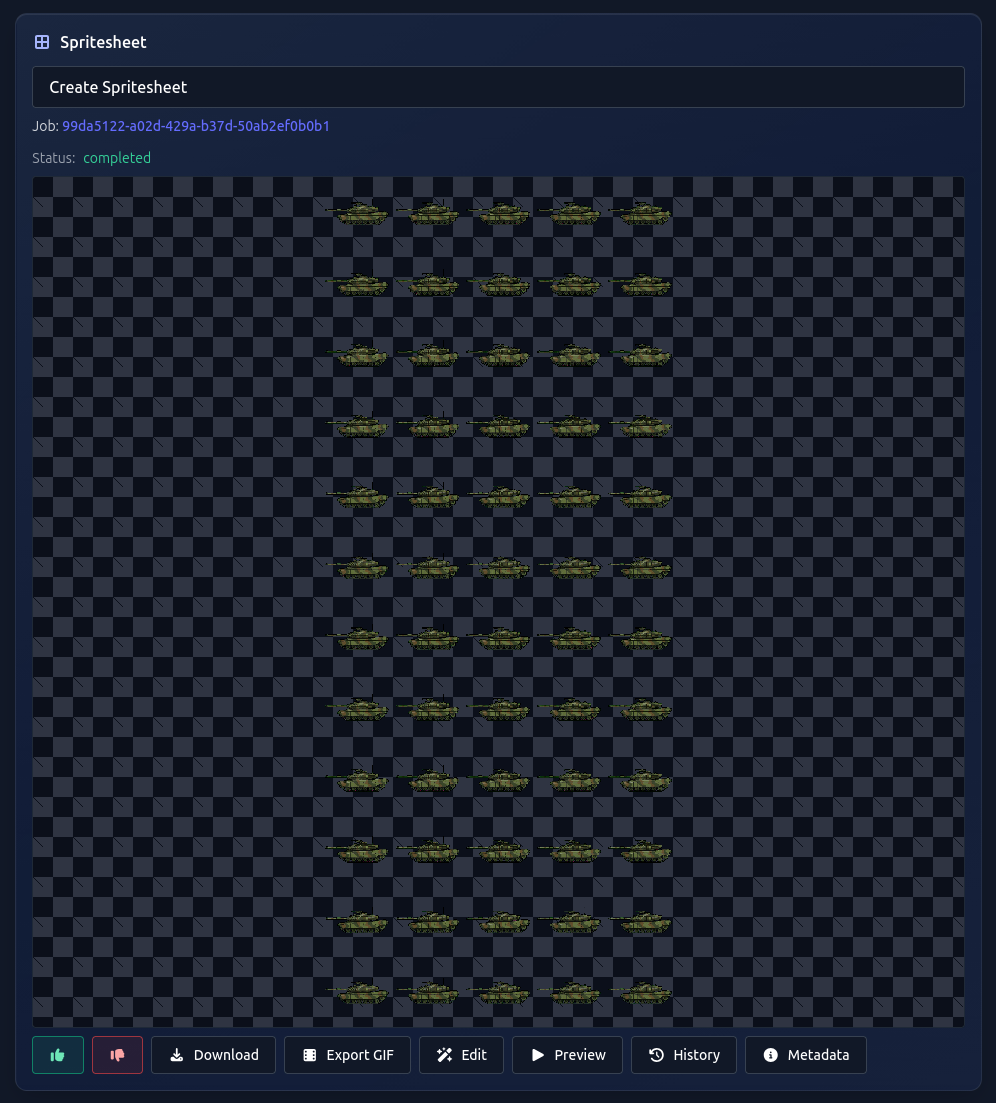
Gamelab Studio handles the entire AI asset pipeline inside one application. You can generate an image, animate it, and convert the animation into a spritesheet. Each spritesheet includes metadata describing its frame size, grid dimensions, frame count, playback speed, and duration.
1. Open Your Asset in Gamelab Studio
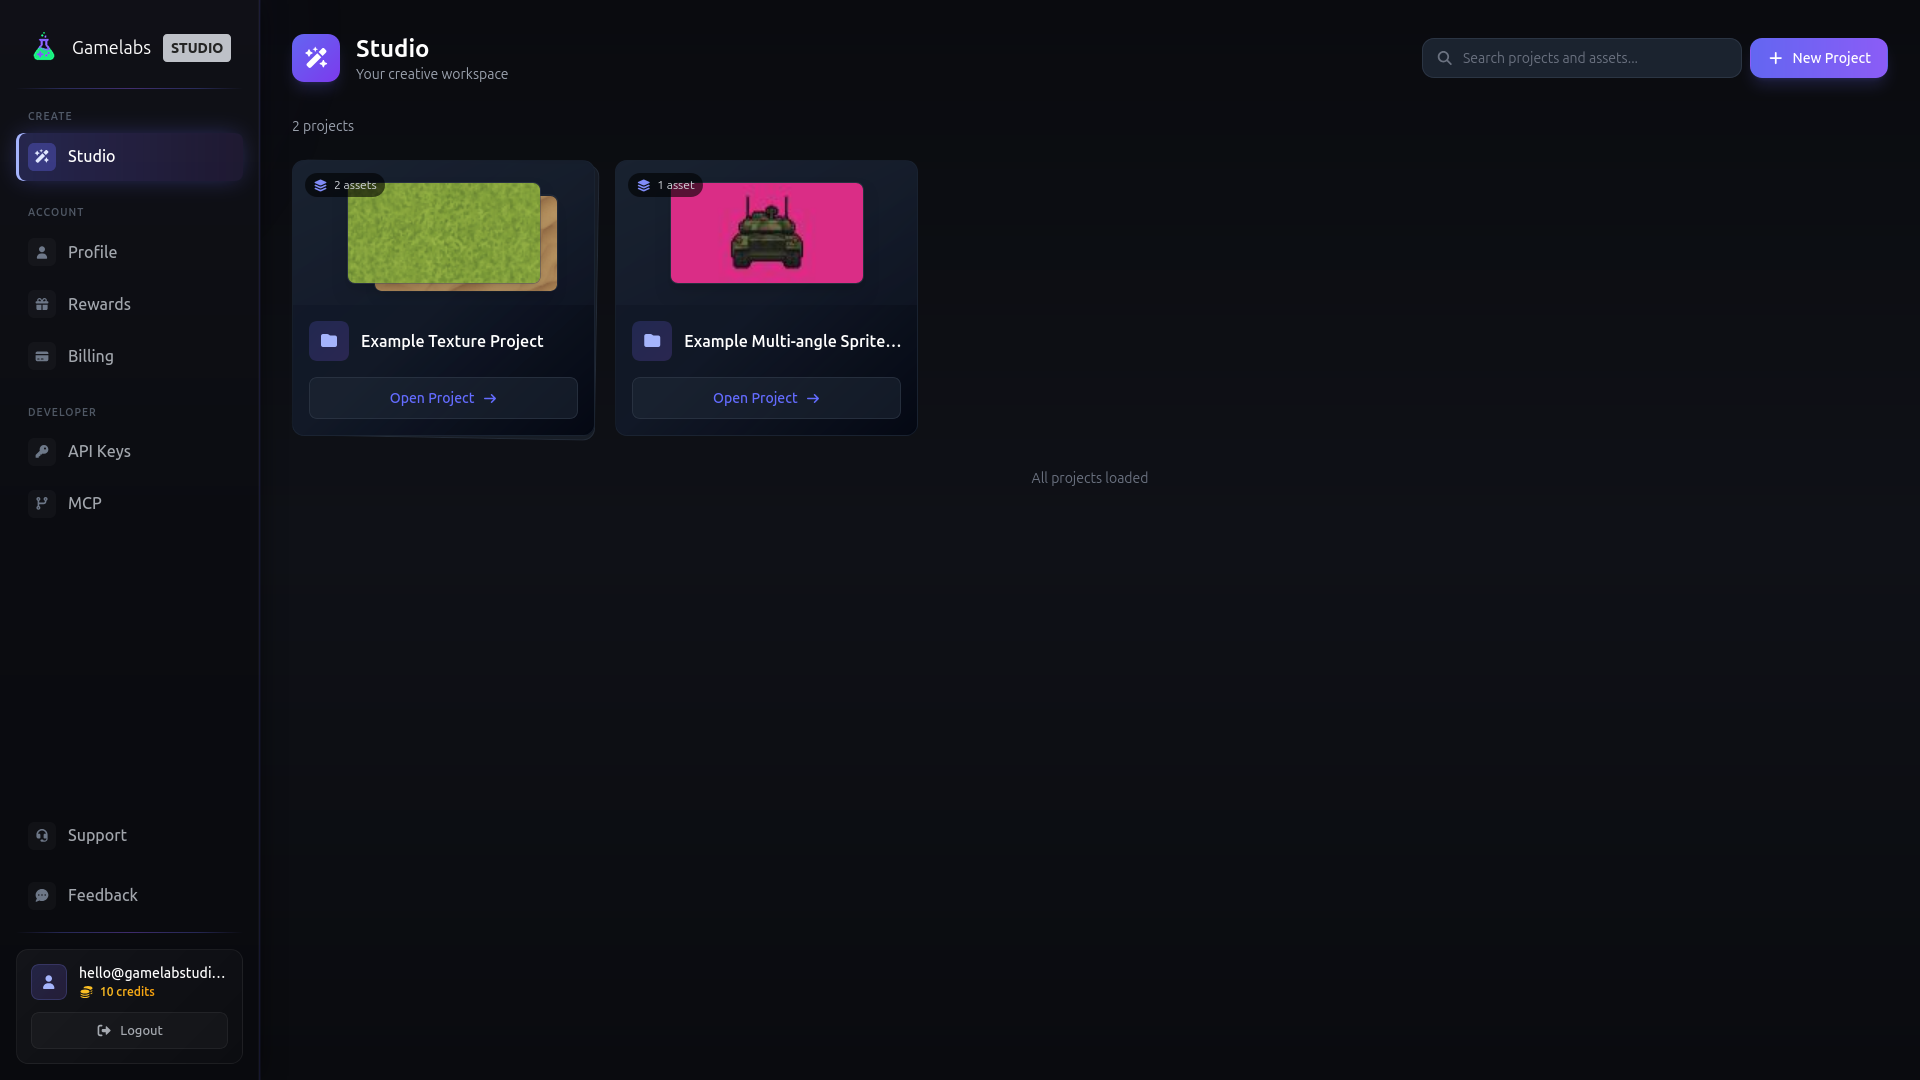
Navigate to gamelabstudio.co and open the project containing your asset. If you have not created one yet, use the Asset Wizard to generate an image with AI, animate it, and extract a spritesheet.
2. Generate and Animate Your Asset with AI
When generating the source image, describe the subject, art style, perspective, and intended use. For example:
A small armored knight for a 2D side-scrolling game,
side view, pixel-art style, readable silhouette,
consistent proportions, centered in frame
Enable the transparent-background option so the finished sprite composites cleanly over your game. After generating the source image, animate it with an action such as idle, walk, run, attack, or jump. Finally, generate a spritesheet from the completed animation.
3. Download the Spritesheet PNG
Once the spritesheet is ready, click the Download button on its card. This saves a single PNG containing every animation frame, for example,
knight_walk.png.
4. View the Spritesheet Metadata
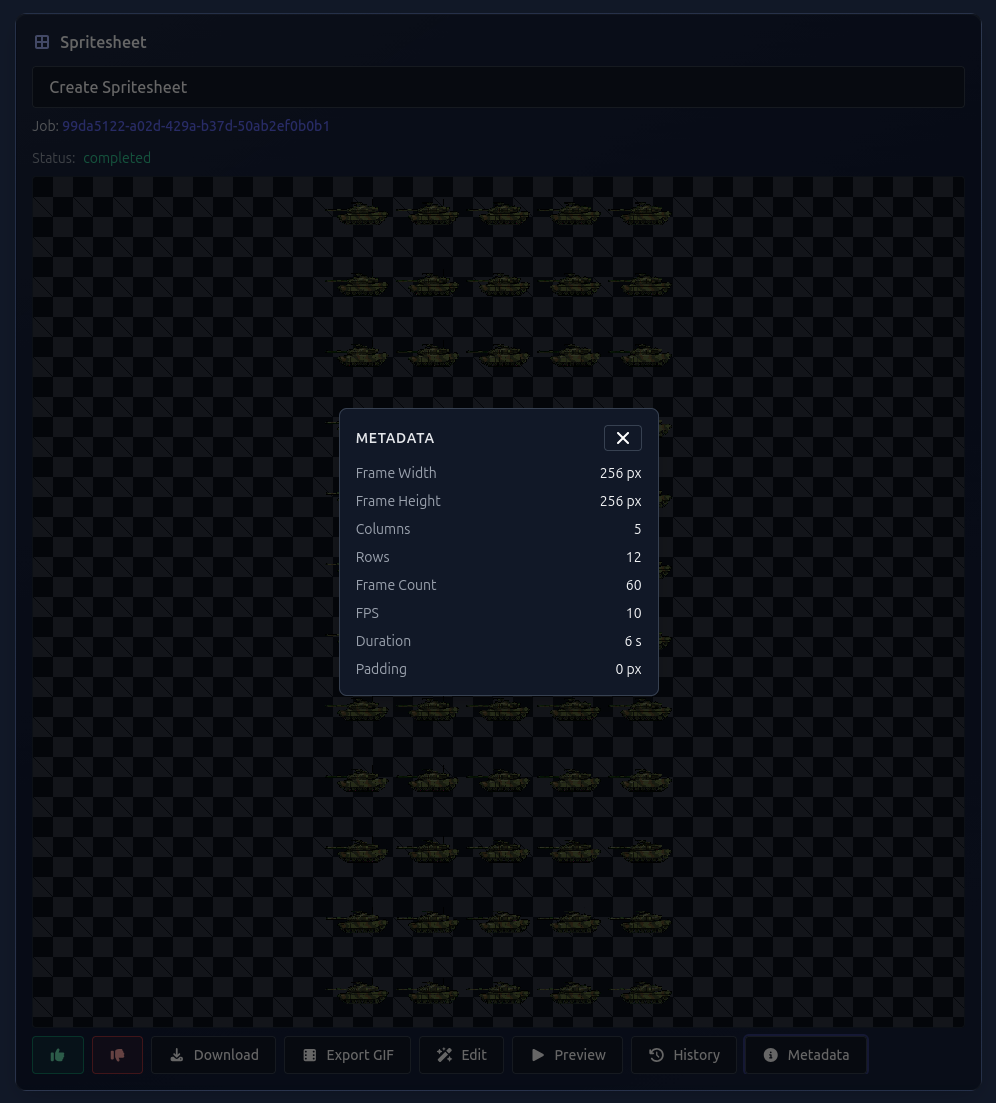
Click the Metadata button—the ⓘ icon—on the spritesheet card. A dialog will display all the values needed to configure the animation in Construct.
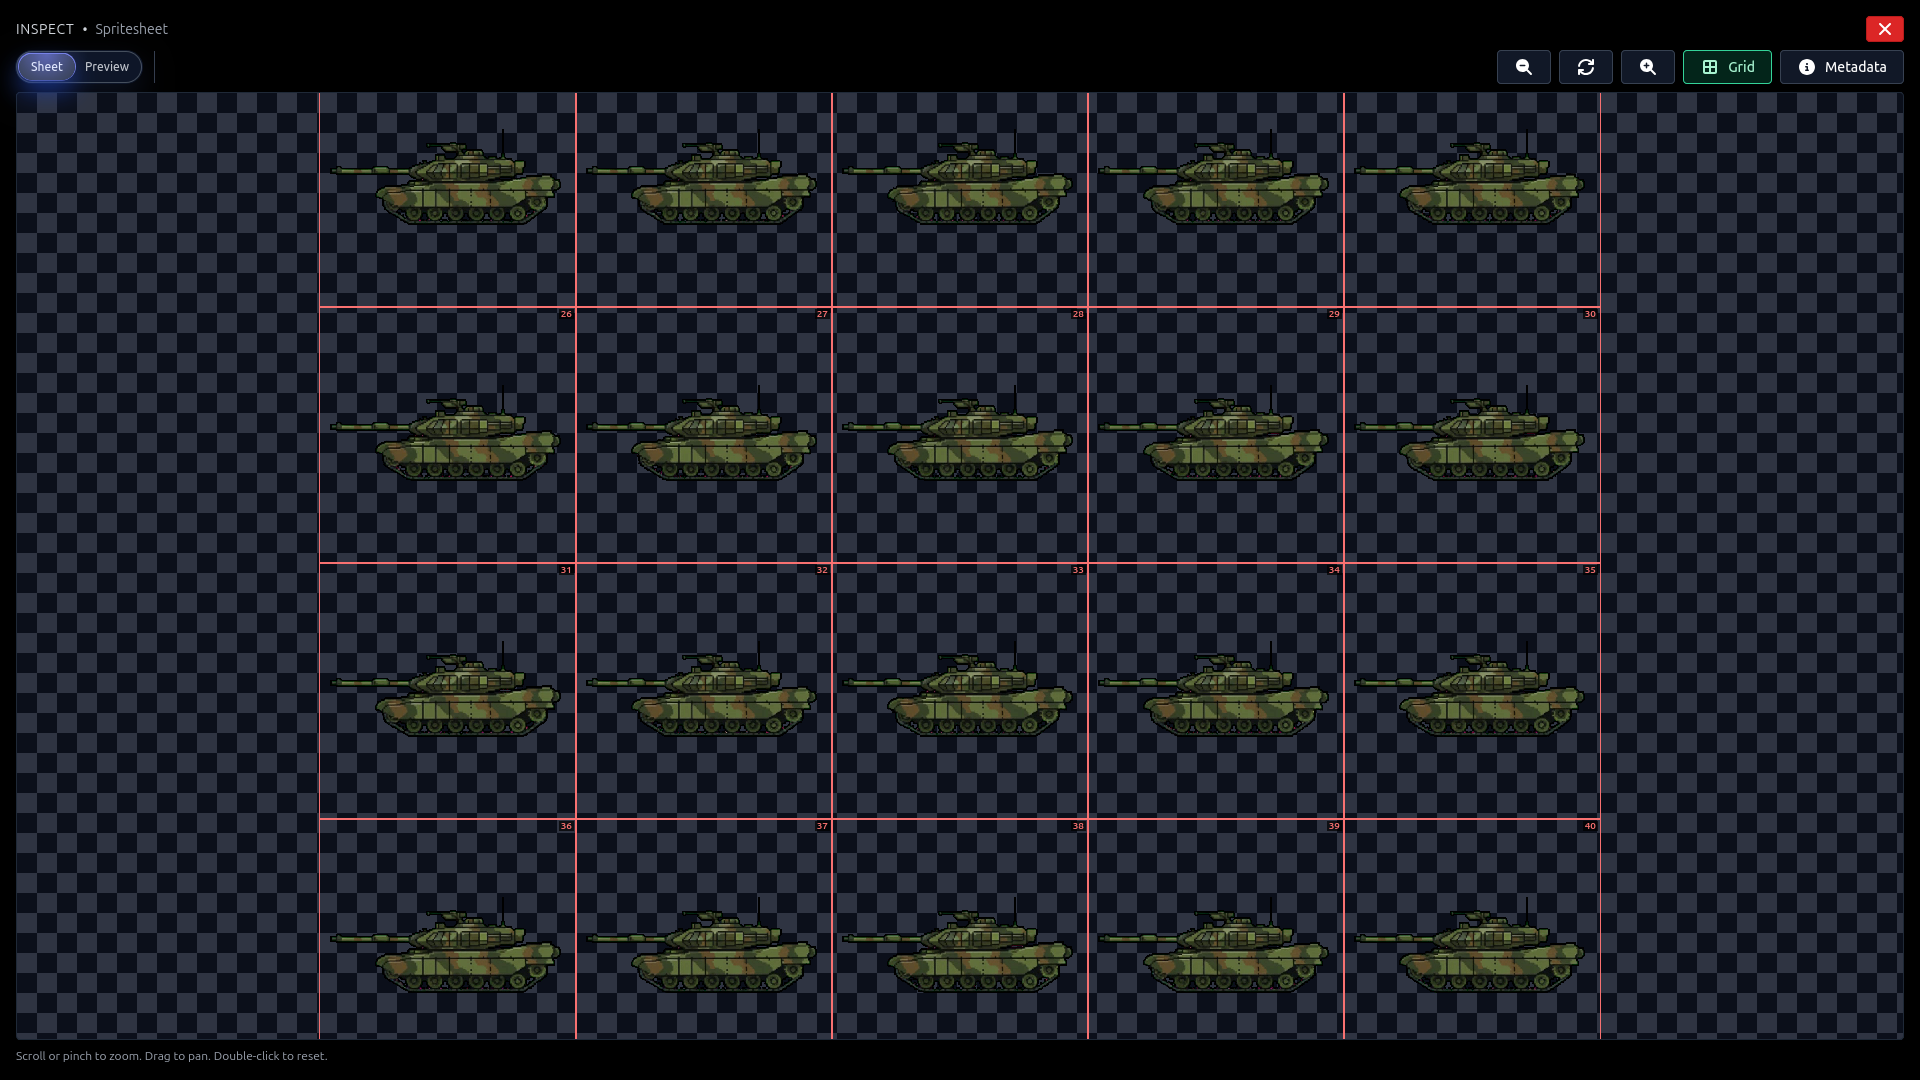
You can also click the spritesheet preview to open the full-screen Inspector. Enable Grid to display numbered frame boundaries or switch to Preview to watch the animation at its configured FPS.
The metadata contains these fields:
- Frame Width / Frame Height — Pixel dimensions of one frame
- Columns — Number of horizontal cells in the sheet
- Rows — Number of vertical cells in the sheet
- Frame Count — Total number of animation frames
- FPS — Playback speed in frames per second
- Duration — Total animation length in seconds
- Padding — Space between frame cells, normally 0
Keep the Columns, Rows, Frame Count, and FPS values handy. You will enter them into Construct in the following steps.
Import the Spritesheet into Construct 3
Construct's Sprite object has a built-in Animations Editor that can divide a uniformly spaced spritesheet into frames. In current versions, the command is named Import frames → From sheet. Older Construct releases may call the same feature From strip.
5. Create a Sprite Object
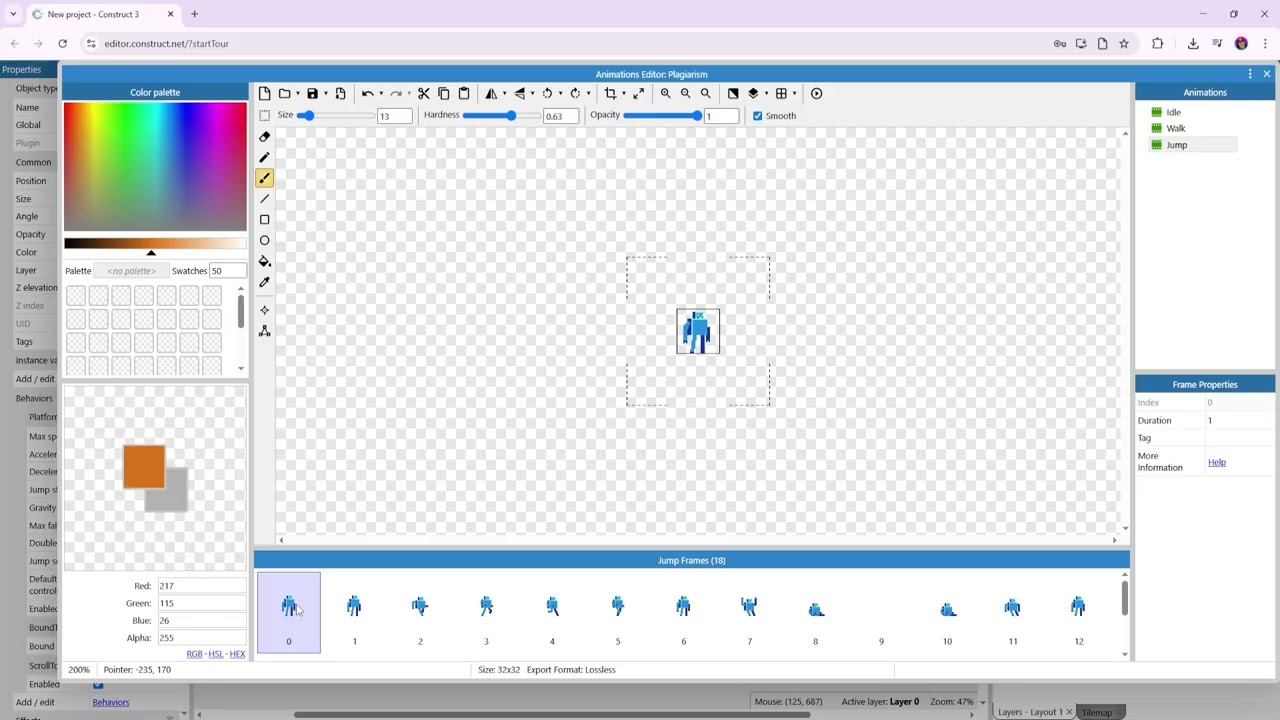
Open your project at editor.construct.net. Double-click an empty area of the layout, select Sprite, and click the layout to place it. Construct will open the Animations Editor automatically.
If the Sprite already exists, double-click it in the layout or click its Edit link in the Properties Bar. Rename the object to something descriptive, such as
Knight.
6. Import Frames from the Spritesheet
In the Frames pane at the bottom of the Animations Editor, right-click the empty area beside the existing frame and select:
Import frames → From sheet
You can also drag a single PNG into the Frames pane and choose to treat it as a spritesheet. If your version of Construct uses the older interface, look for Import frames → From strip.
7. Enter the Grid Dimensions
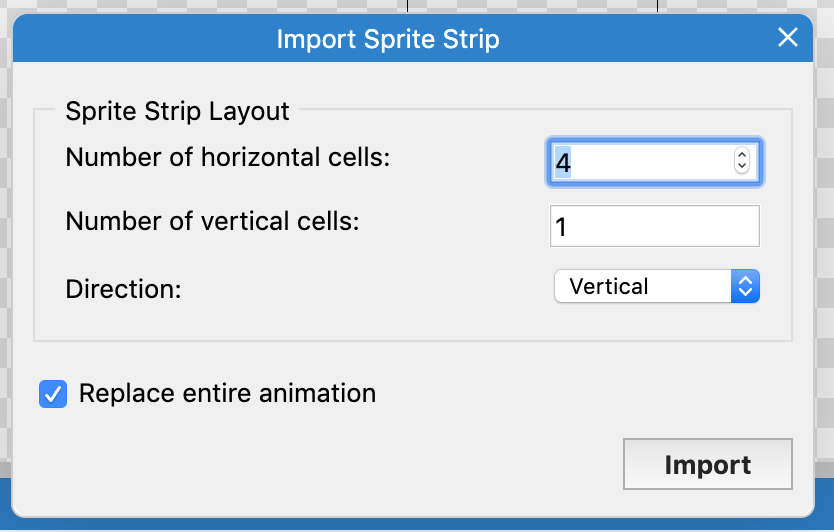
Select the PNG downloaded from Gamelab Studio. Construct's frame picker will display the image with a grid overlay. Enter the values from the Gamelab metadata:
- Horizontal cells — Set to Gamelab's Columns value
- Vertical cells — Set to Gamelab's Rows value
For example, if the metadata reports 6 columns and 4 rows, enter 6 horizontal cells and 4 vertical cells. Construct will divide the sheet into 24 equal cells.
8. Select the Frames
Select the cells in playback order. In current versions of Construct, you can use the grid button in the frame picker's toolbar to select the complete grid. You can also select a region and use Add Frames.
Import only the cells containing actual animation frames. A rectangular sheet may include unused cells after the final frame, so the number selected should match the Frame Count in Gamelab's metadata. Click Import frames when the selection is correct.
9. Remove the Default Empty Frame
A new Construct animation starts with one default frame. If this empty frame remains after importing the sheet, select it in the Frames pane and delete it.
Some versions of Construct display a Replace existing animation or Replace entire animation option in the import window. Enable that option to remove the original frame automatically.
10. Configure the Animation
Select the imported animation in the Animations pane. Its settings appear in the Properties pane. Configure the following:
- Name — Rename it to something descriptive, such as "Idle", "Walk", "Run", or "Attack"
- Speed — Set this to the FPS from Gamelab's metadata
- Loop — Enable for animations that should repeat indefinitely
- Repeat to — Usually leave this at frame 0
- Ping pong — Enable only when the animation should alternate forward and backward
Construct measures animation Speed in frames per second. If Gamelab reports 10 FPS, set Construct's Speed property to 10.

11. Preview the Animation
Click the Preview button in the Animations Editor. Compare the result with Preview mode in Gamelab Studio's Inspector. The sequence, speed, and movement should look the same in both applications.
12. Set a Consistent Origin
If the character appears to jump or wobble while animating, check its origin. Select the Image points tool in the Animations Editor and position the origin at a stable location. The center of a character's feet is often a good choice for walking animations.
Right-click the origin and choose Apply to whole animation. This gives every frame the same relative origin position.
Control Animations with Construct Events
Construct uses visual events to switch Sprite animations. You do not need a traditional script to play the spritesheet.
13. Switch Between Idle and Walk
In the Event Sheet, add conditions for your movement controls and use the Sprite object's Set animation action:
Keyboard: Right arrow is down
    → Knight: Set animation to "Walk"

Keyboard: Right arrow is not down
    → Knight: Set animation to "Idle"
The Set animation action can play from the beginning or continue from the current frame. If the requested animation is already playing, the action does not restart it. To restart the current animation, use the Sprite's Start action and choose from beginning.

14. Play a Non-Looping Attack Animation
Disable Loop on one-shot animations such as attacks, damage reactions, or death sequences. Use Construct's animation-finished trigger to return to the default state:
Keyboard: On Space pressed
    → Knight: Set animation to "Attack" from beginning

Knight: On "Attack" finished
    → Knight: Set animation to "Idle" from beginning
This is more reliable than waiting a fixed number of seconds. If you change the animation's frame count or FPS later, the event will still run when the animation actually finishes.
Tips and Best Practices
Use Transparent Backgrounds
Enable the transparent-background option in Gamelab Studio before producing the spritesheet. Construct supports PNG transparency, so the character will composite correctly over your layout without additional processing.
Keep Pixel Art Crisp
Select the project name in Construct's Project Bar and set Sampling to Nearest in the Properties Bar. Enabling Pixel rounding can also prevent pixel art from appearing blurry when objects move through fractional positions.
For high-resolution or painterly assets, use Bilinear or Trilinear sampling instead.
Use Equal-Sized Frame Cells
Construct divides a spritesheet into equal cells. Every pose must fit inside the same frame dimensions, even if a sword, arm, or leg extends farther in certain frames.
Frame Width  = Sheet Width ÷ Columns
Frame Height = Sheet Height ÷ Rows
If parts of neighboring frames appear in the wrong cell, verify the Columns and Rows values and confirm that the source sheet uses a consistent grid.
Use Zero Padding for the Simplest Import
A Gamelab spritesheet with Padding set to 0 maps directly to Construct's equal-cell importer. If your sheet contains gutters or additional spacing, verify the frame boundaries carefully in the frame picker.
Check Collision Polygons
Construct can guess a collision polygon for every imported frame, but an outline that changes with each pose may cause inconsistent movement. For a player character, consider using a separate invisible rectangular Sprite as the collision body and position the animated artwork over it.
Import Multiple Animations
Generate separate Gamelab spritesheets for Idle, Walk, Run, Attack, Jump, and other actions. In Construct's Animations pane, right-click an empty area, add a new animation, and import the corresponding spritesheet.
Construct also provides Import animations → From sheet for images containing several animation rows. Importing one Gamelab sheet into one named Construct animation is generally the simplest approach.
If Clicking Import Adds No Frames
In newer versions of Construct, defining the grid does not always select the cells for import. Select the desired cells, use the grid button to choose the complete grid, or use Add Frames before clicking the final Import frames button.
Automate with the Gamelab MCP Server
If you have the Gamelab MCP server connected to your editor, you can ask an AI assistant to generate an asset, animate it, and extract a spritesheet directly from your development environment.
Quick Reference
Use this reference to map Gamelab metadata to Construct's import and animation settings:
Gamelab Metadata    Construct Setting          Where
────────────────    ─────────────────          ─────
Columns             Horizontal cells           Frame picker
Rows                Vertical cells             Frame picker
Frame Count         Selected/imported cells    Frame picker
FPS                 Speed                      Animation properties
Duration            Frame Count ÷ FPS          Animation playback
Transparent PNG     Sprite frame alpha         Automatic
Padding             Prefer 0                   Spritesheet generation
Construct Documentation
For more information, see the official Construct Animations Editor documentation and the official Sprite object reference.
That is all it takes. Generate and animate your asset with AI in Gamelab Studio, inspect its grid and metadata, download the PNG, import it through Construct's From sheet command, enter the Columns and Rows values, set the original FPS, and preview the result. Your AI-generated character is now ready to control from a Construct event sheet.