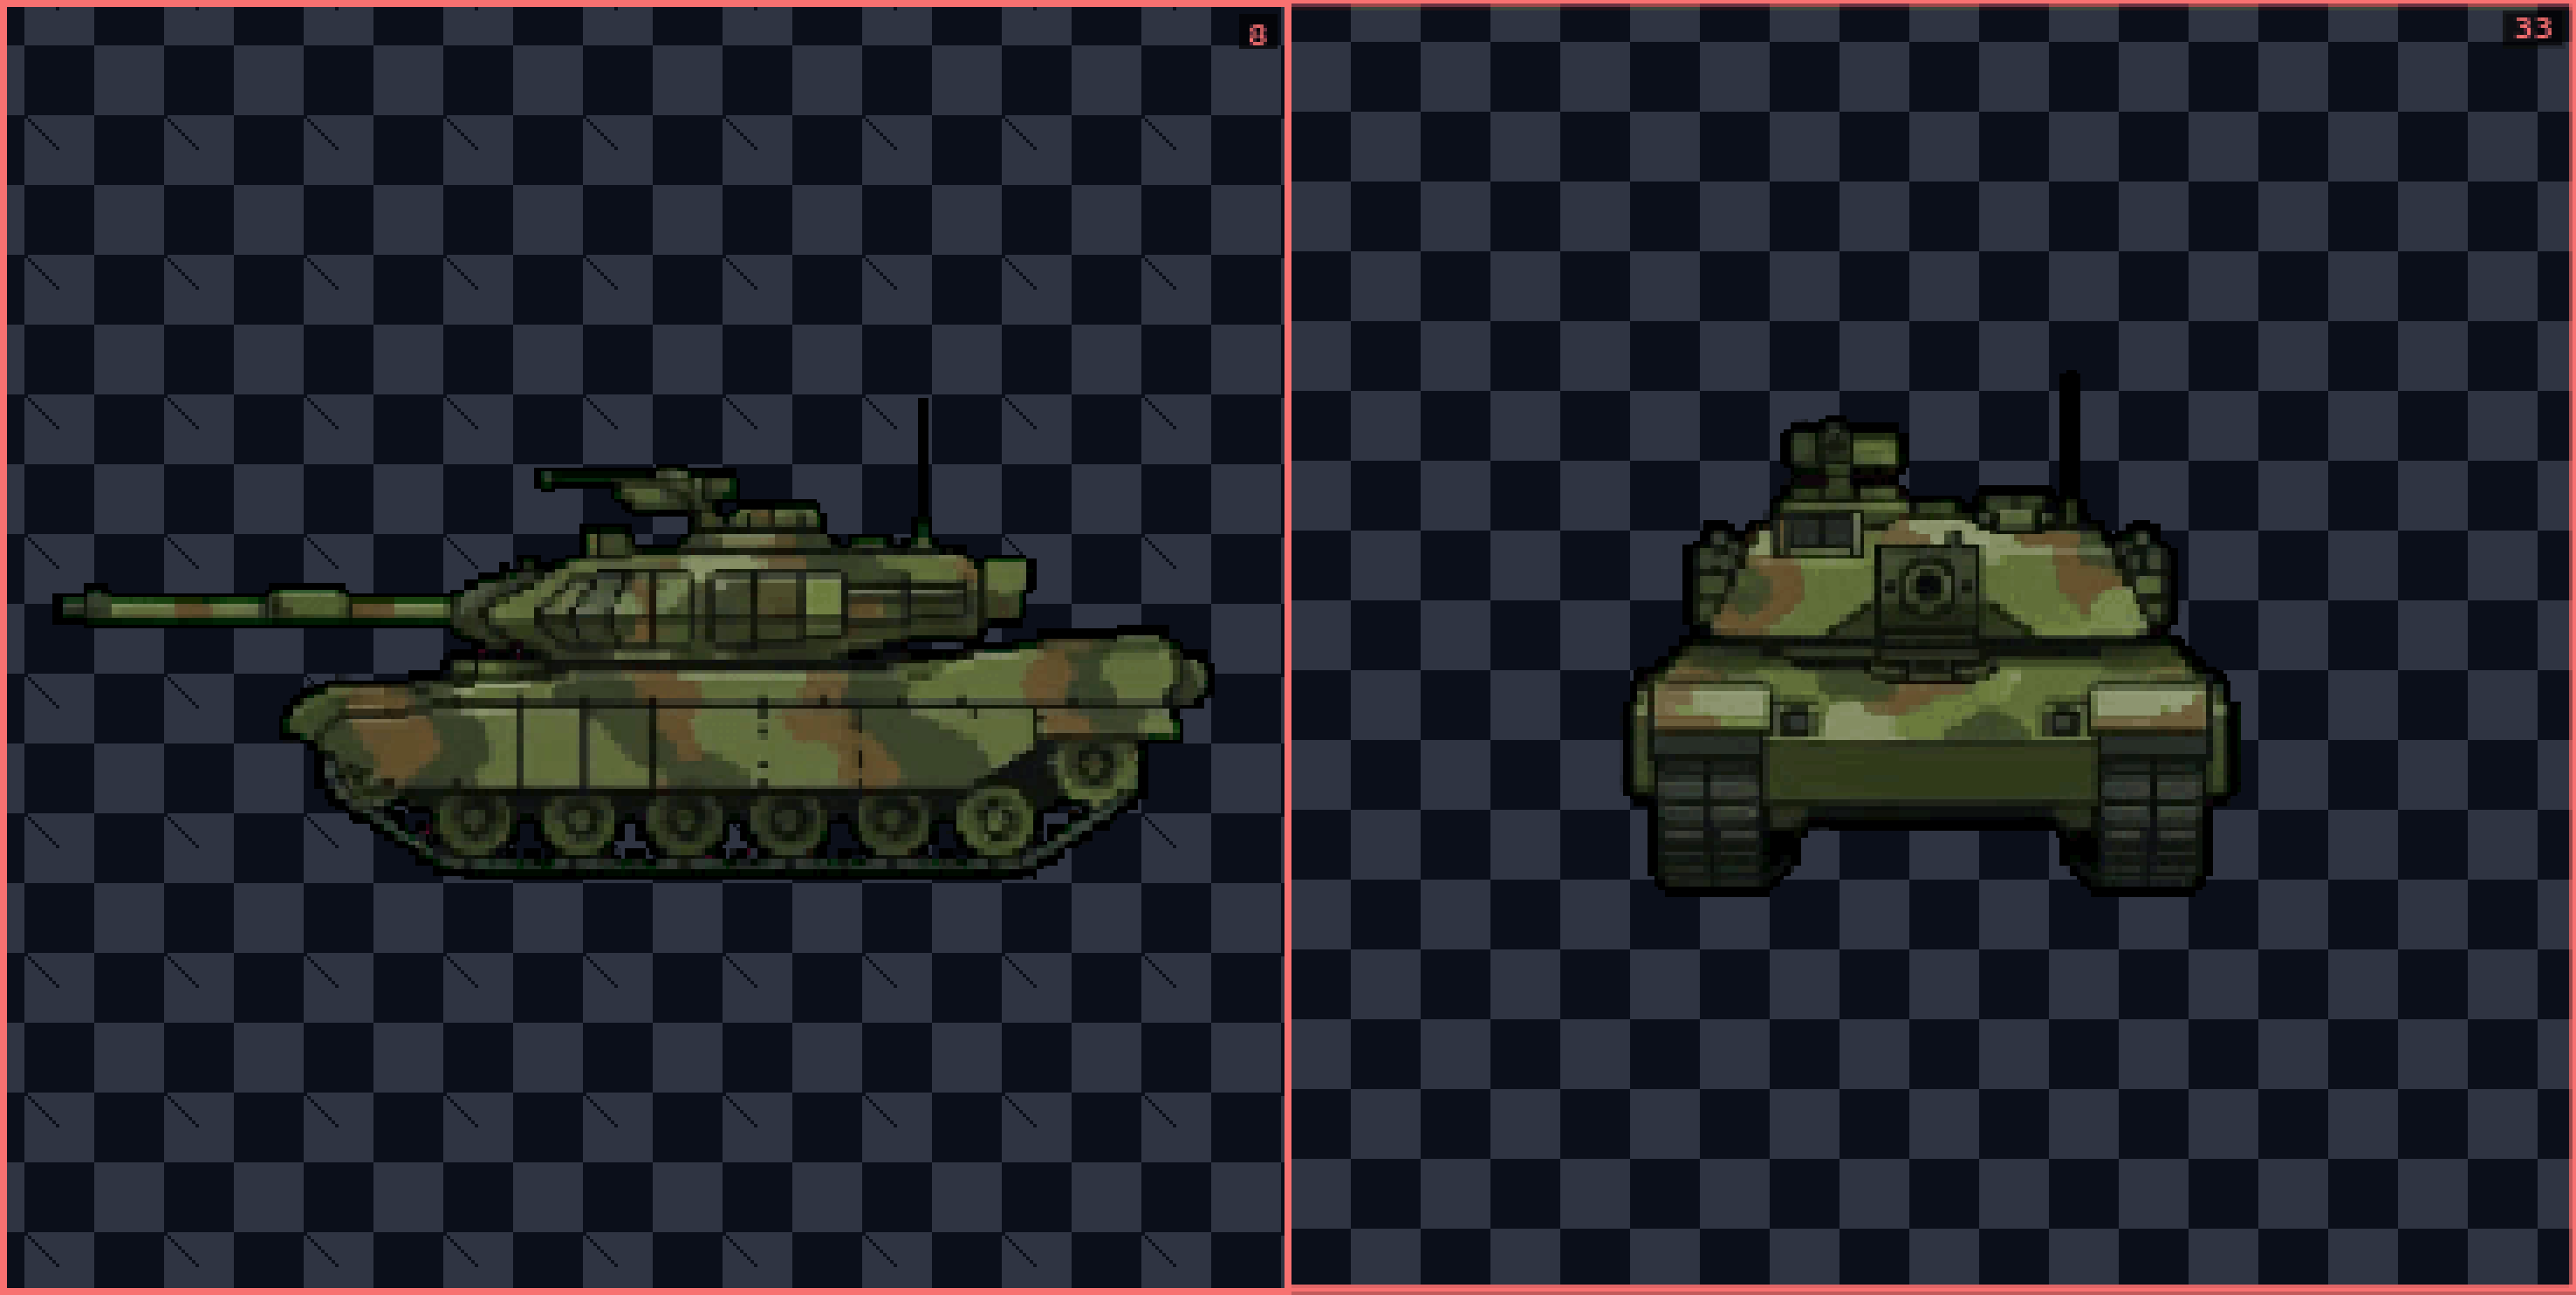
Most 2D games need sprites from more than one direction—a character walking left, right, up, and down, or a vehicle seen from every compass point. Drawing each angle by hand while keeping the style consistent is tedious and error-prone.
Gamelab Studio solves this with a "from existing view" feature. You start with a single sprite you have already generated (like the tank from our previous tutorial), tell the AI which new angle you need, and it produces a matching version automatically. In this guide, we walk through the full workflow: generating a new angle, animating it, and exporting everything as a game-ready spritesheet.
Generate a New Angle from an Existing Sprite
The idea is simple: you already have a sprite facing one direction. Instead of describing the asset from scratch, you point the AI at that existing view and tell it which new perspective to create. The AI interprets the geometry and art style to produce a consistent result.
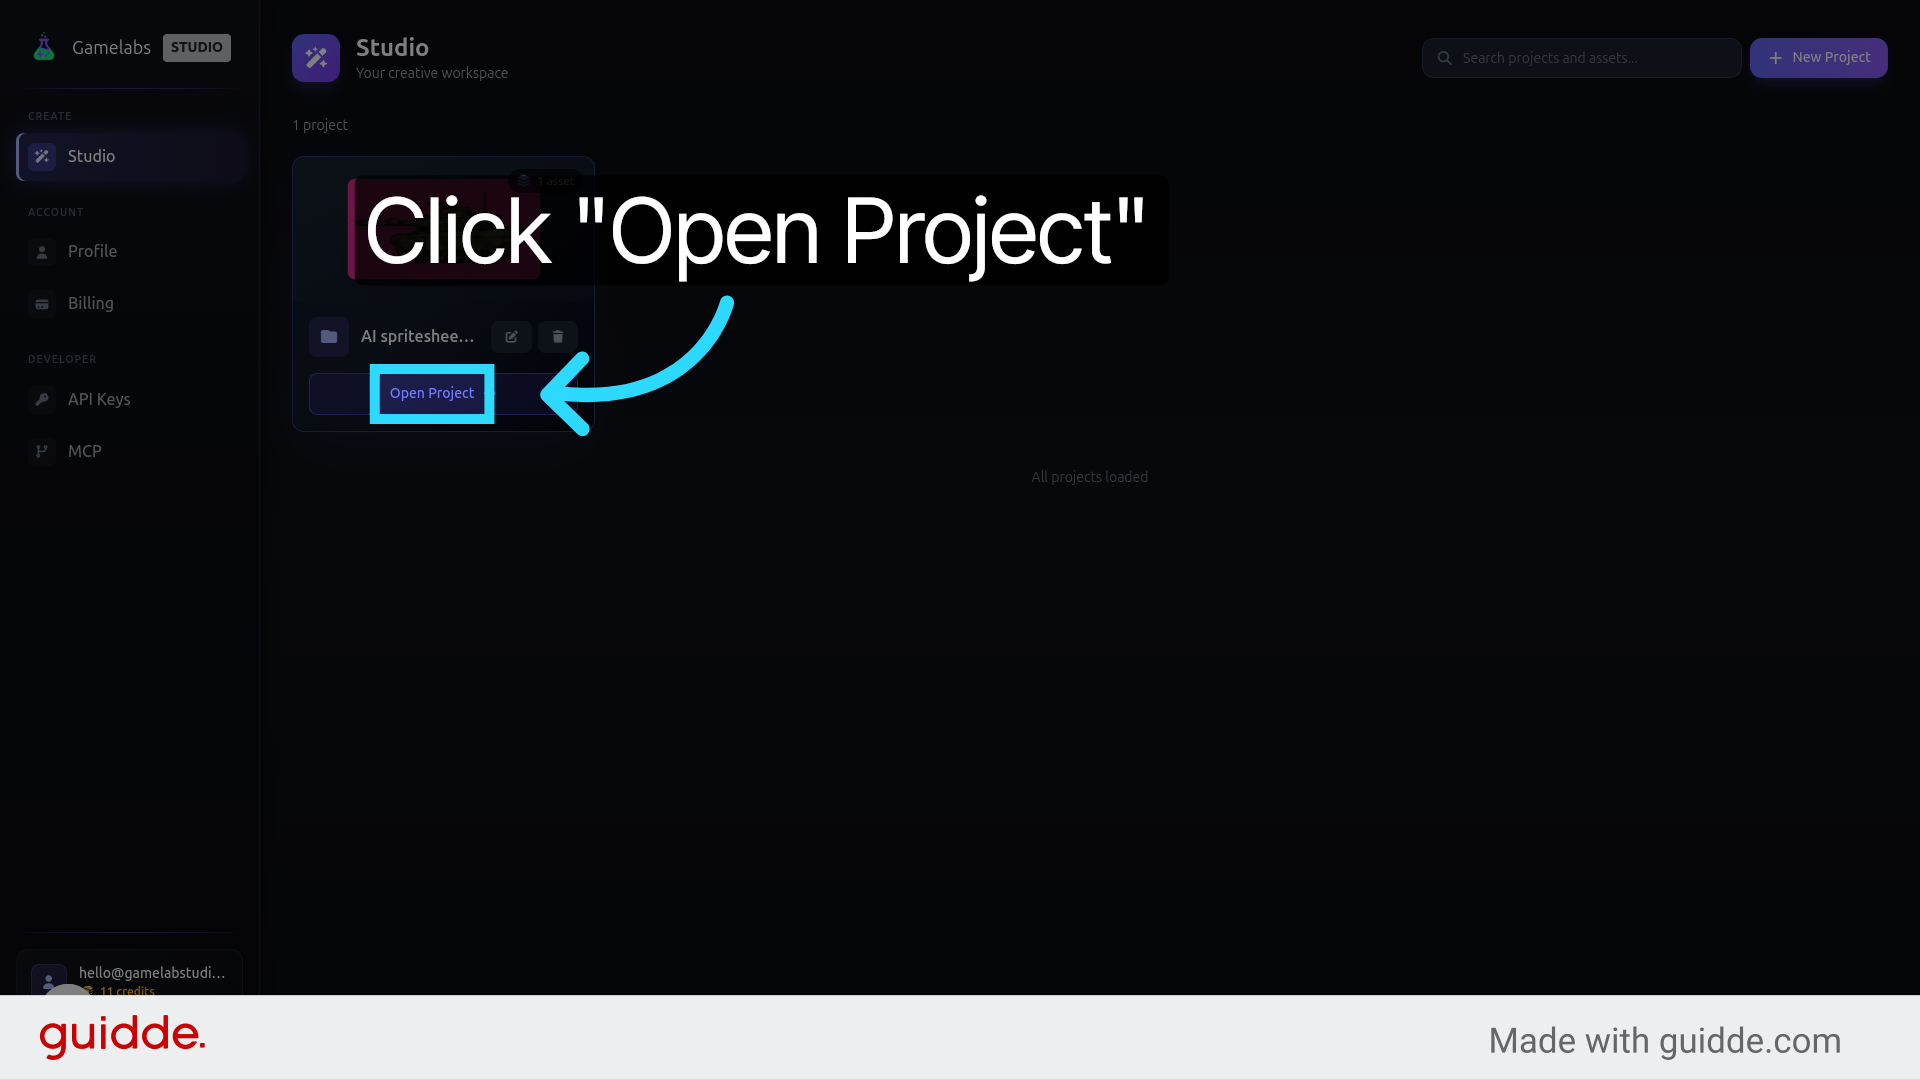
1. Open Your Existing Asset

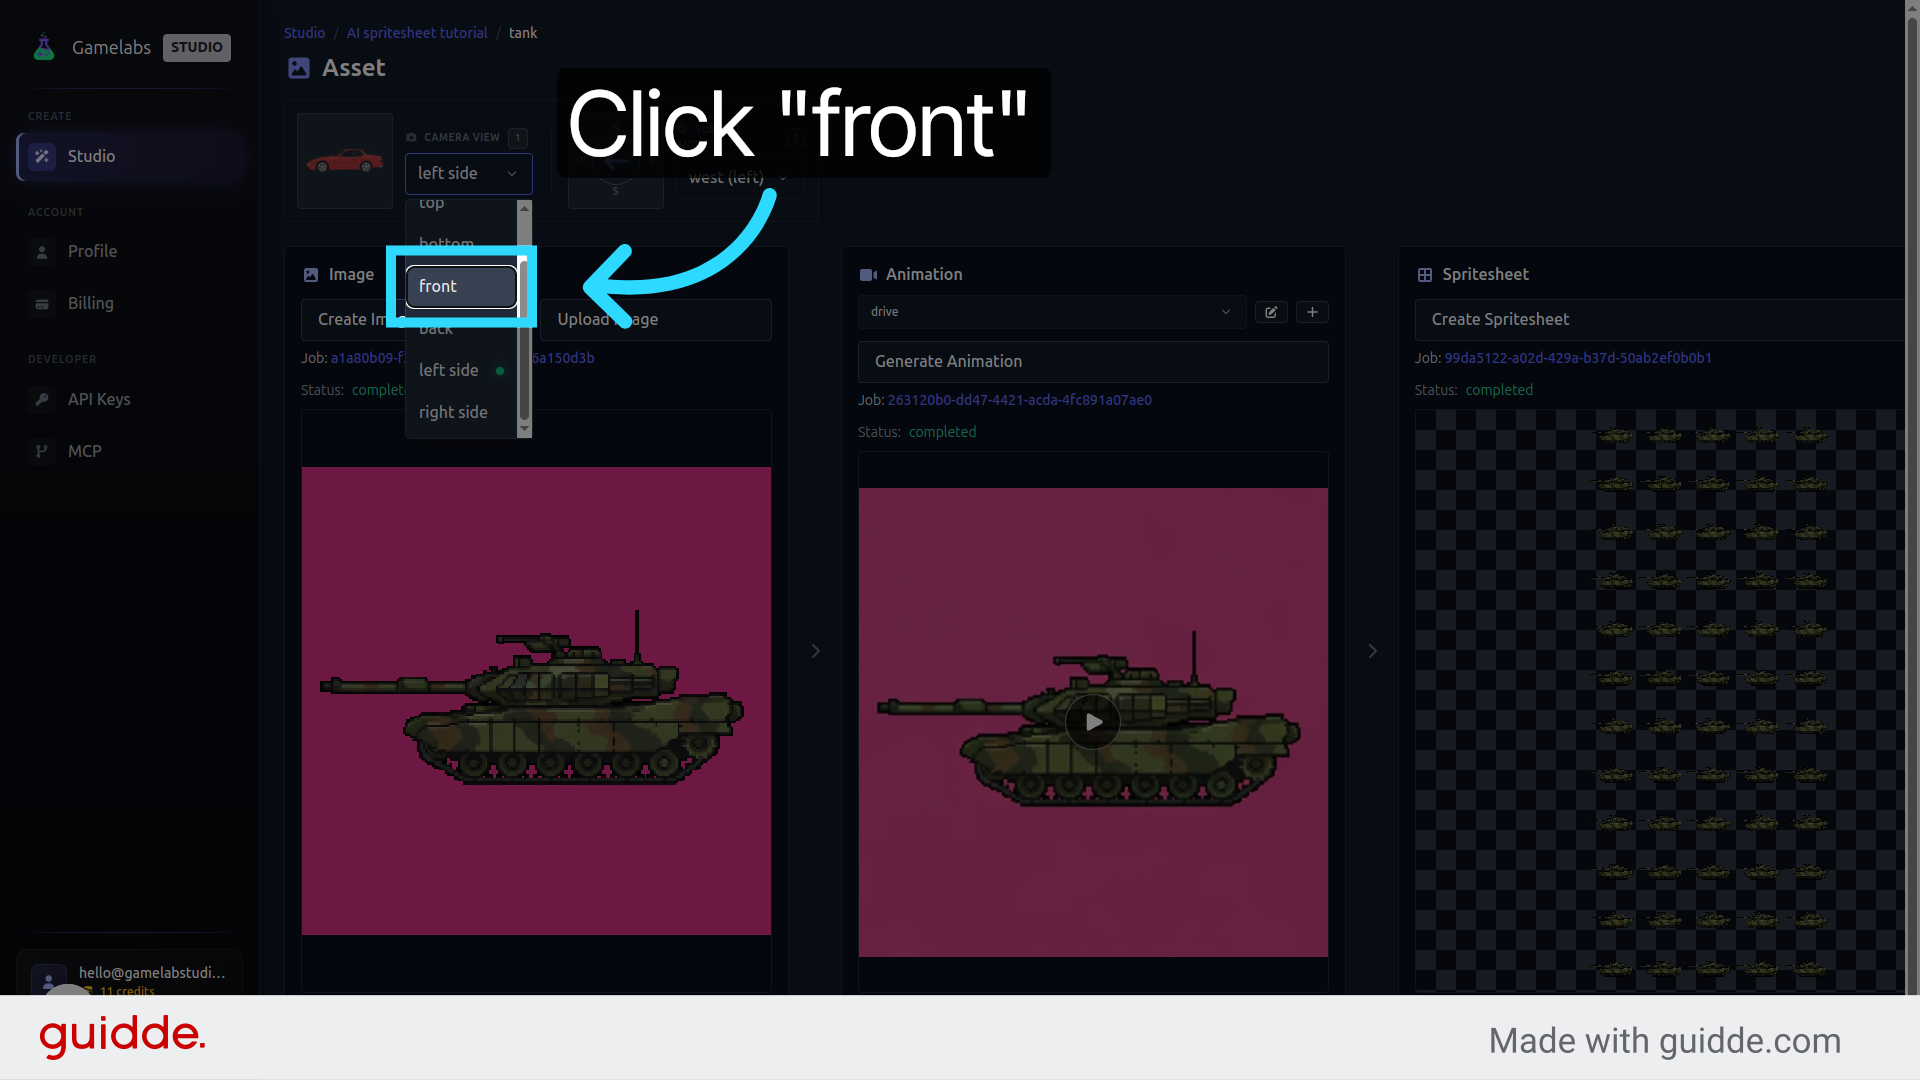
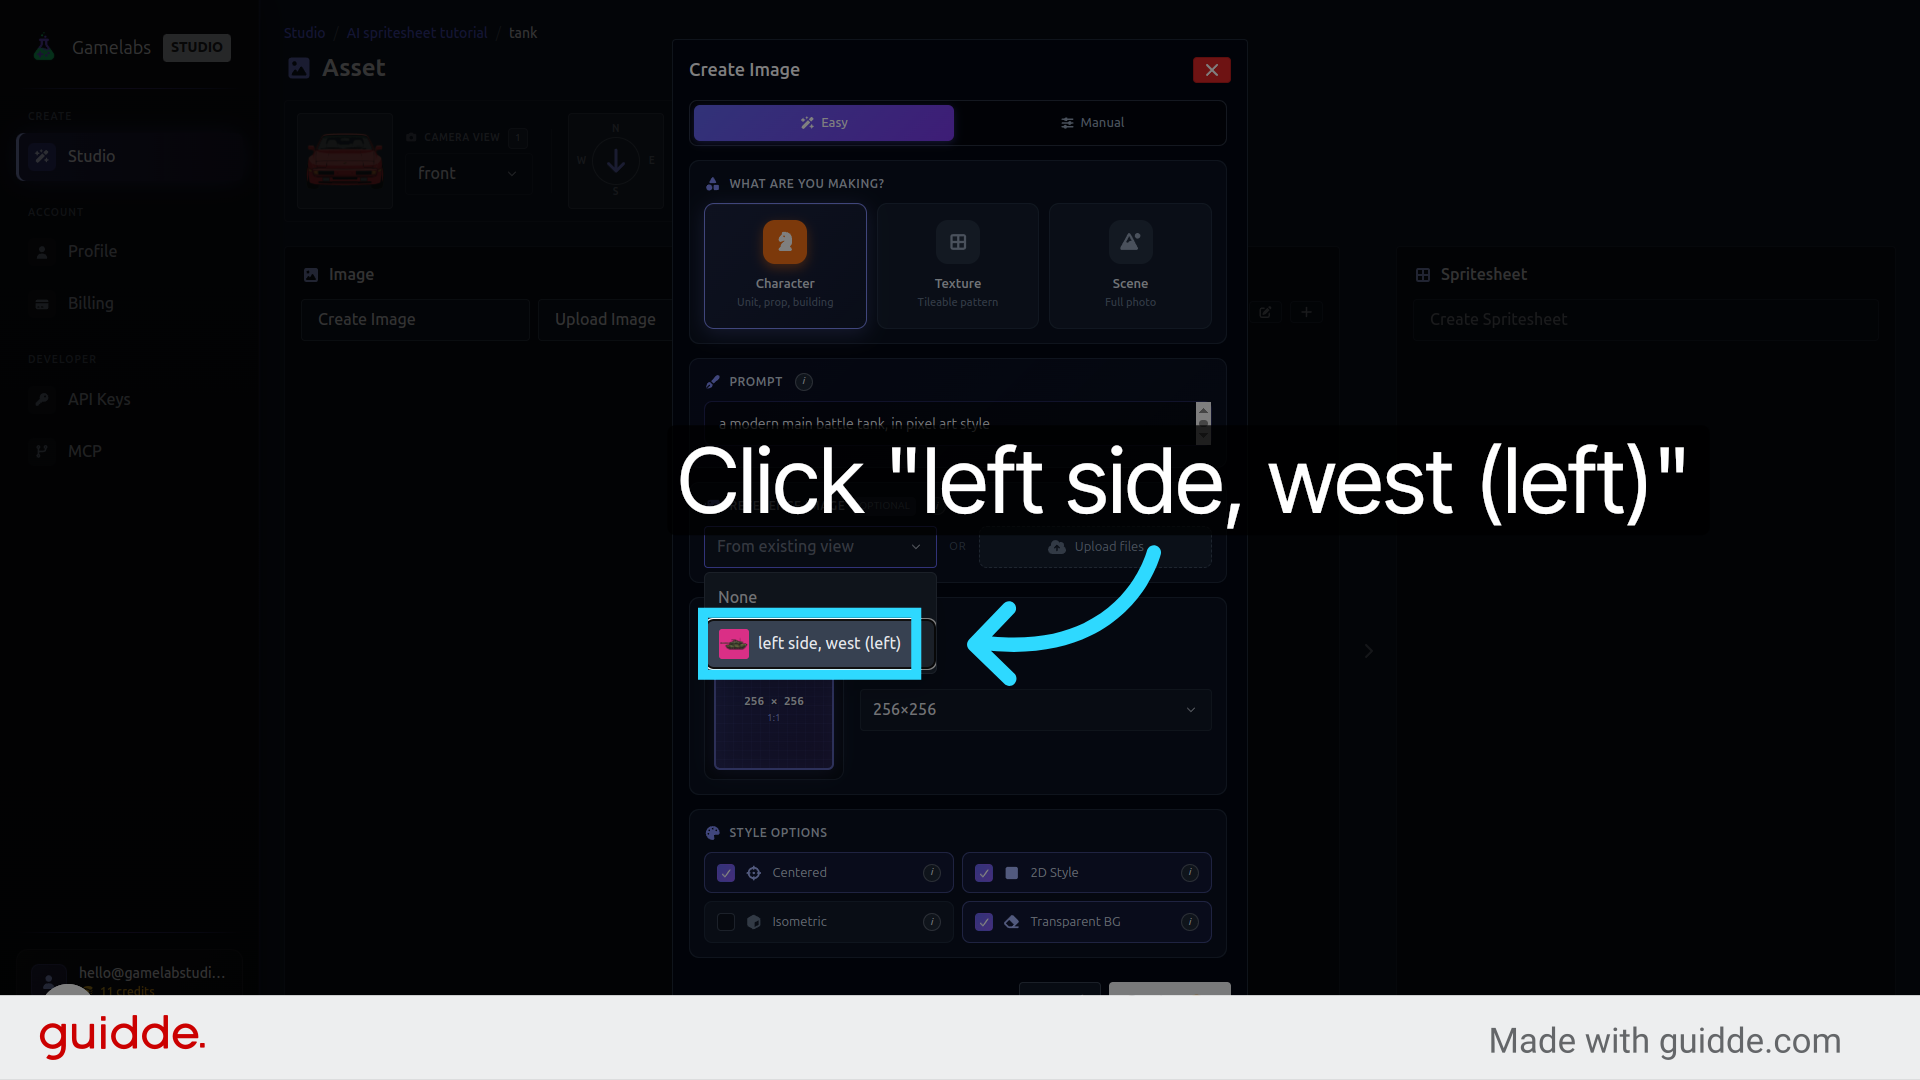
2. Choose the Target Angle
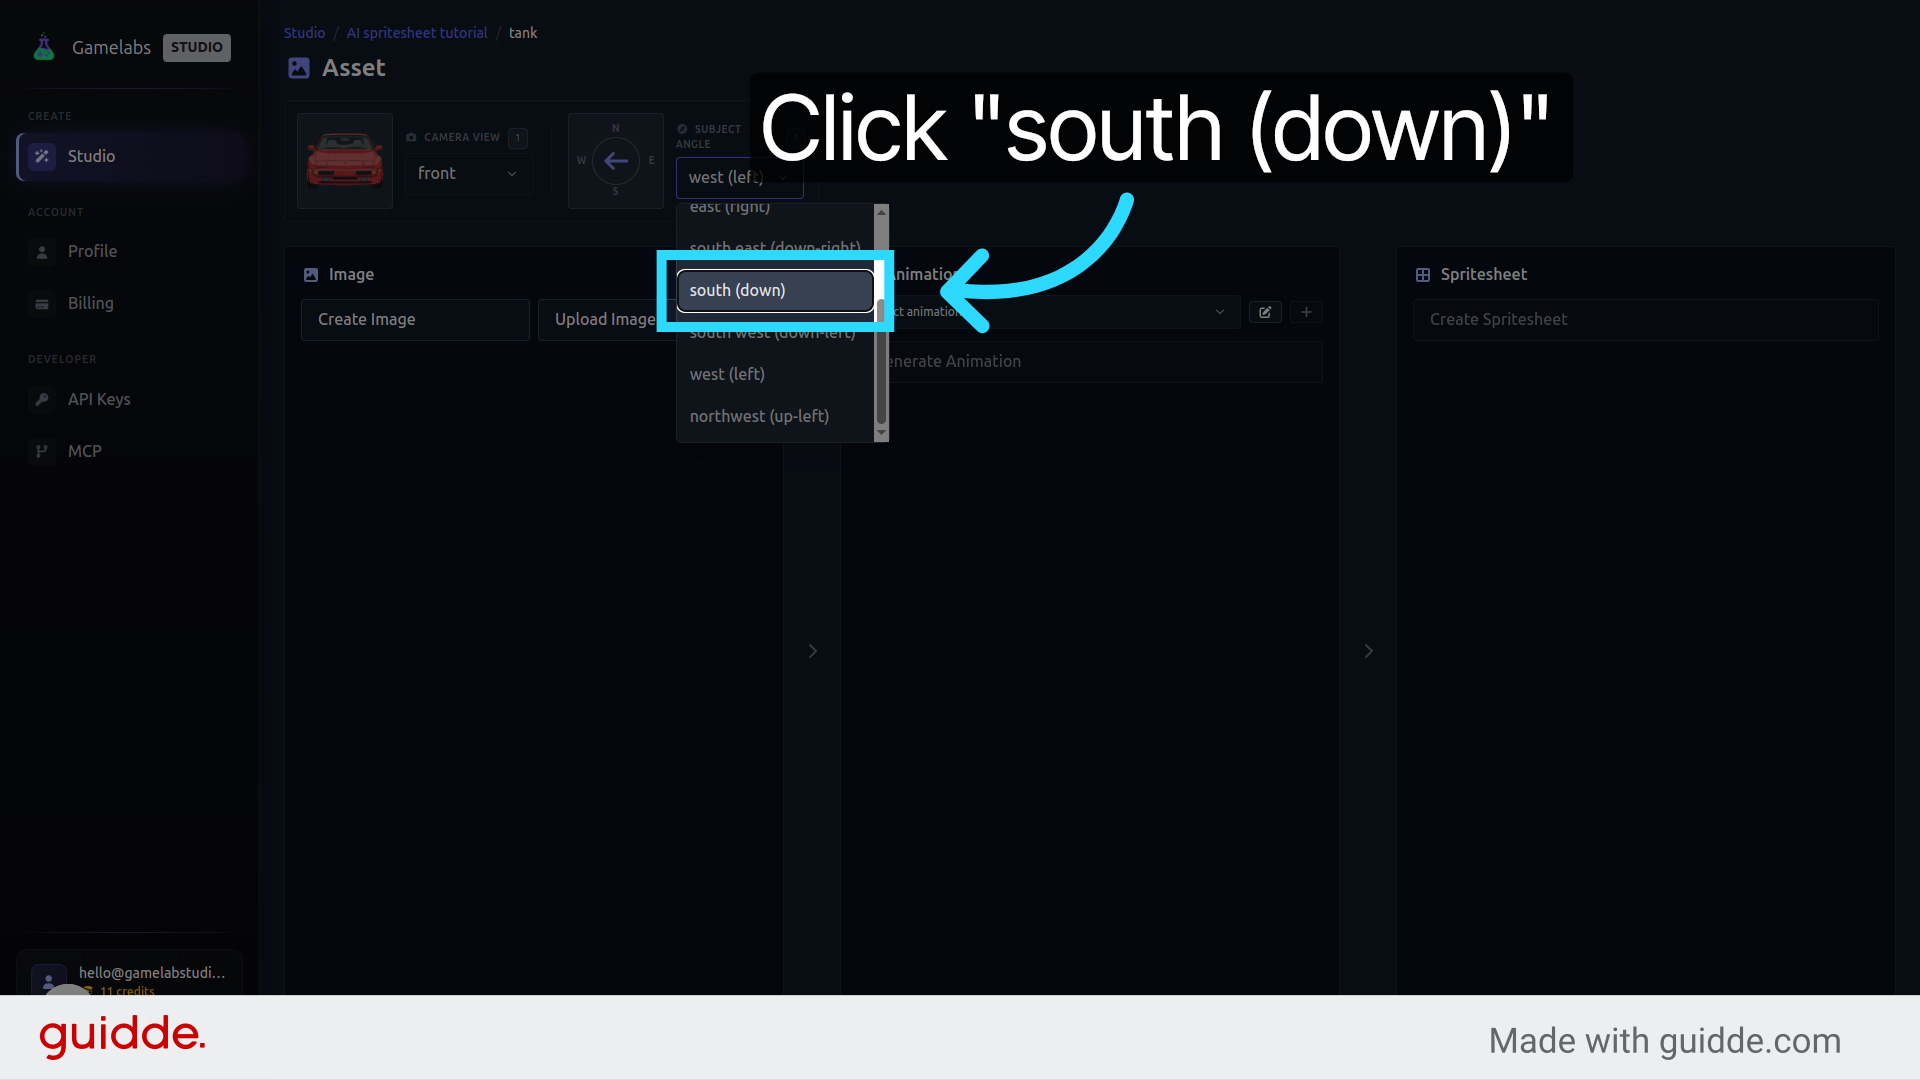
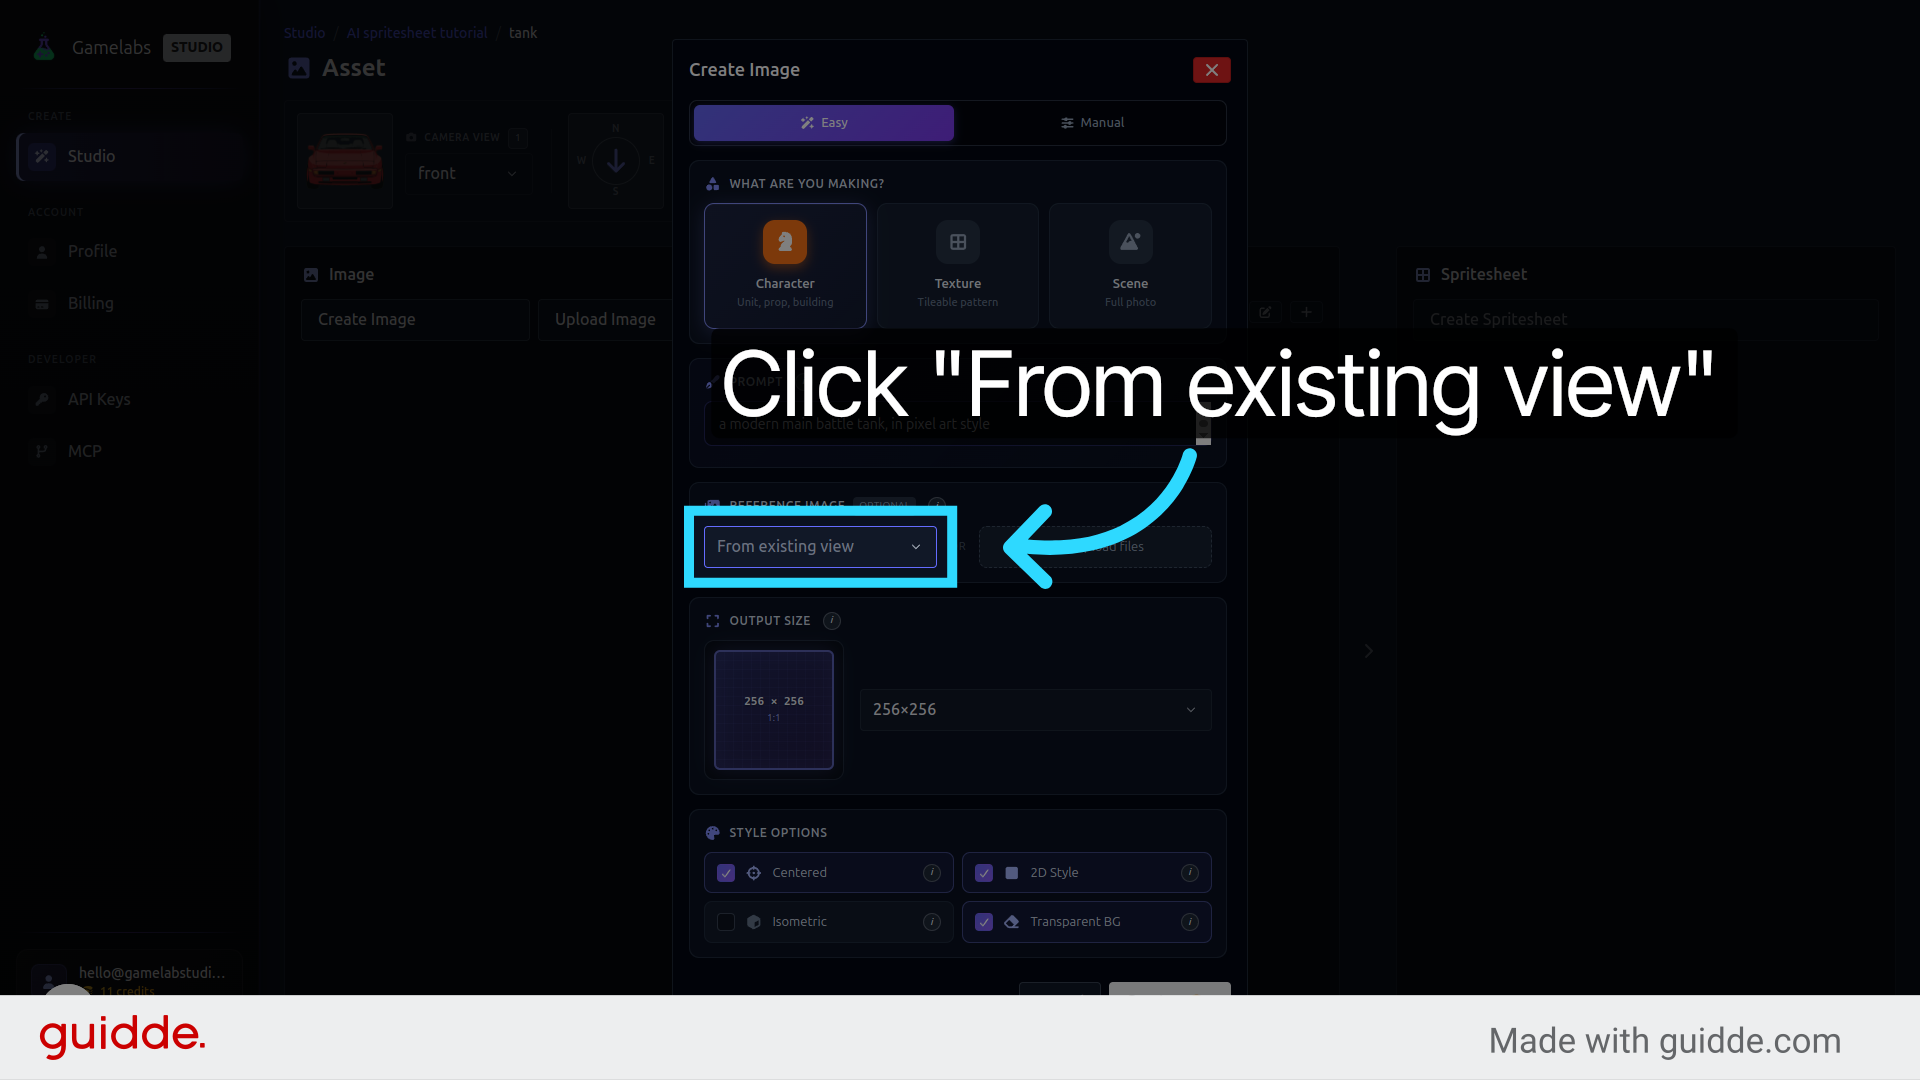
3. Generate from Existing View

Animate the New Angle
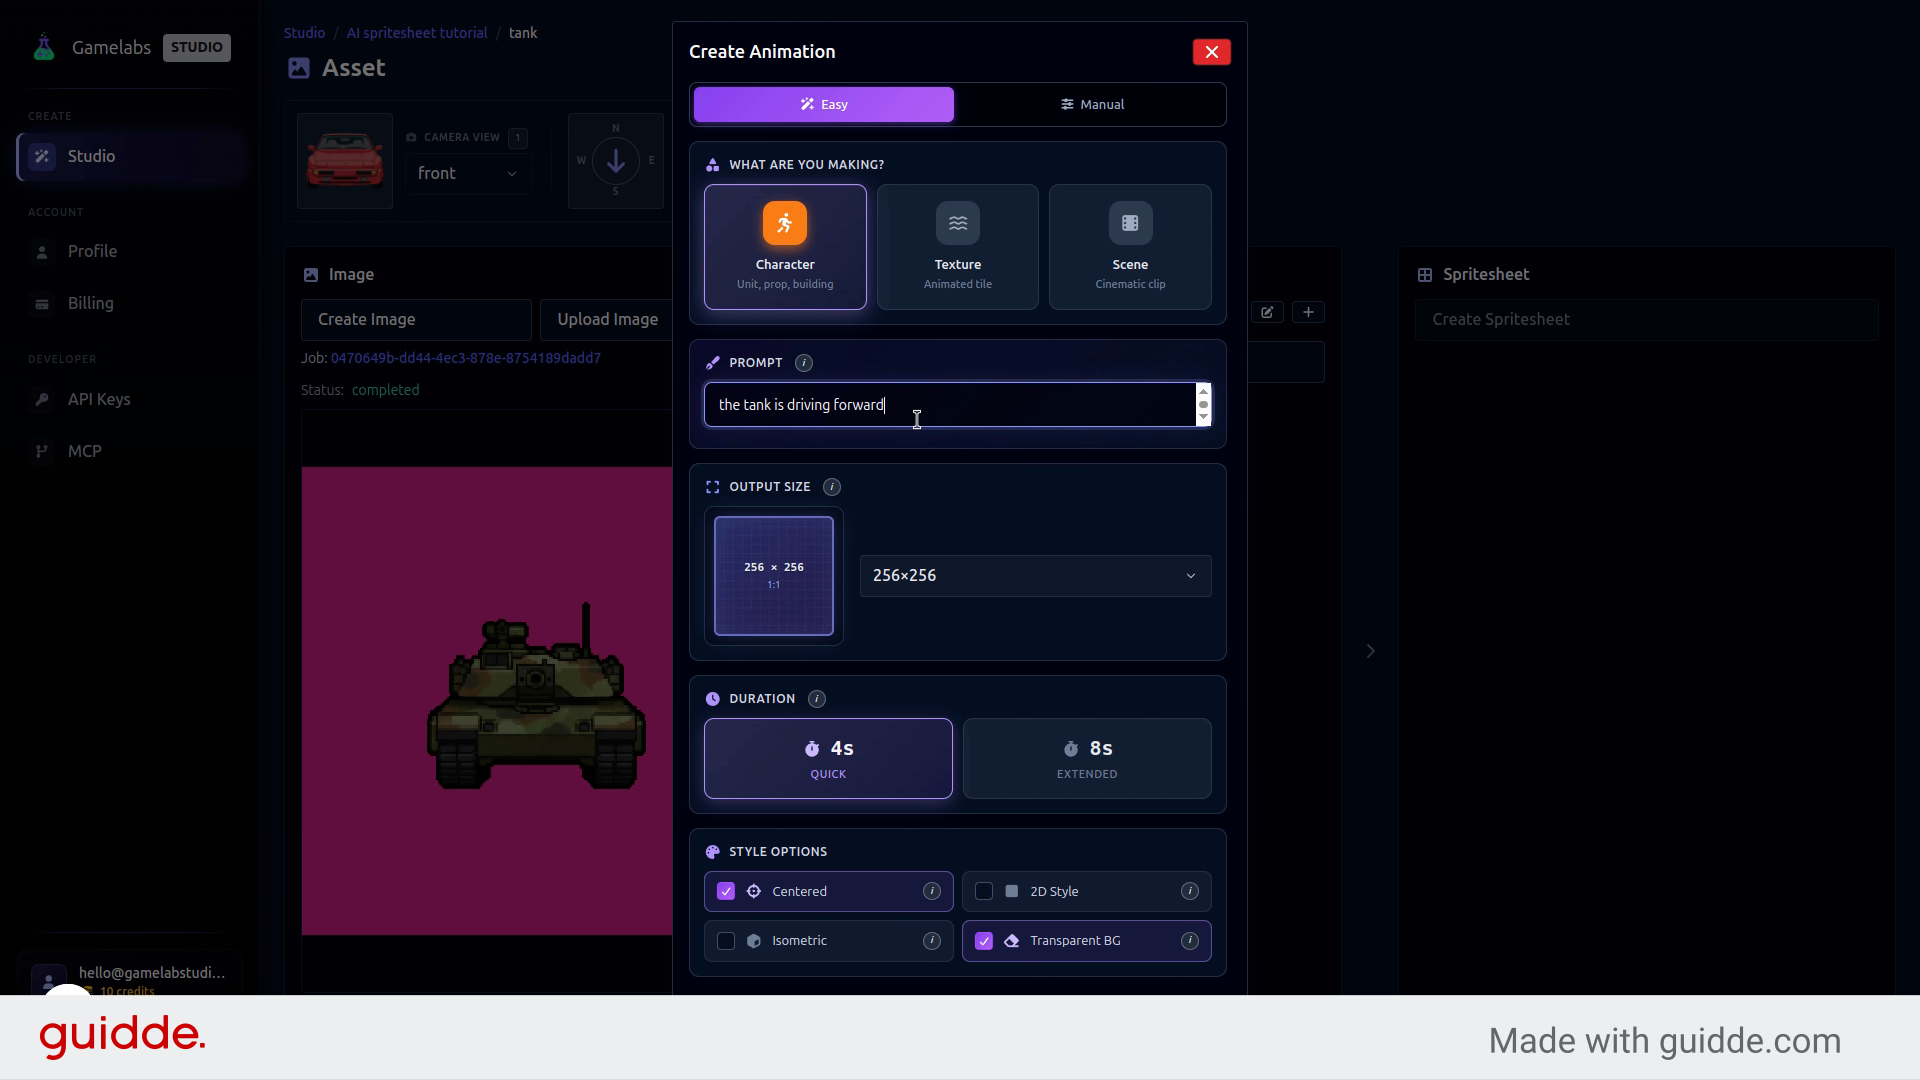
With the new static angle ready, the next step is to give it motion. The animation workflow is the same as before: name the sequence, describe the movement in plain text, and let the AI generate the frames.
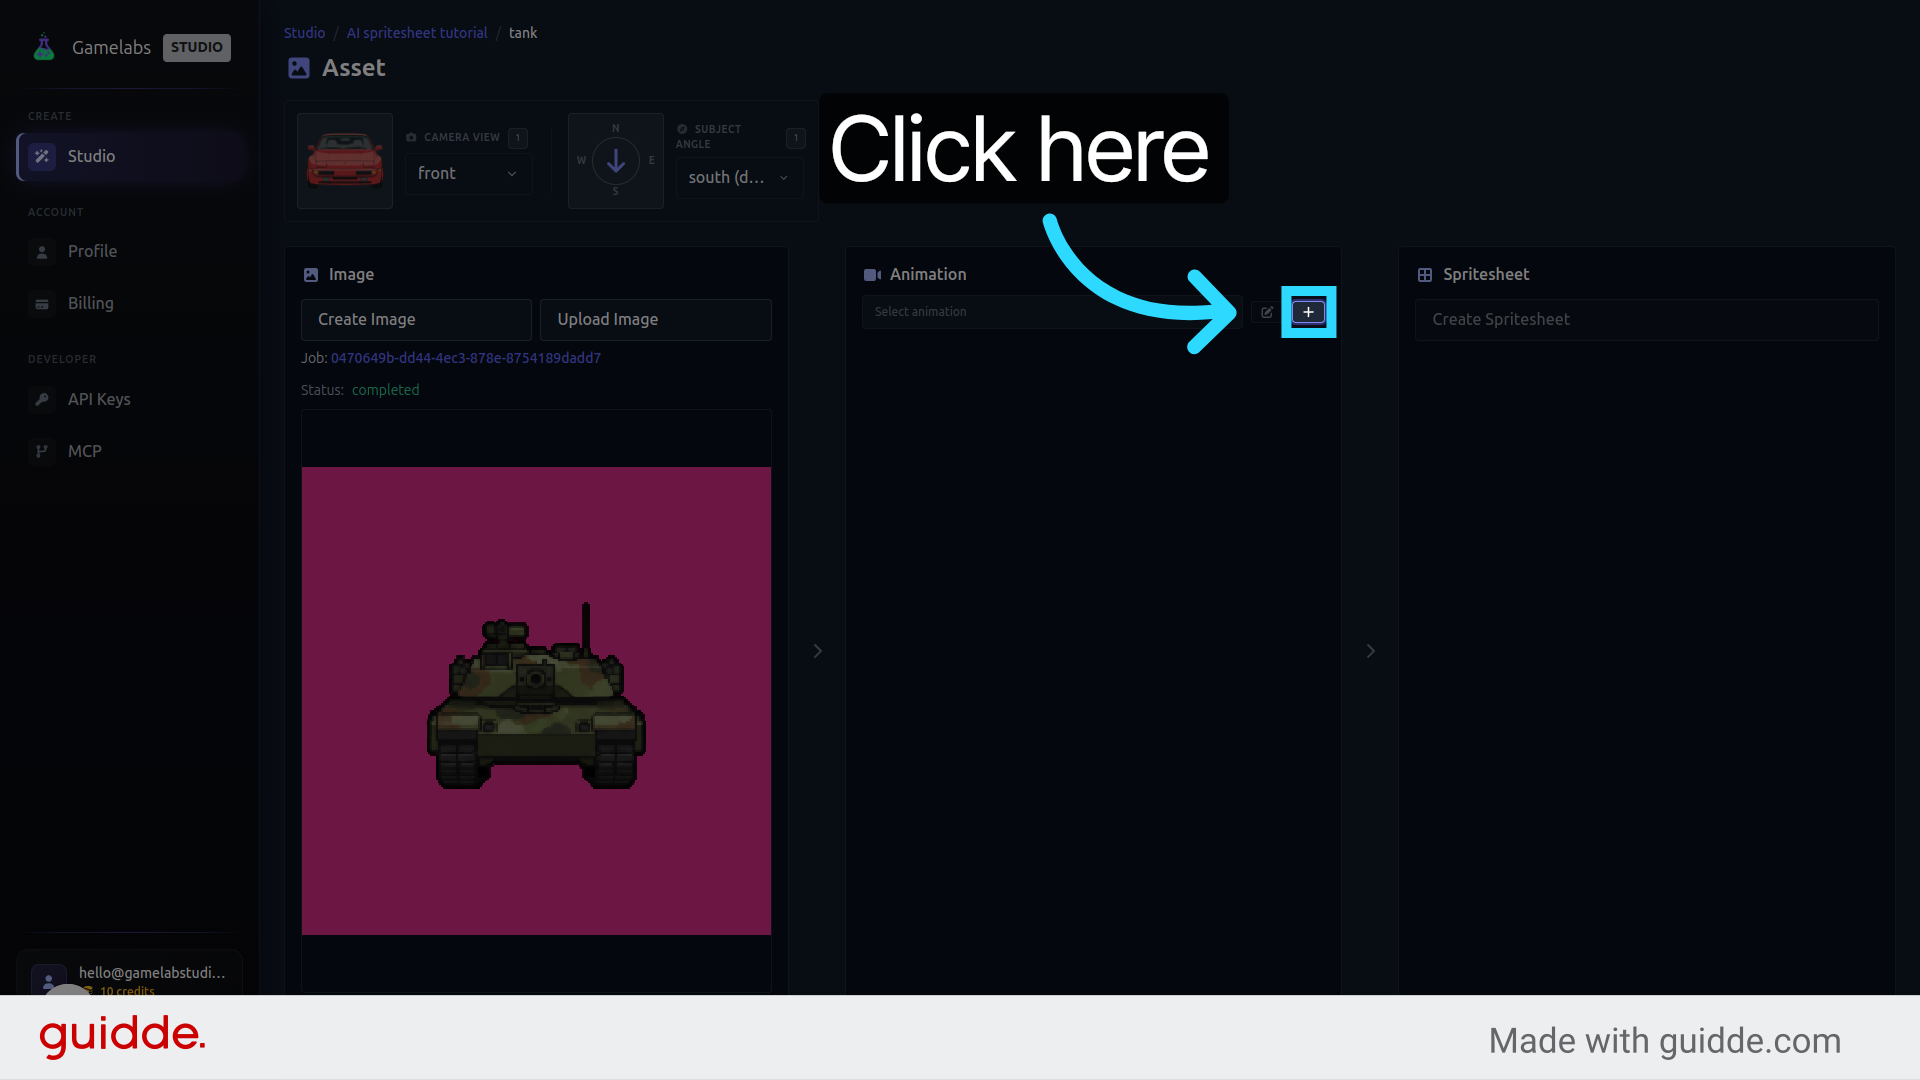
4. Create a New Animation
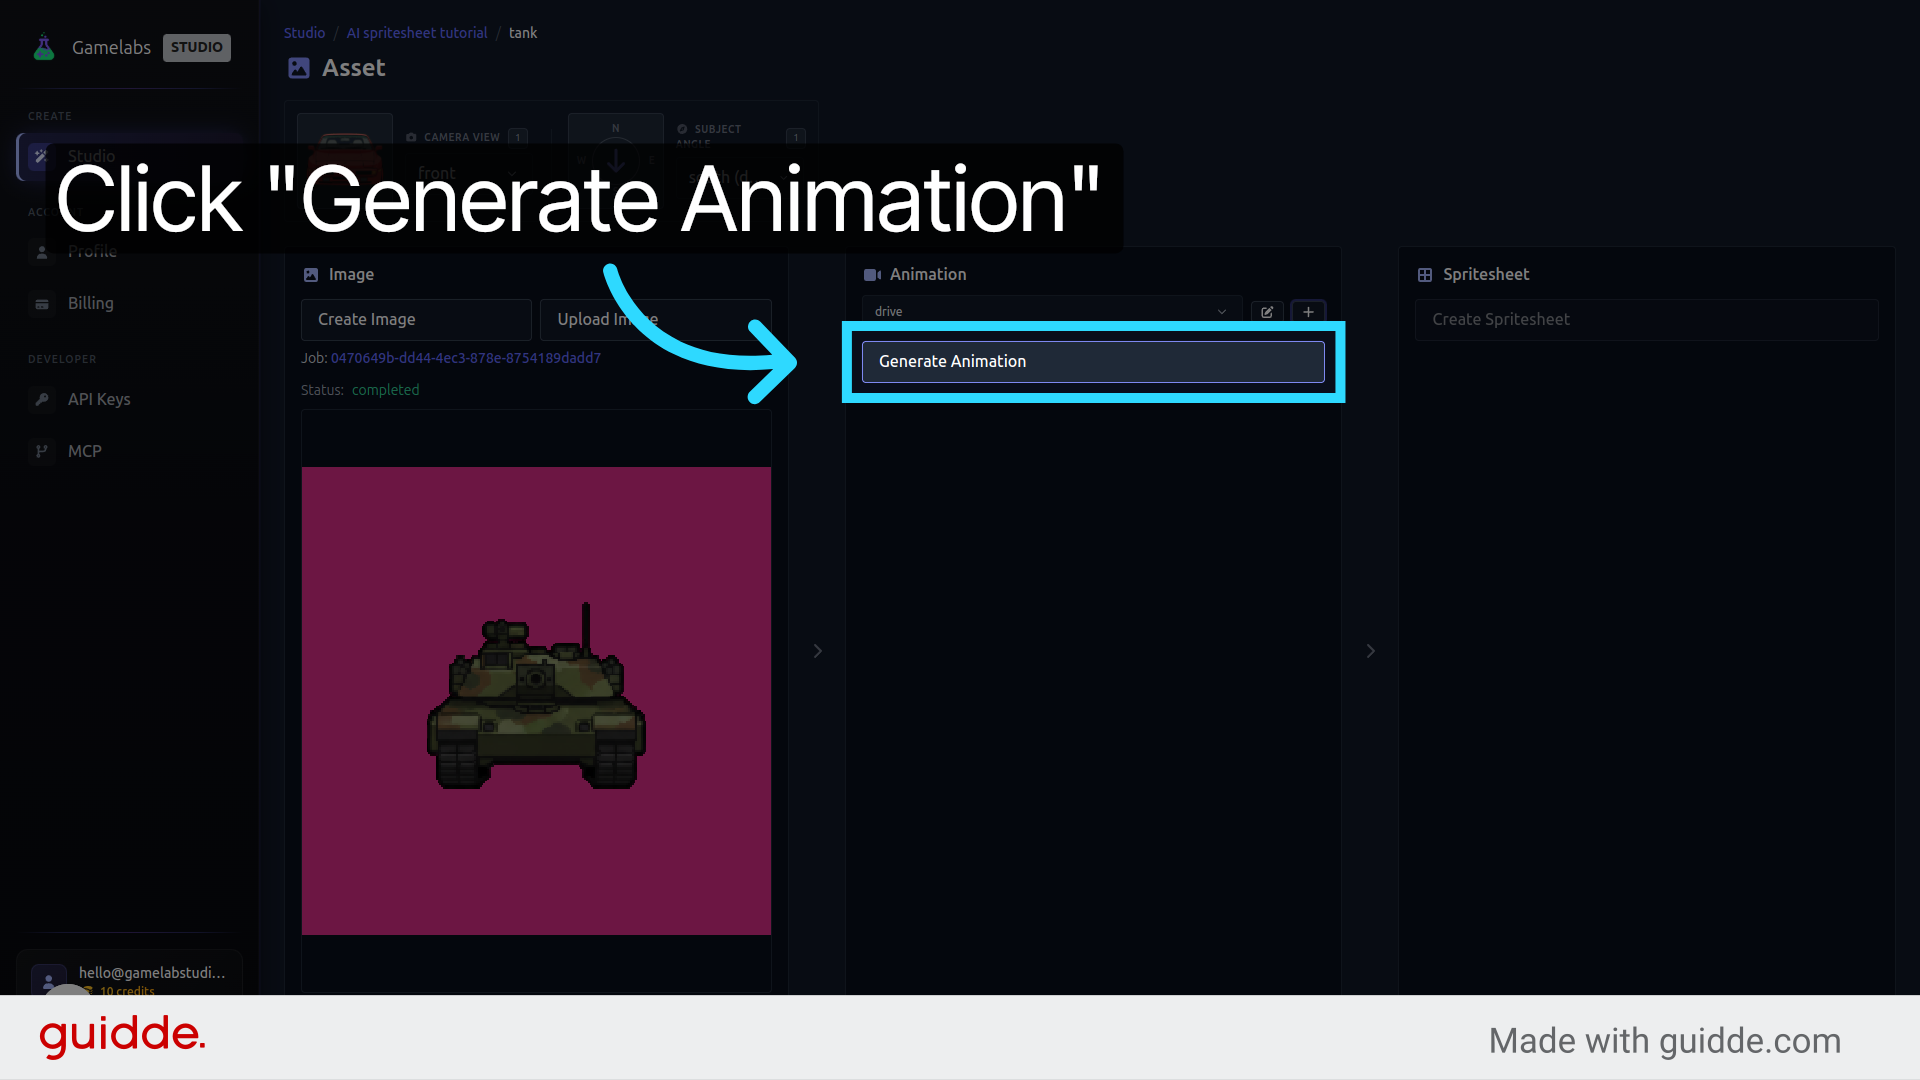
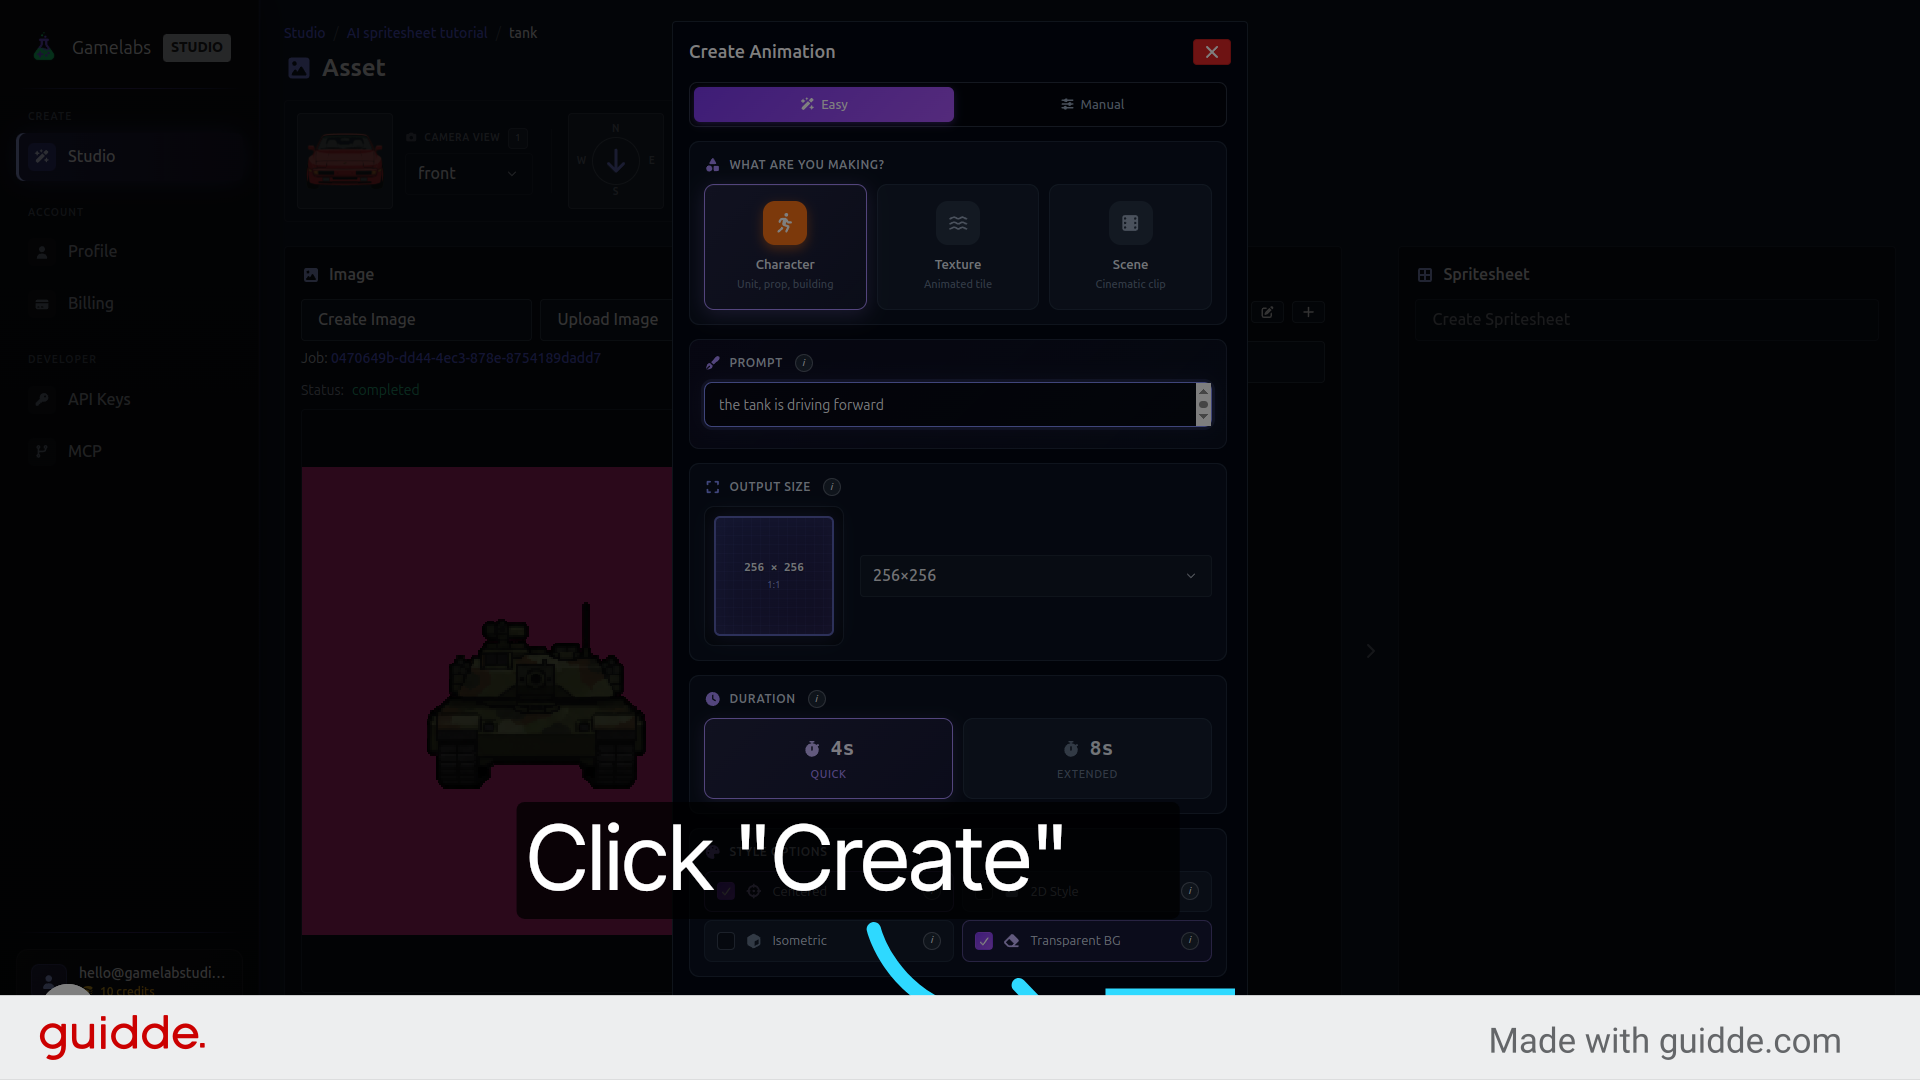
5. Describe the Motion and Generate
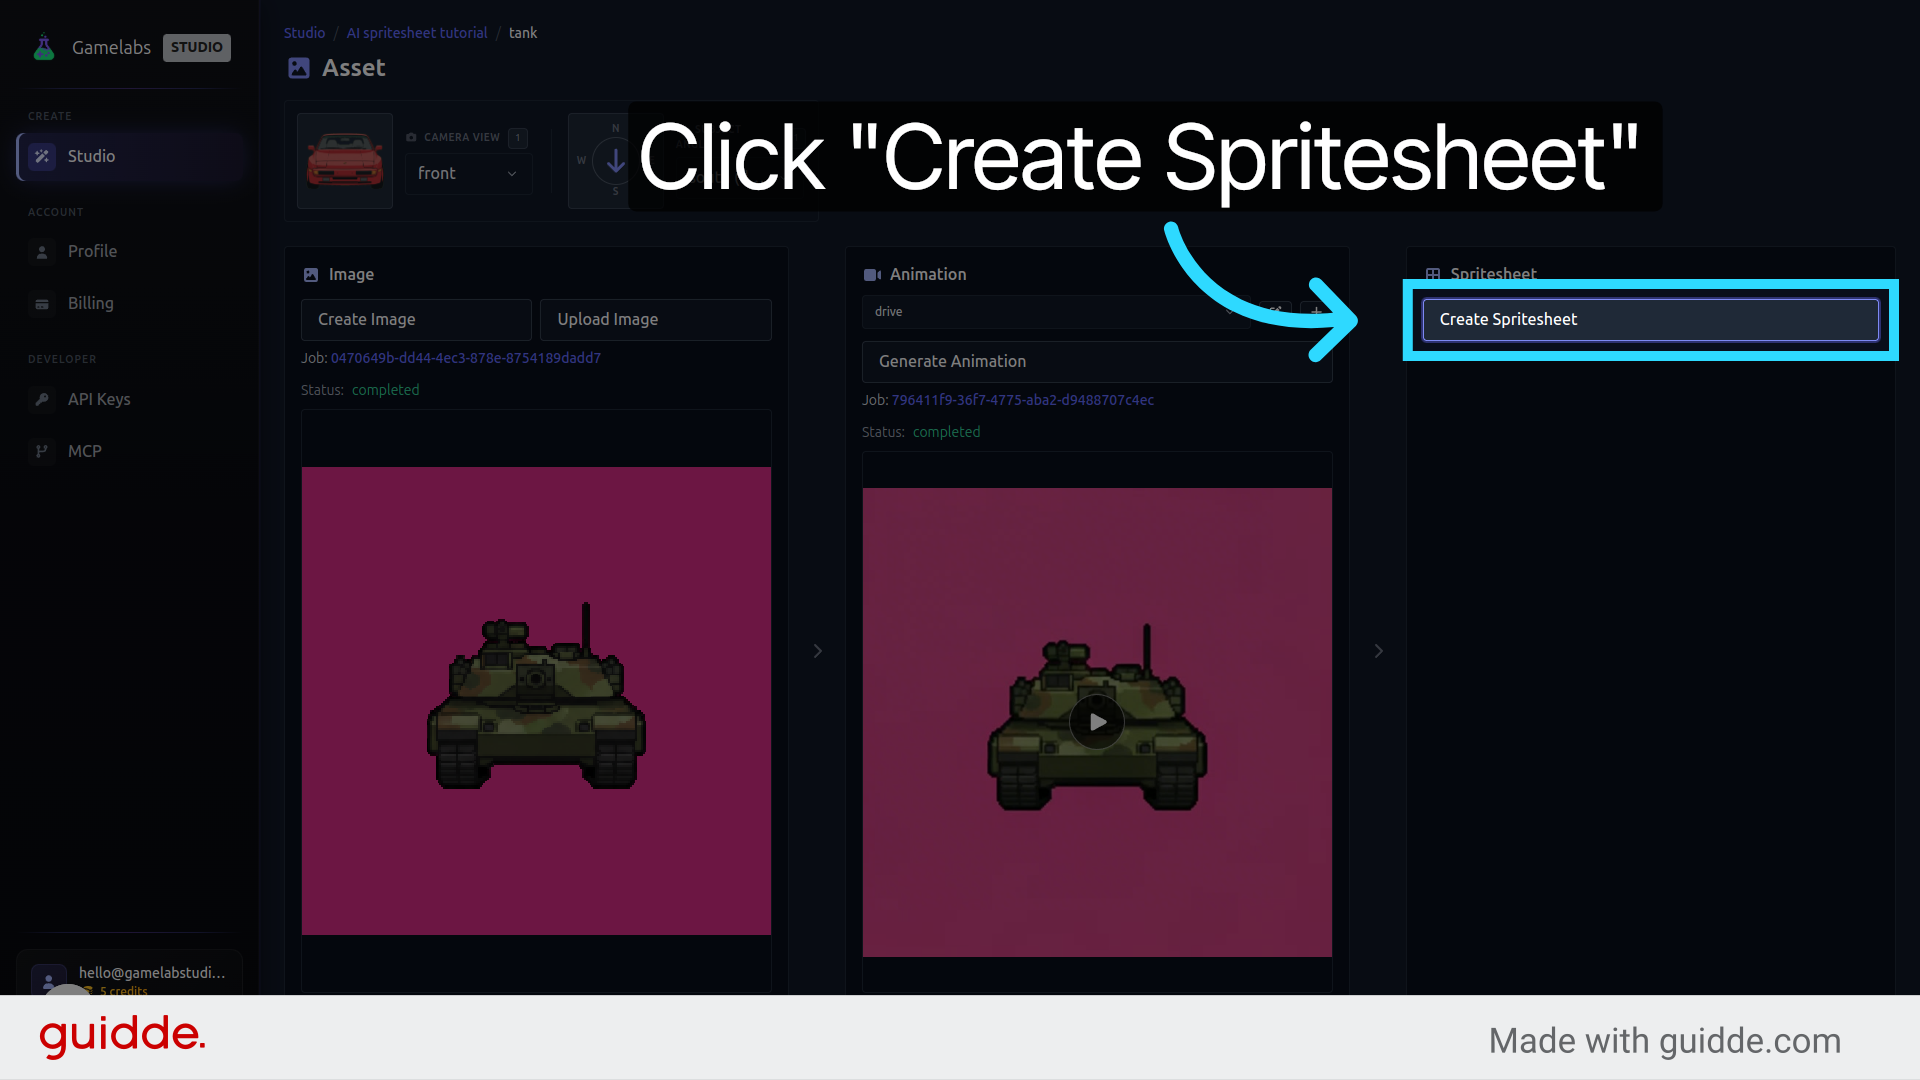
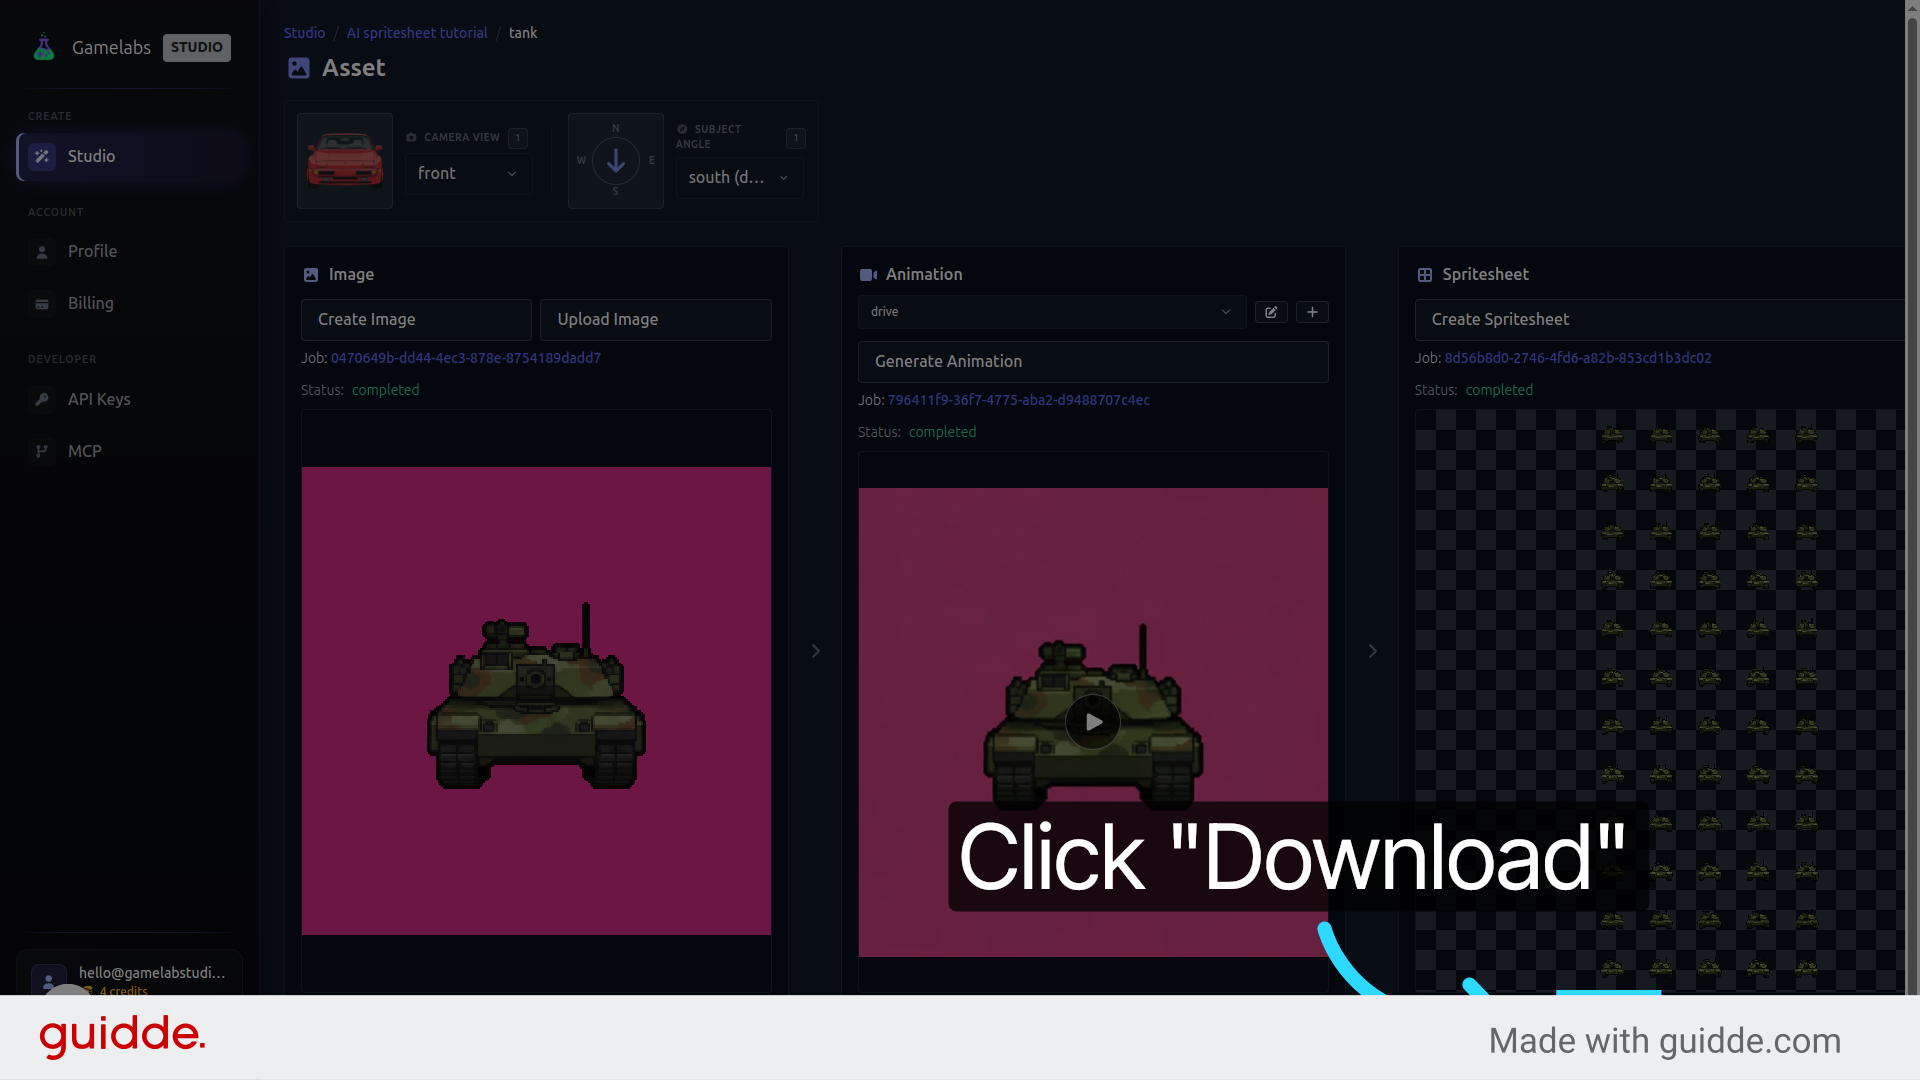
Export the Spritesheet
With your new angle generated and animated, the last step is compiling everything into a single spritesheet file you can drop into your game engine.
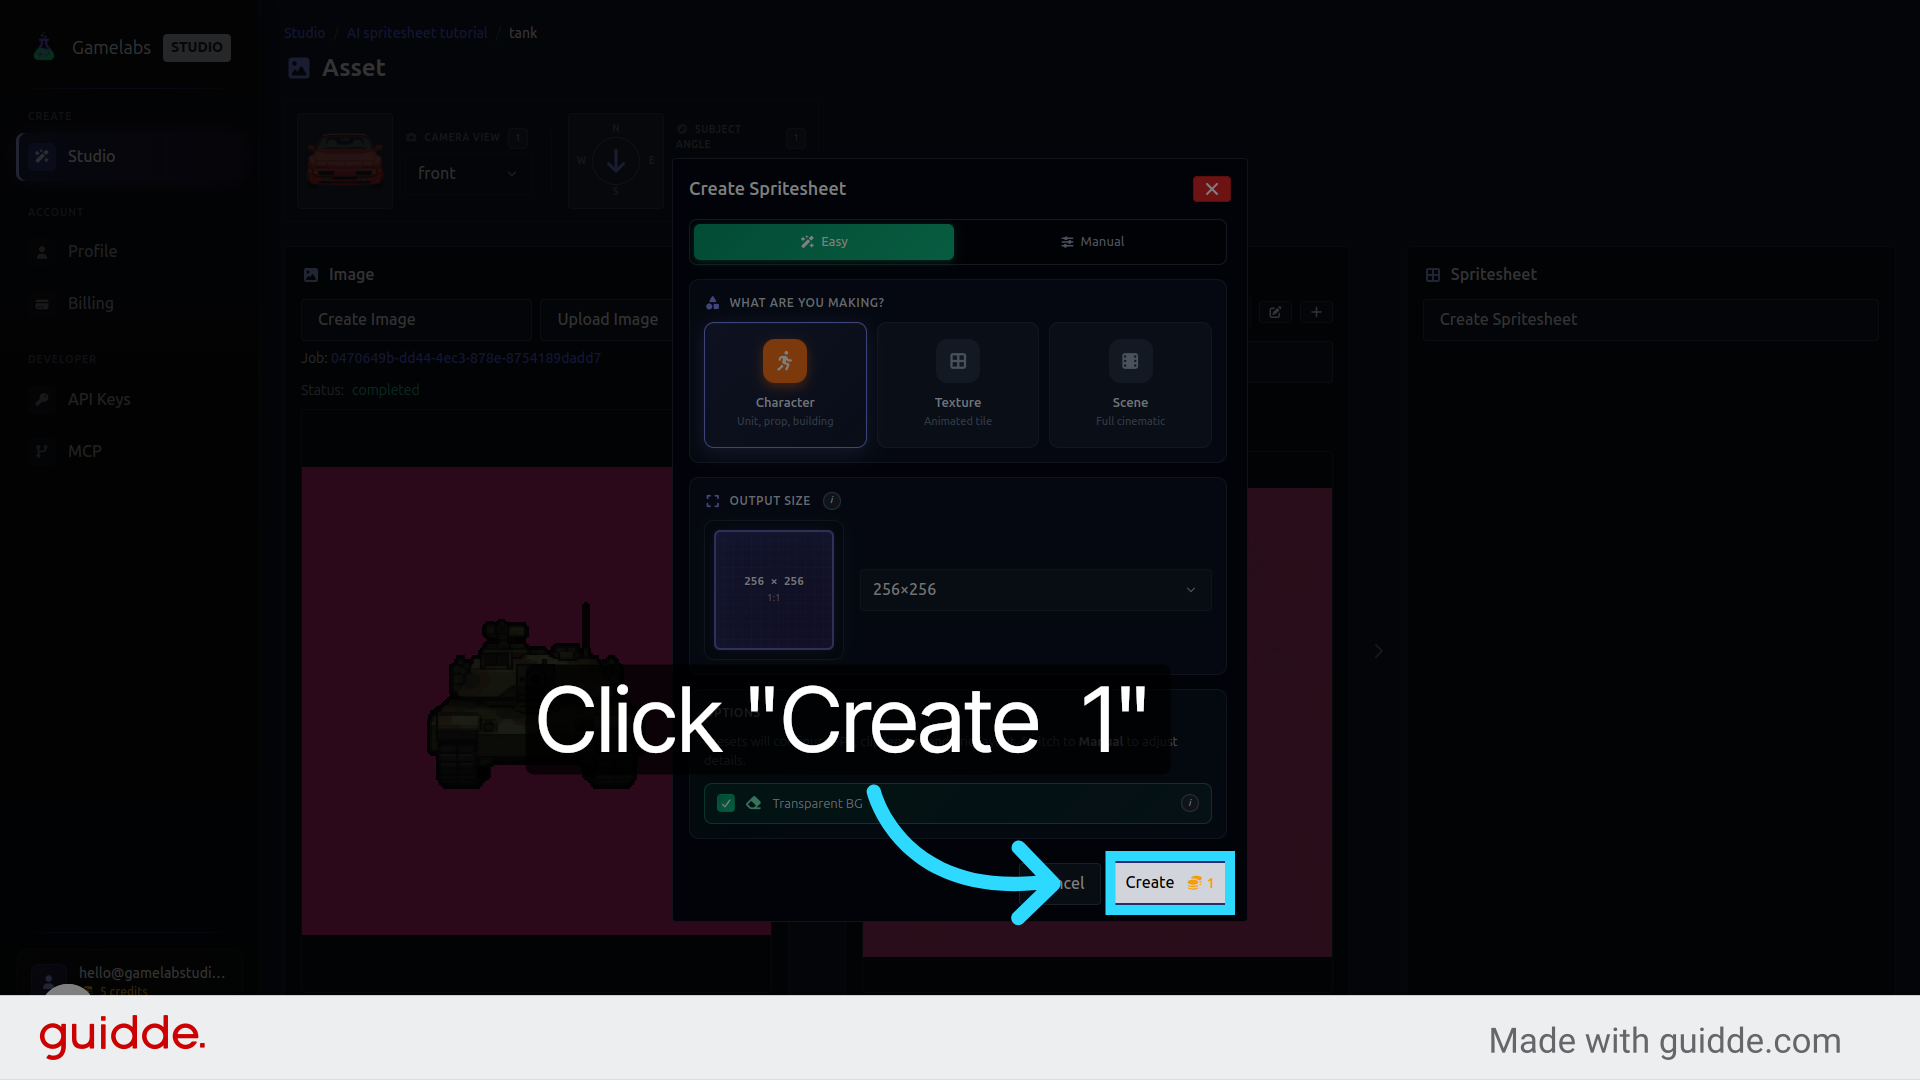
6. Create the Spritesheet
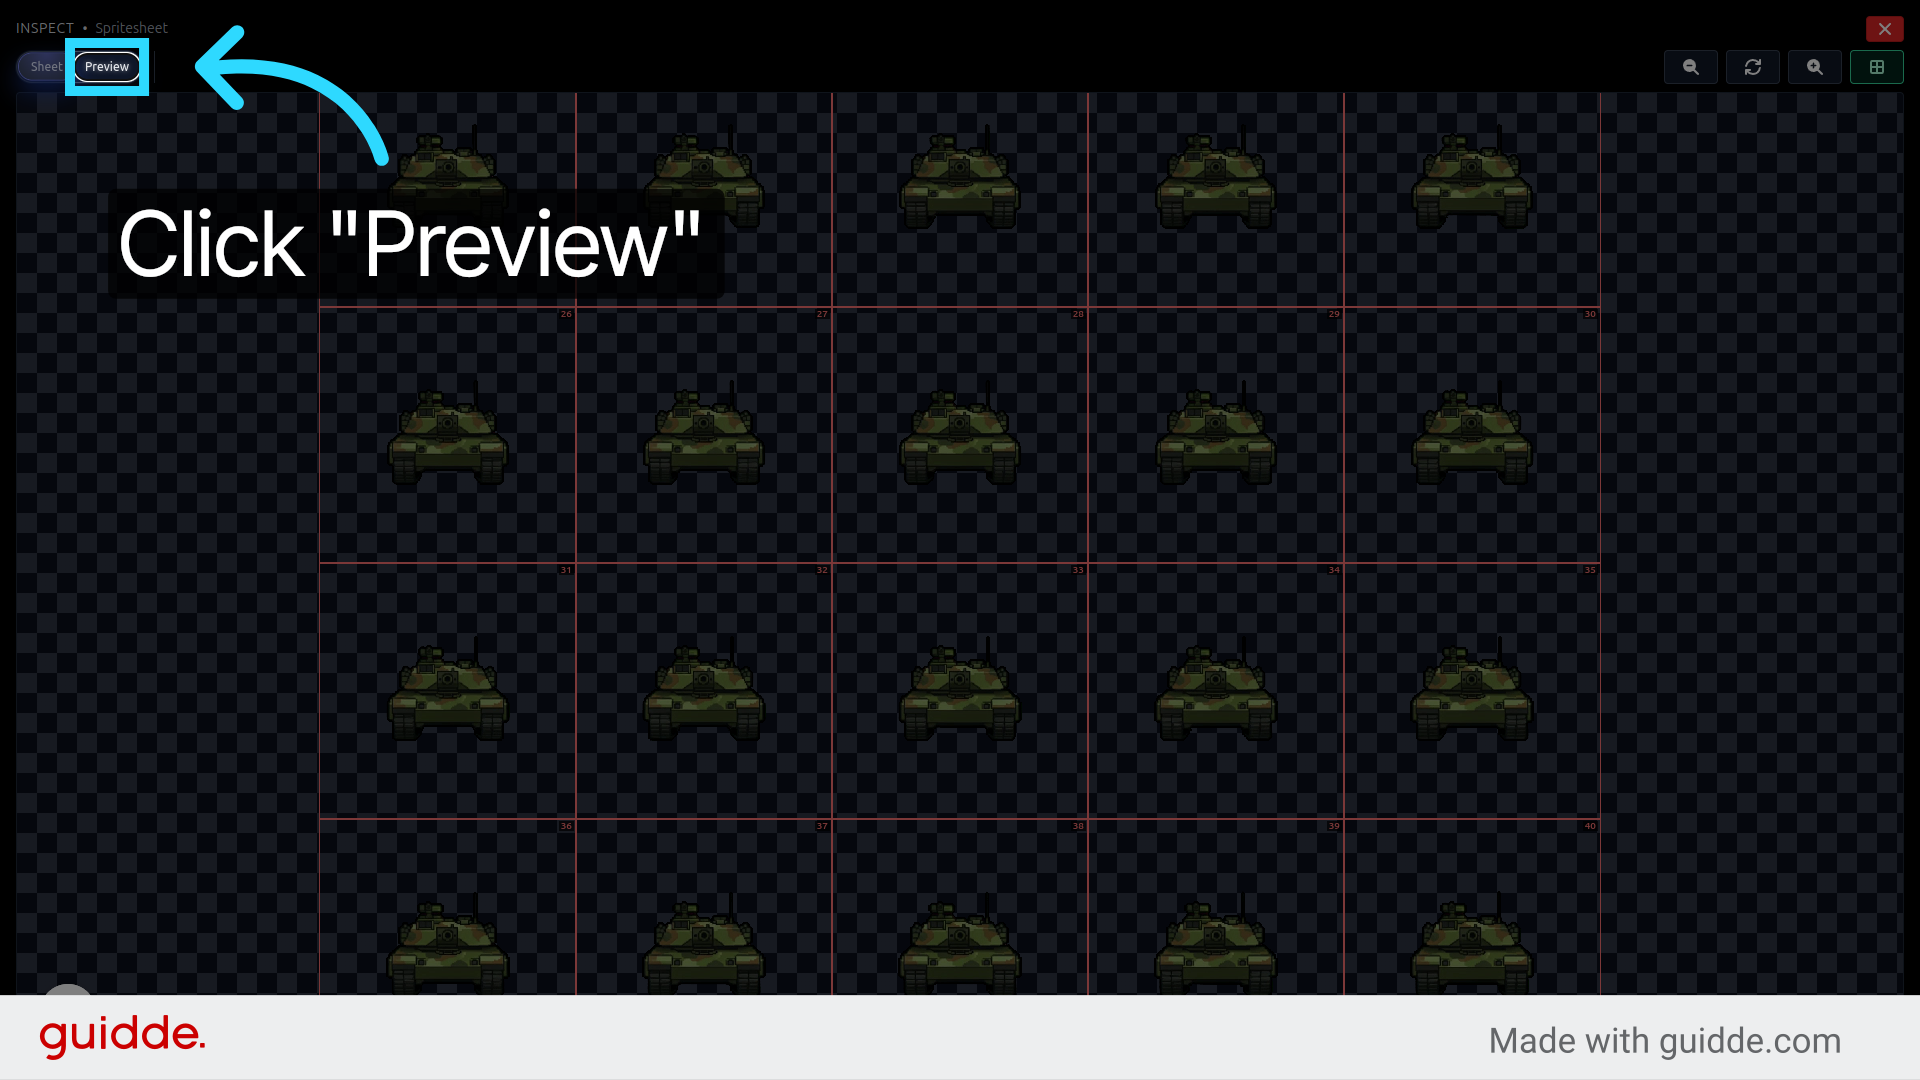
7. Preview and Download
What's Next
You now have a multi-angle, animated spritesheet built from a single source sprite. To cover all eight compass directions, repeat this process for each remaining angle—the AI keeps the style consistent across every view. You can also add more animation types (idle, shoot, explode) to any angle, and each new spritesheet will include all the frames your game engine needs.